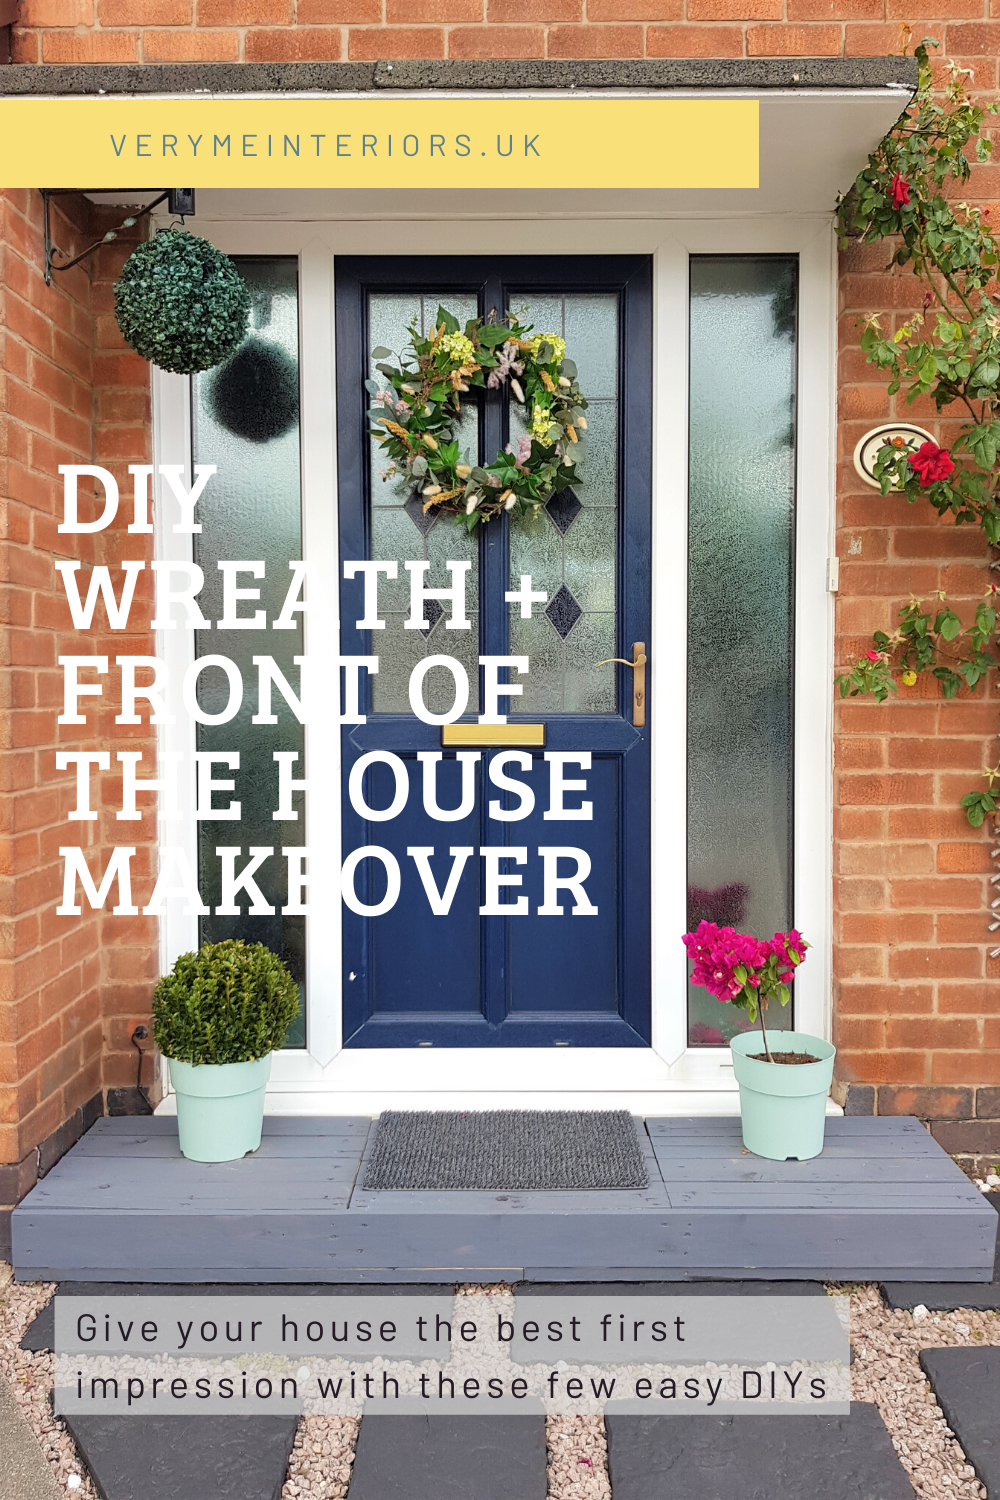
Few weeks ago I made an easy DIY wreath for our front door. I love making door wreaths almost out of nothing. I decorated one few years ago with dry leafs made into roses (you can read about it here). This time was no different! To make this DIY wreath I only used what I already had in the house. I do appreciate that not everyone has dry flowers, decorations or an actual wreath base just laying around the house. And I wasn’t actually planning on writing about it but people liked my little project on my Instagram so I thought you might like it too. So I’ll show you how i did it at the end of this post.
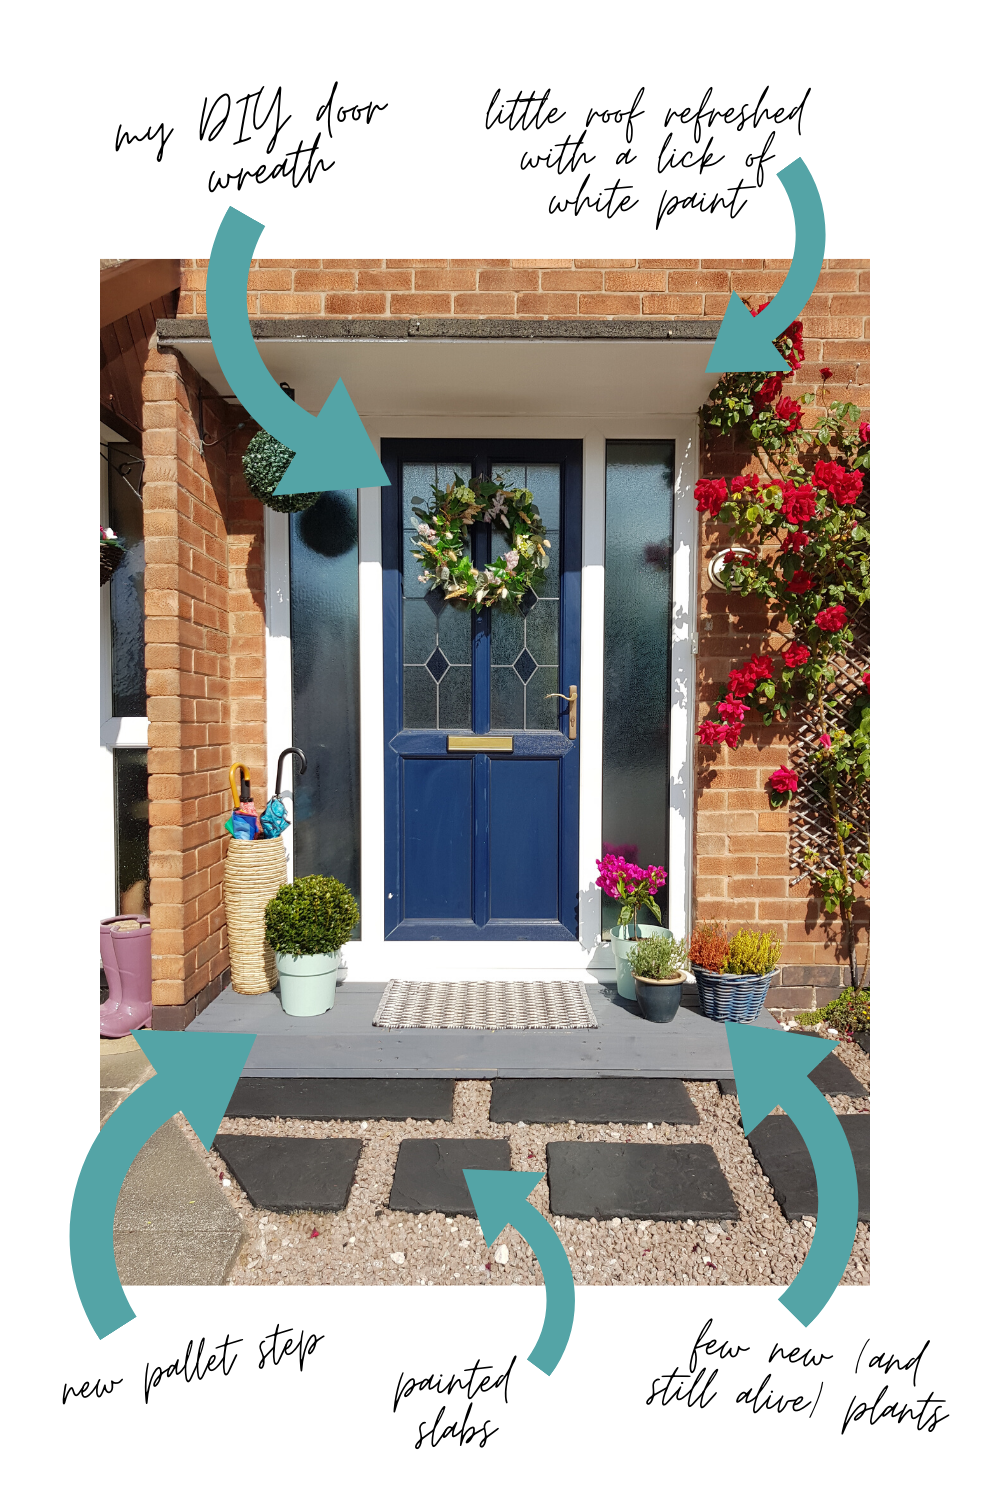
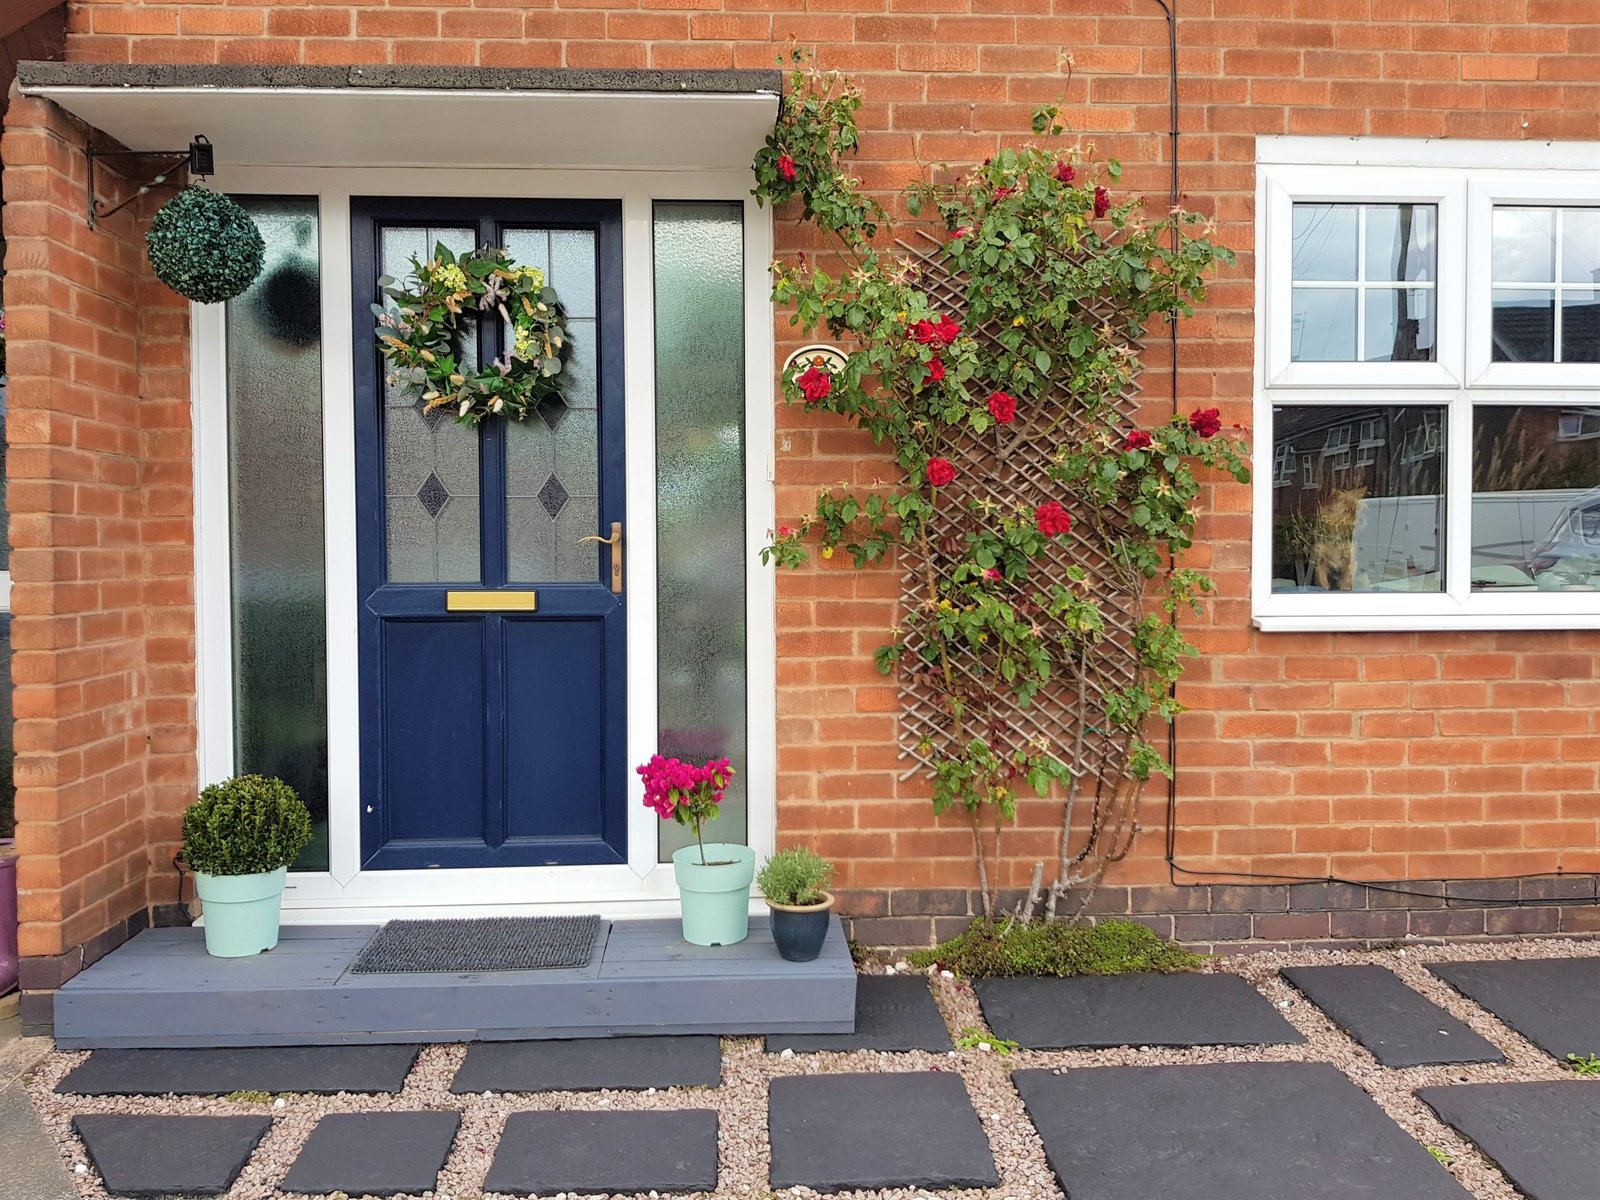
But as pretty as the wreath is – just hanging it on our door simply would not do the trick! The front of our house looked really tired after the winter and it needed a little bit more TLC than just my DIY wreath. So, by using the stuff that I already had left from different projects (like the pallets left after I made an outdoor sofa), some leftover paint and just a little bit of time I’ve created the best first impression this house can get (for now, that is).
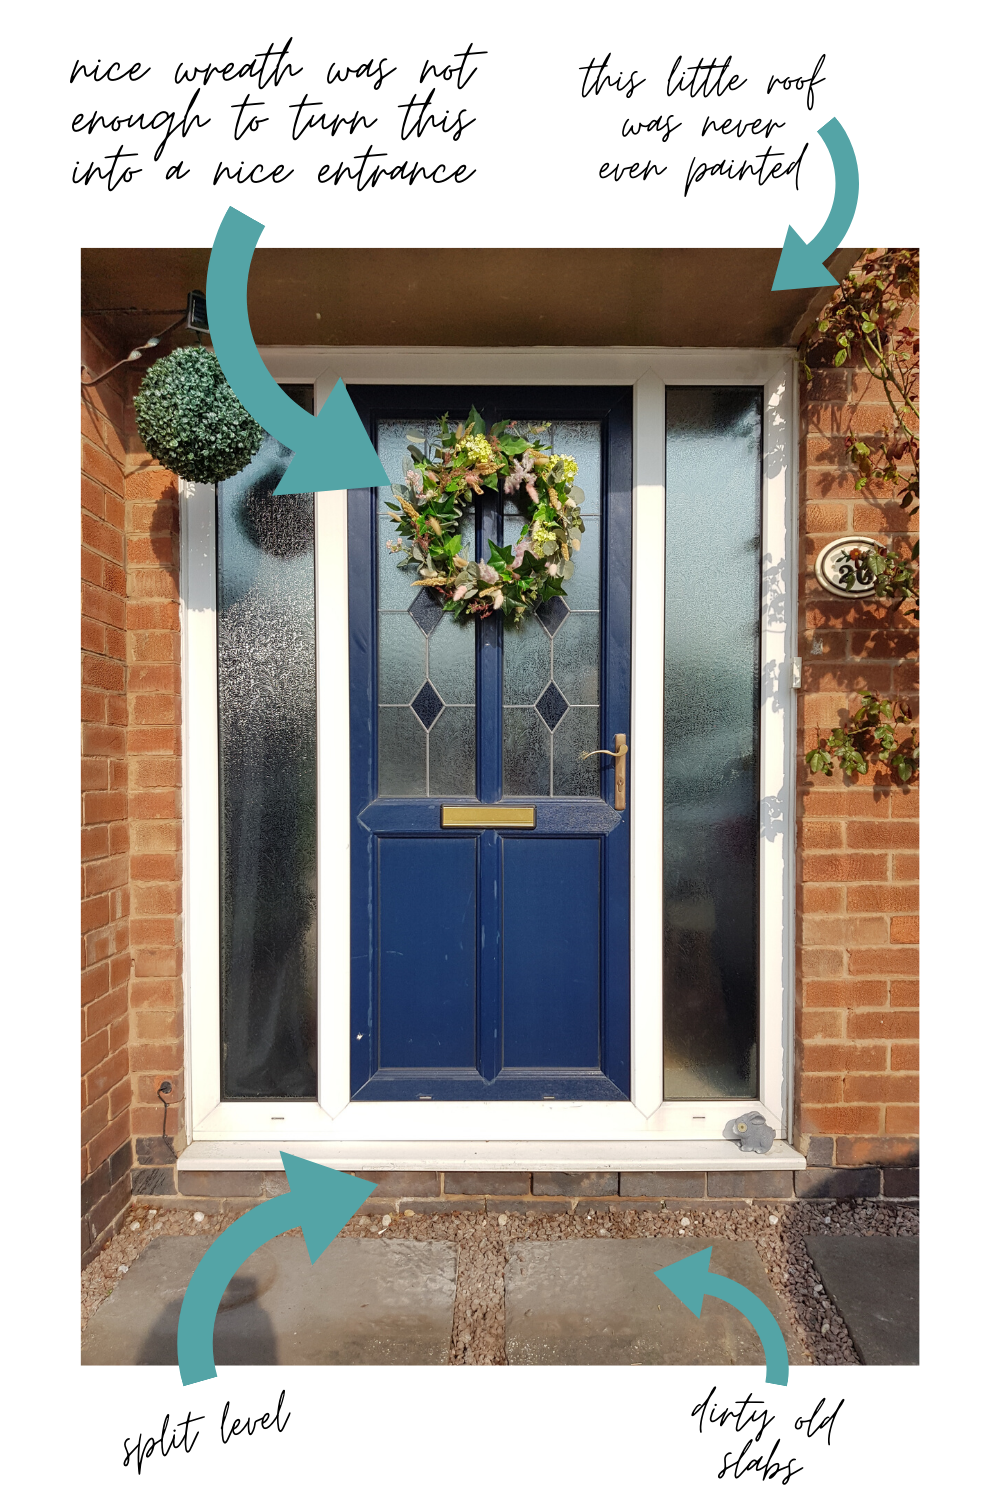
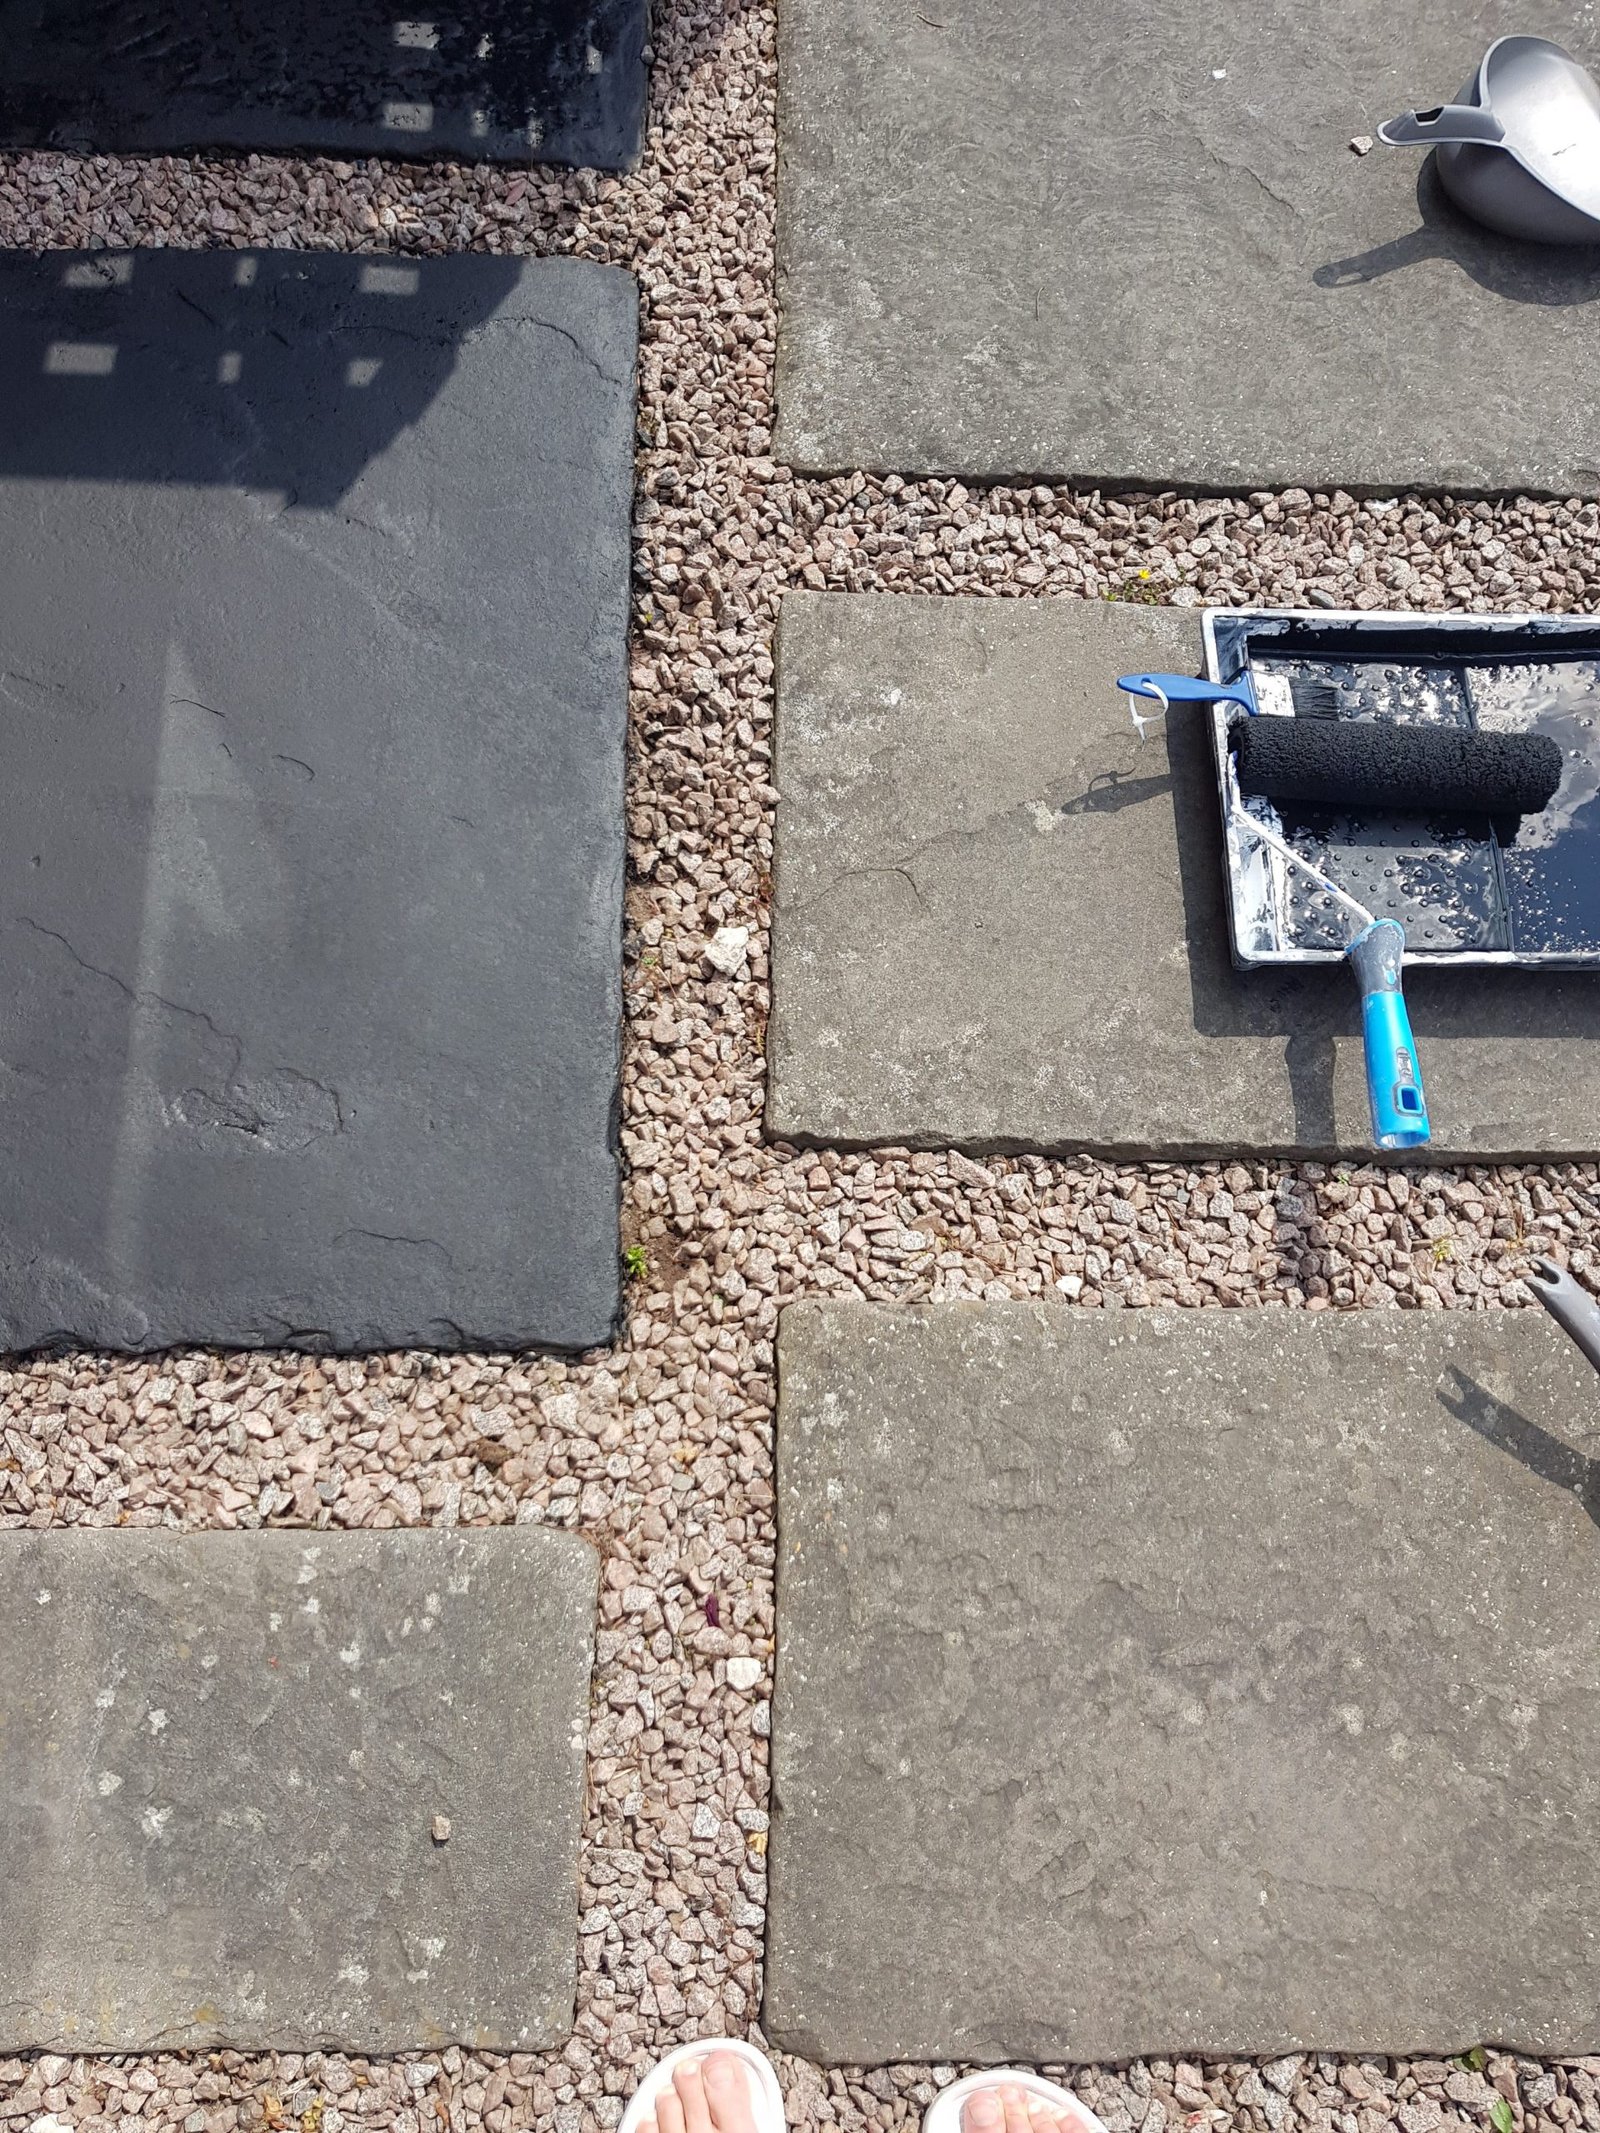
But first let me show you what was wrong with this space!
 I’m guessing since we’re in lockdown time is no longer an issue for most of us. Money, on the other hand is. But with this project (like with all my projects in fact) I’ve spent as little as possible. Well… zero actually! But like I mentioned before, I already had everything I needed for this front of the house makeover. if you want to try any of my DIYs you may have to spend a little bit of money but I promise, it won’t be much. So let’s go!
Here’s what I did to update the front of our house:
- built a step out of wooden pallets
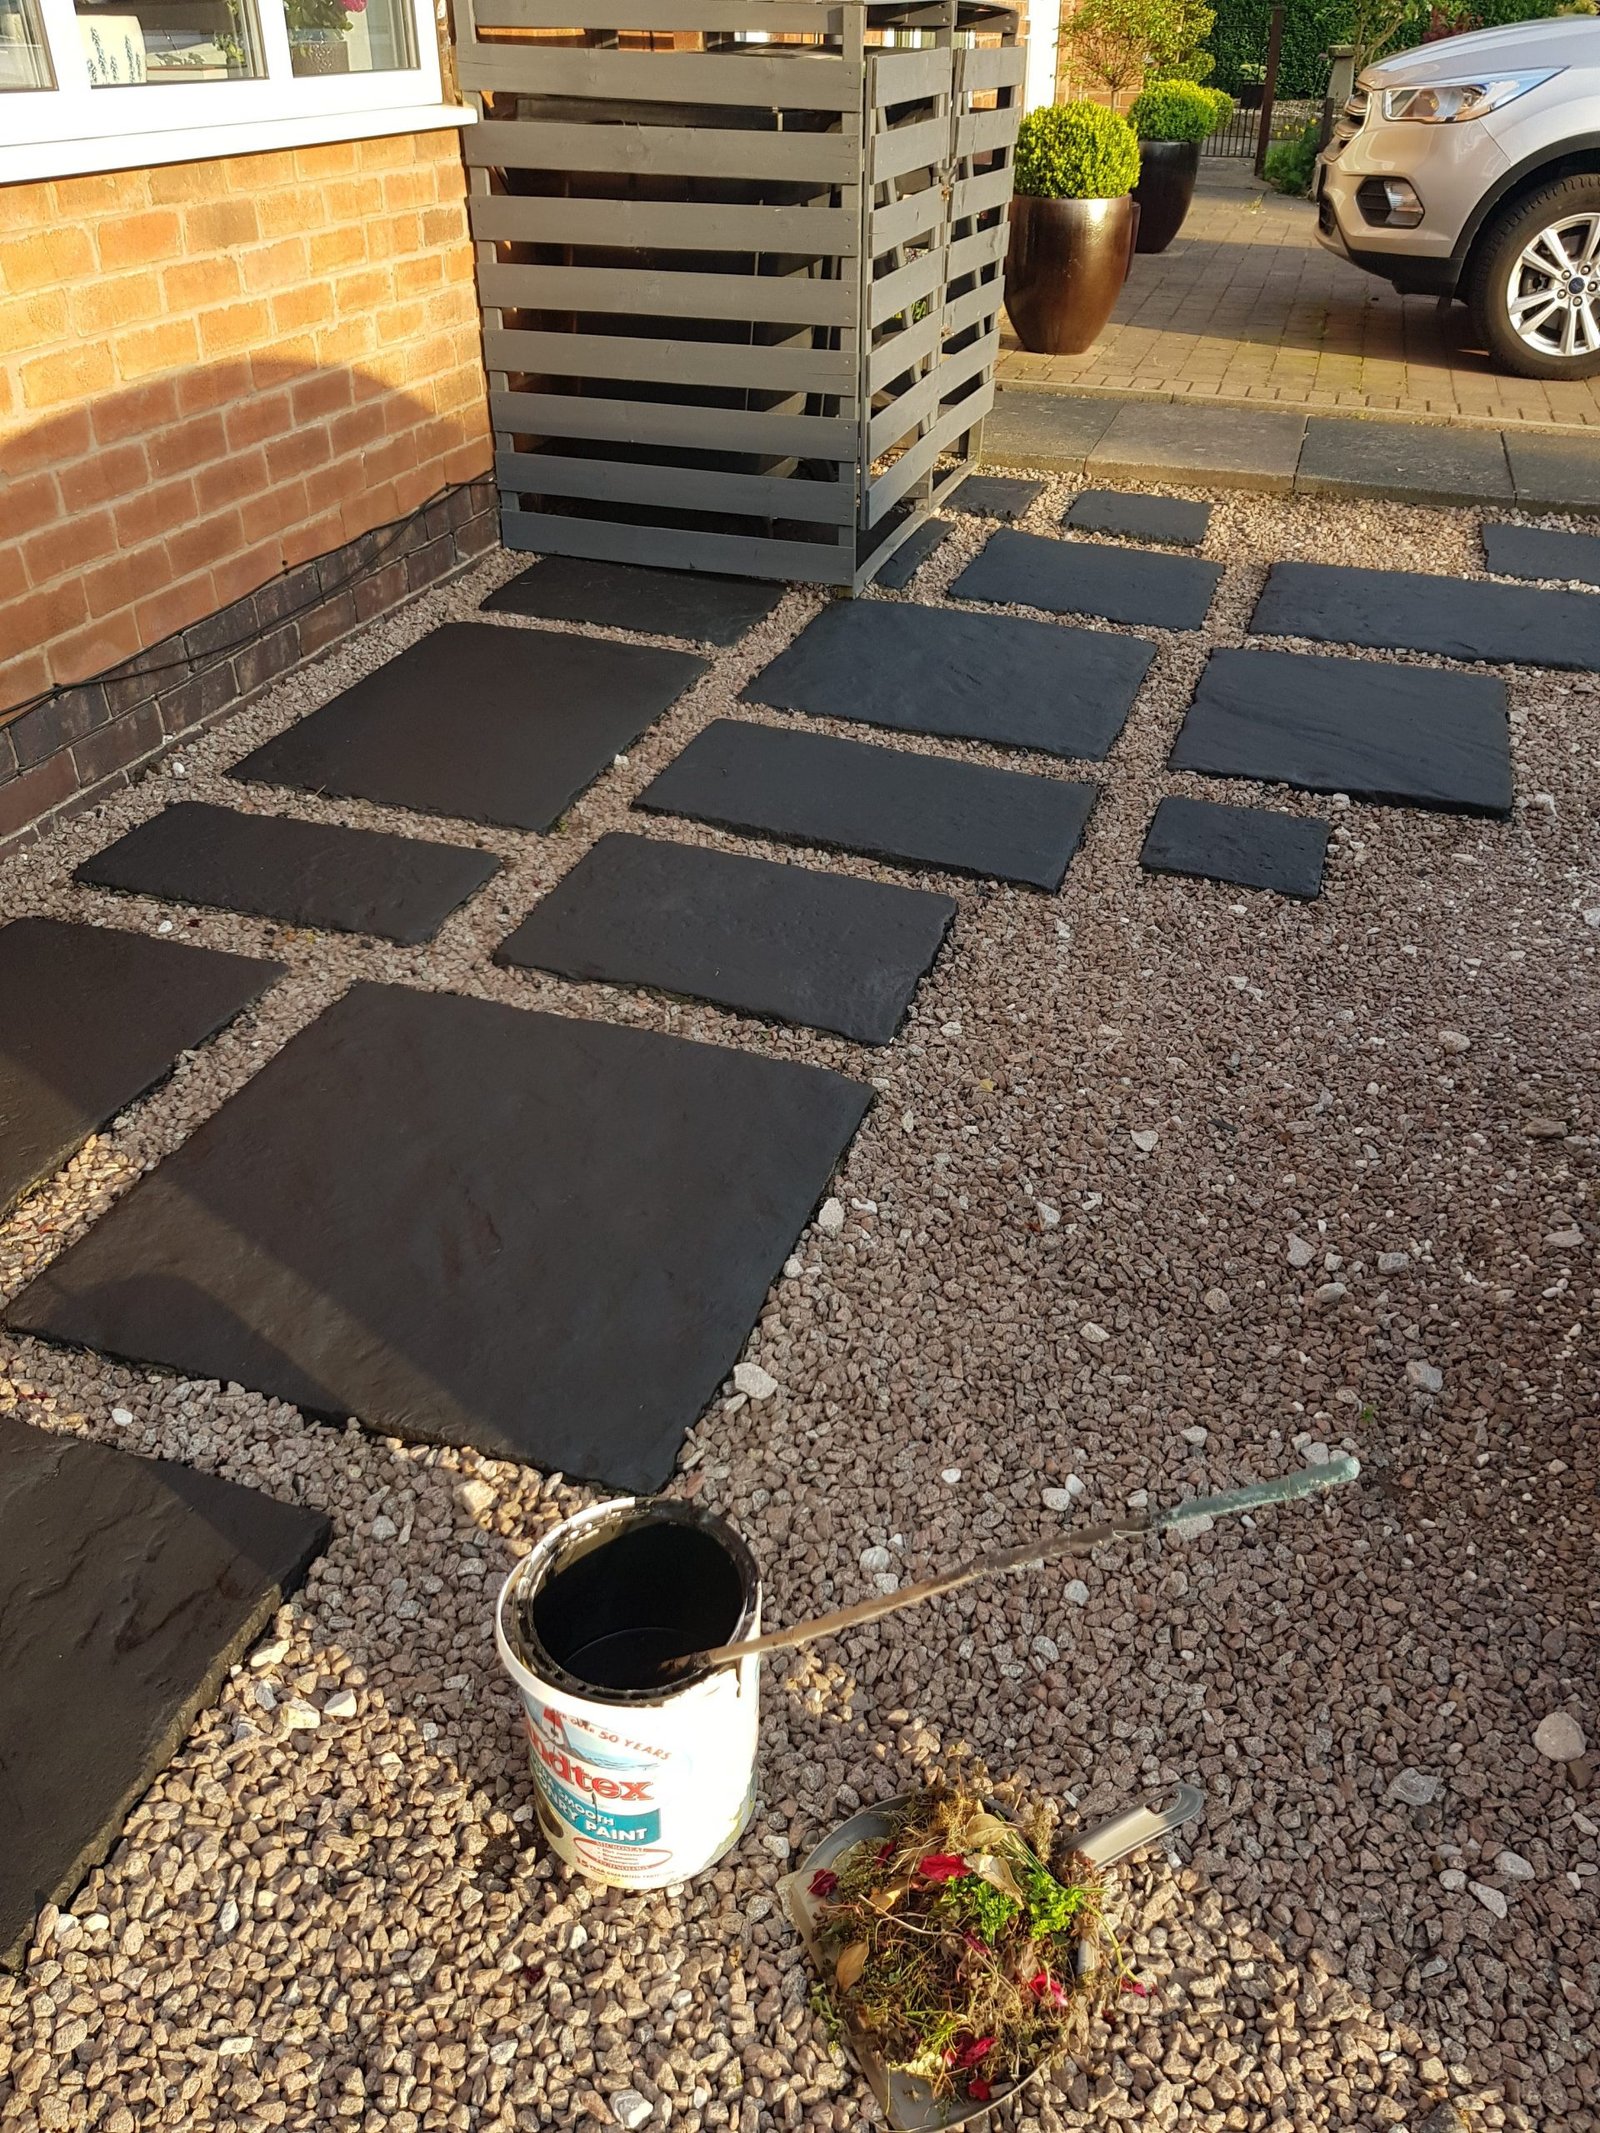
- painted the slabs black
- painted the little roof above the door white
- added few pots with nice looking plant (instead of dead ones)
- hung my DIY wreath on the door
Of course I would love to rip it all out and have a nice porch and driveway built instead. But we don’t want to spend 10k on a house that we want to move out of in a couple of years time. (Fingers crossed the recession won’t hit us very hard and that still will be the plan) But it will do for now and in fact we’re all very impressed with the results. And especially the painted slabs made such a difference.
But if you’ve been following my blog for a while than you’ll know that this wasn’t the first time i decided to refresh old concrete slabs with a lick of paint. I did it before in our garden and in fact it is still my most read post! (click here if you haven’t seen it).
But before i reached for the paint I had an idea which I wasn’t sure would work for us. Luckily it was a quick and easy DIY so it was worth a try.
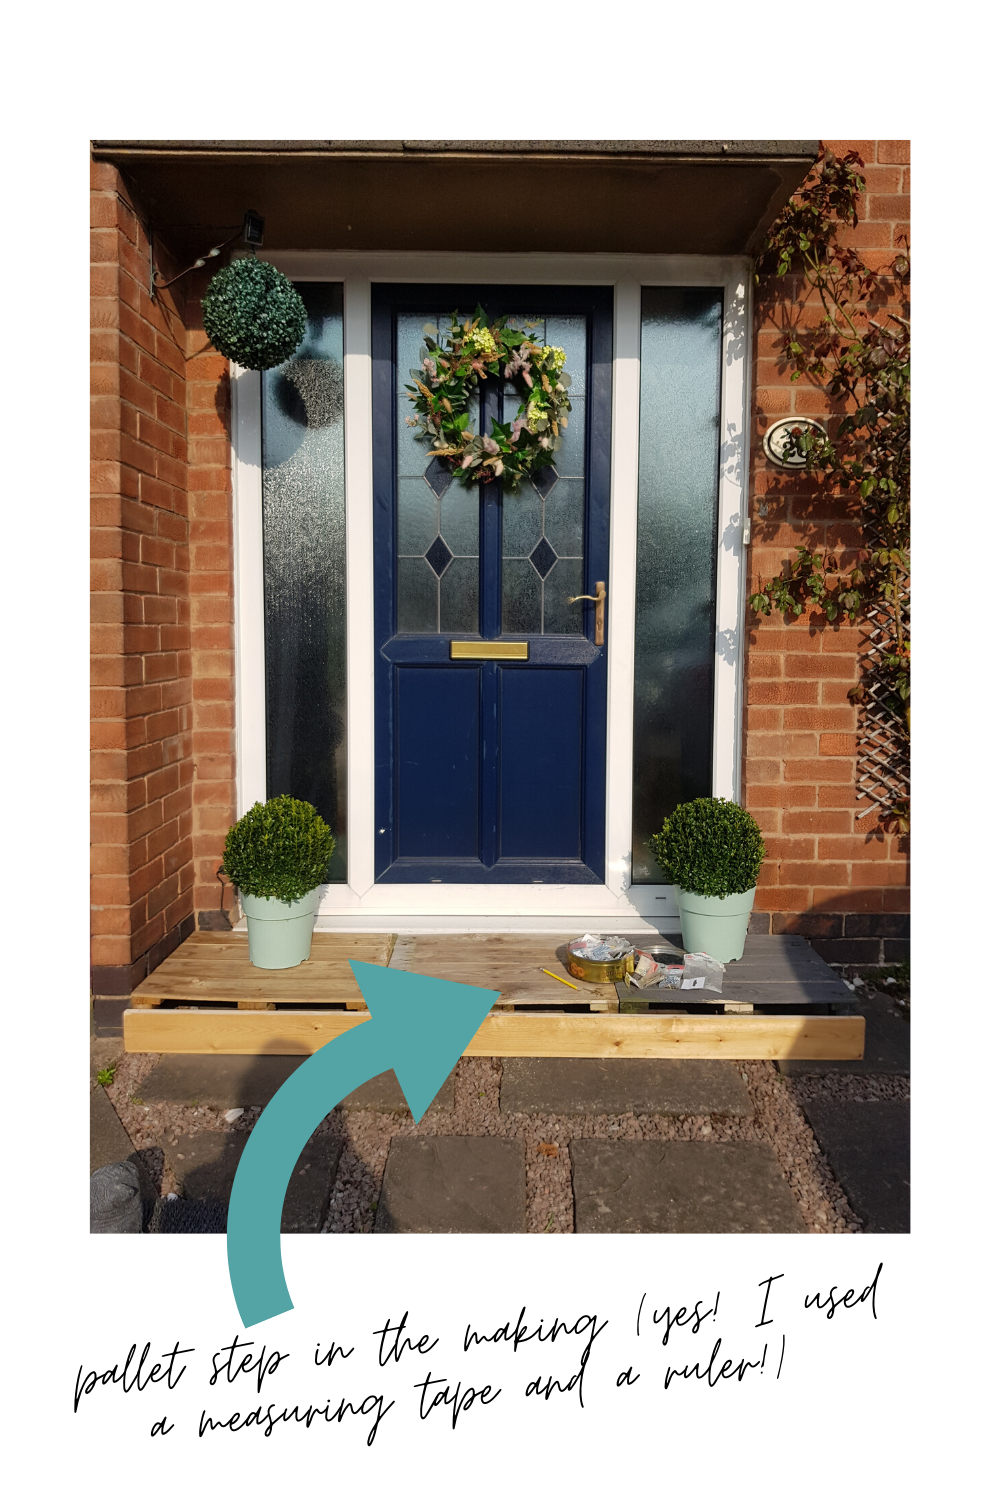
Making a step out of pallets
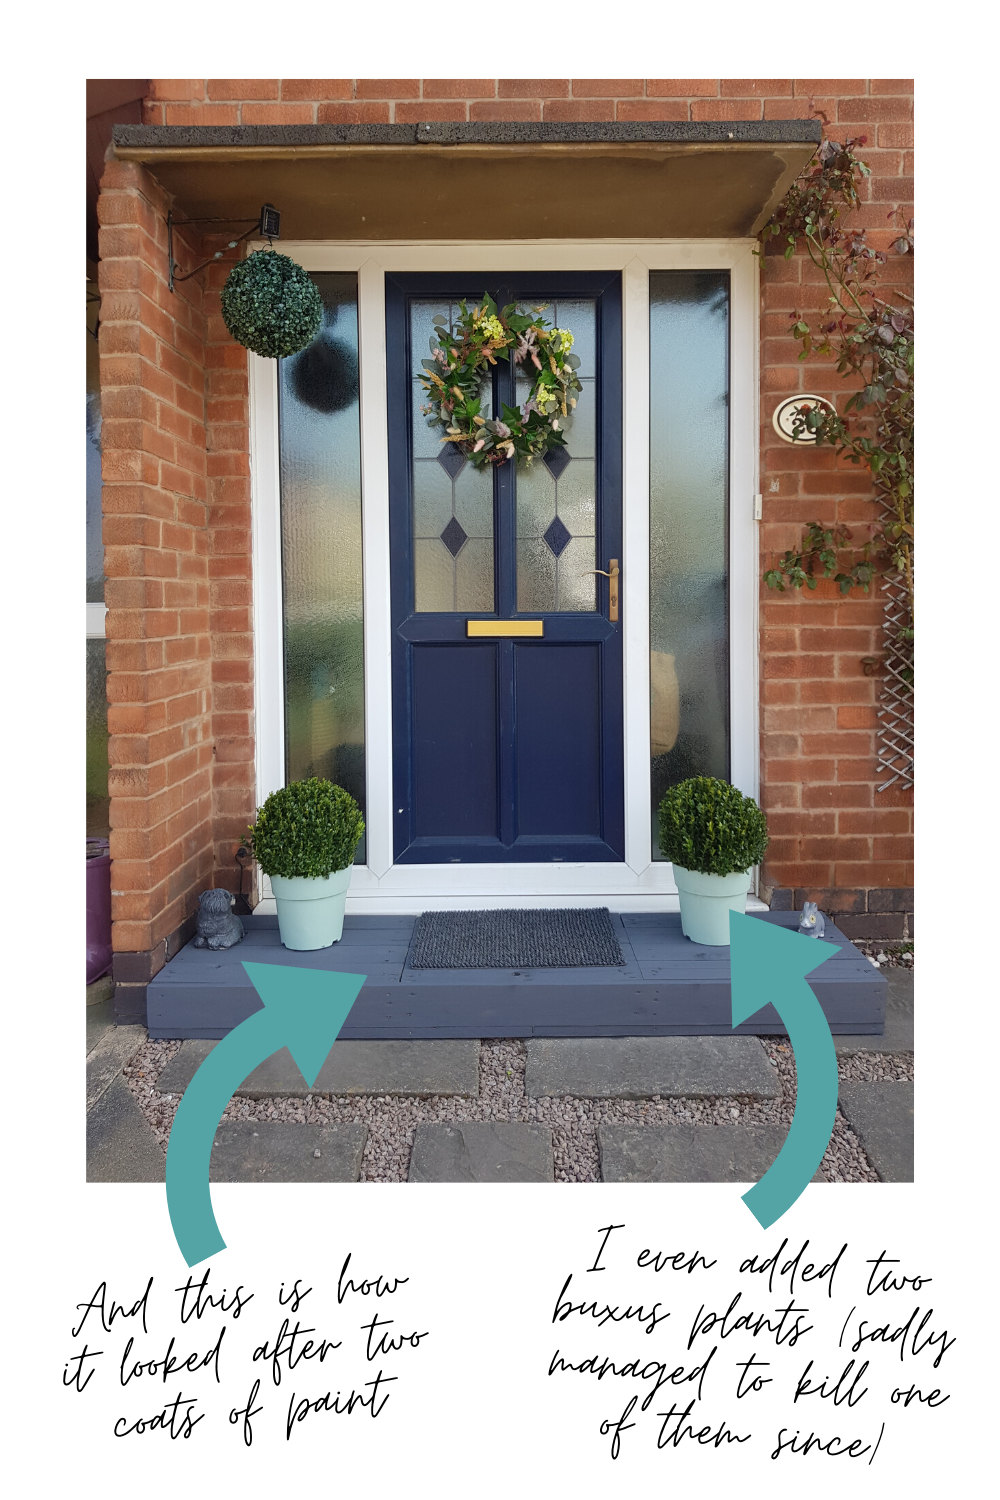
I used three wooden pallets and turned them into a step. Screwed them together and then I added one long board to the front to finish it off. I then used some leftover fence paint and gave it two coats. And that’s it! That’s the whole job. The only tricky bit was to find three identical pallets from the ones I had left since the last summer. And as we have a combination of slabs and gravel at the front of the house I had to make sure it was not too wobbly. Happy to report – it is sturdy as if the step was always there!
So, what will you need to make a step like this one?
- 3 wooden pallets
- one long board
- a pencil and a measuring tape
- fence paint and a brush
Painting the slabs black
Did you know that you can paint your old concrete slabs? This a a cheap and easy fix but you have to prepare yourself for a once a yearly maintenance. I still prefer this than spending thousands of pounds on replacing them! But since i painted the slabs in our garden few years ago I already knew that! And this is something people keep asking me all the time. Does it last? No – it won’t last forever, but it will last the whole season or two. And as it really is a cheap and easy DIY that will save me thousands of pounds I can live with that. Can you?
If your answer is yes than all you’ll need is a roller and a tray, a paintbrush and a black masonry paint. That’s it! That’s really is all to it! No special techniques, no tricks, just paint the slabs like you would any other surface. And then add a water sealer on top (I haven’t done that yet) and it might even last longer than you think.
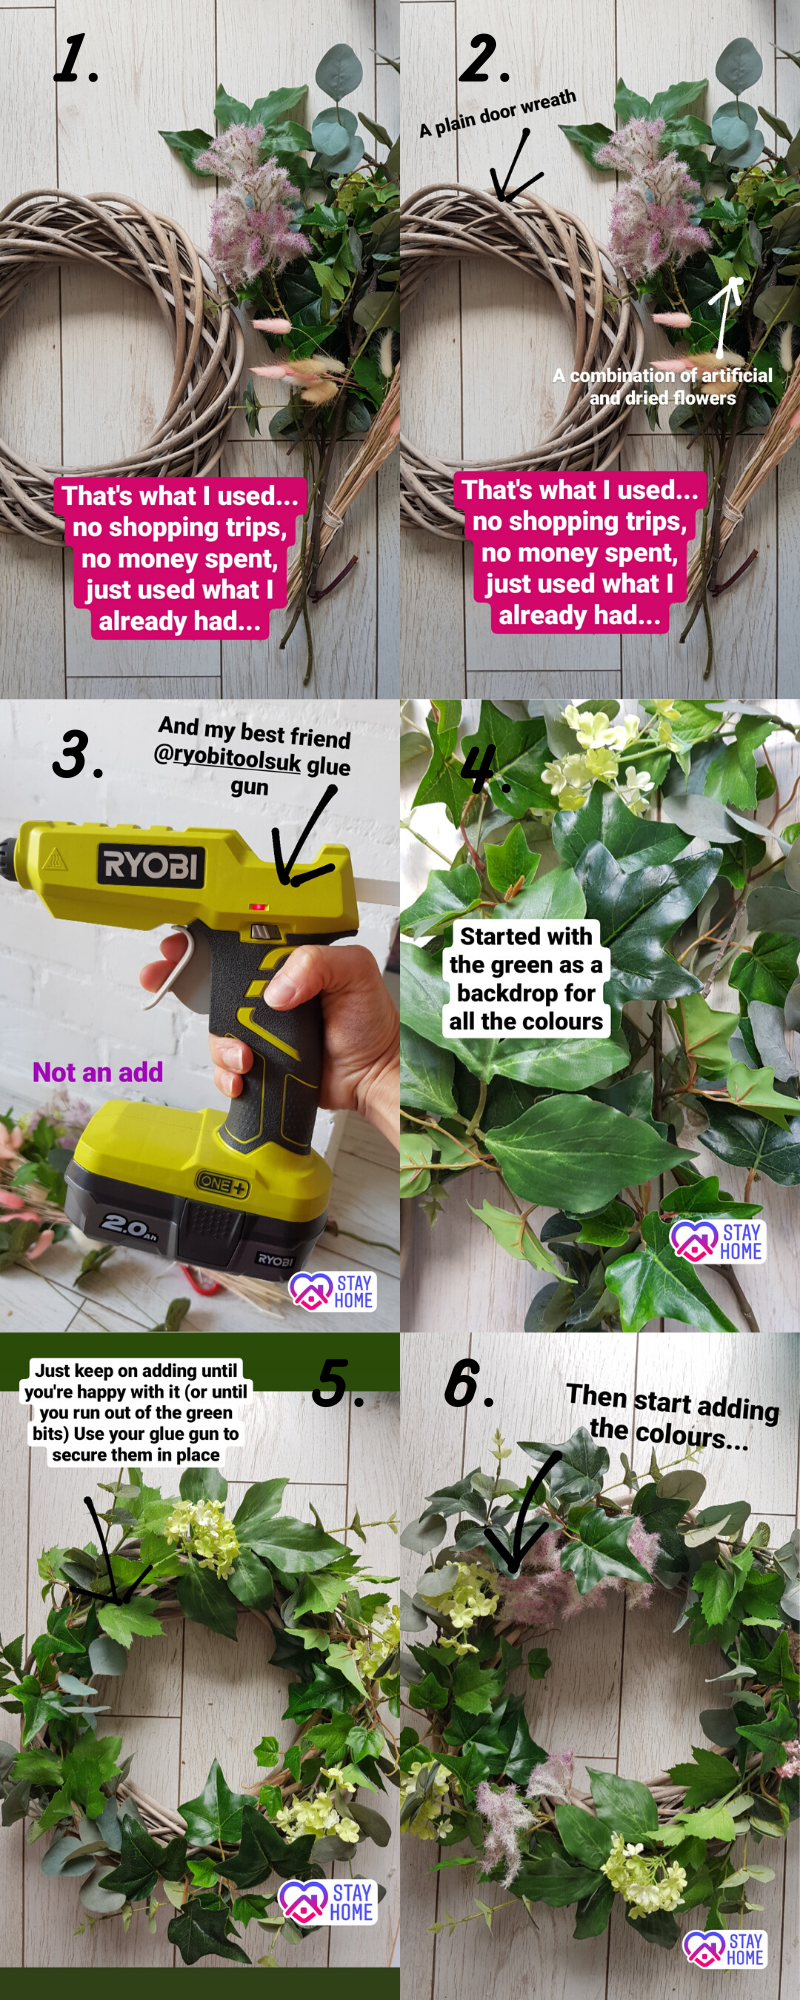
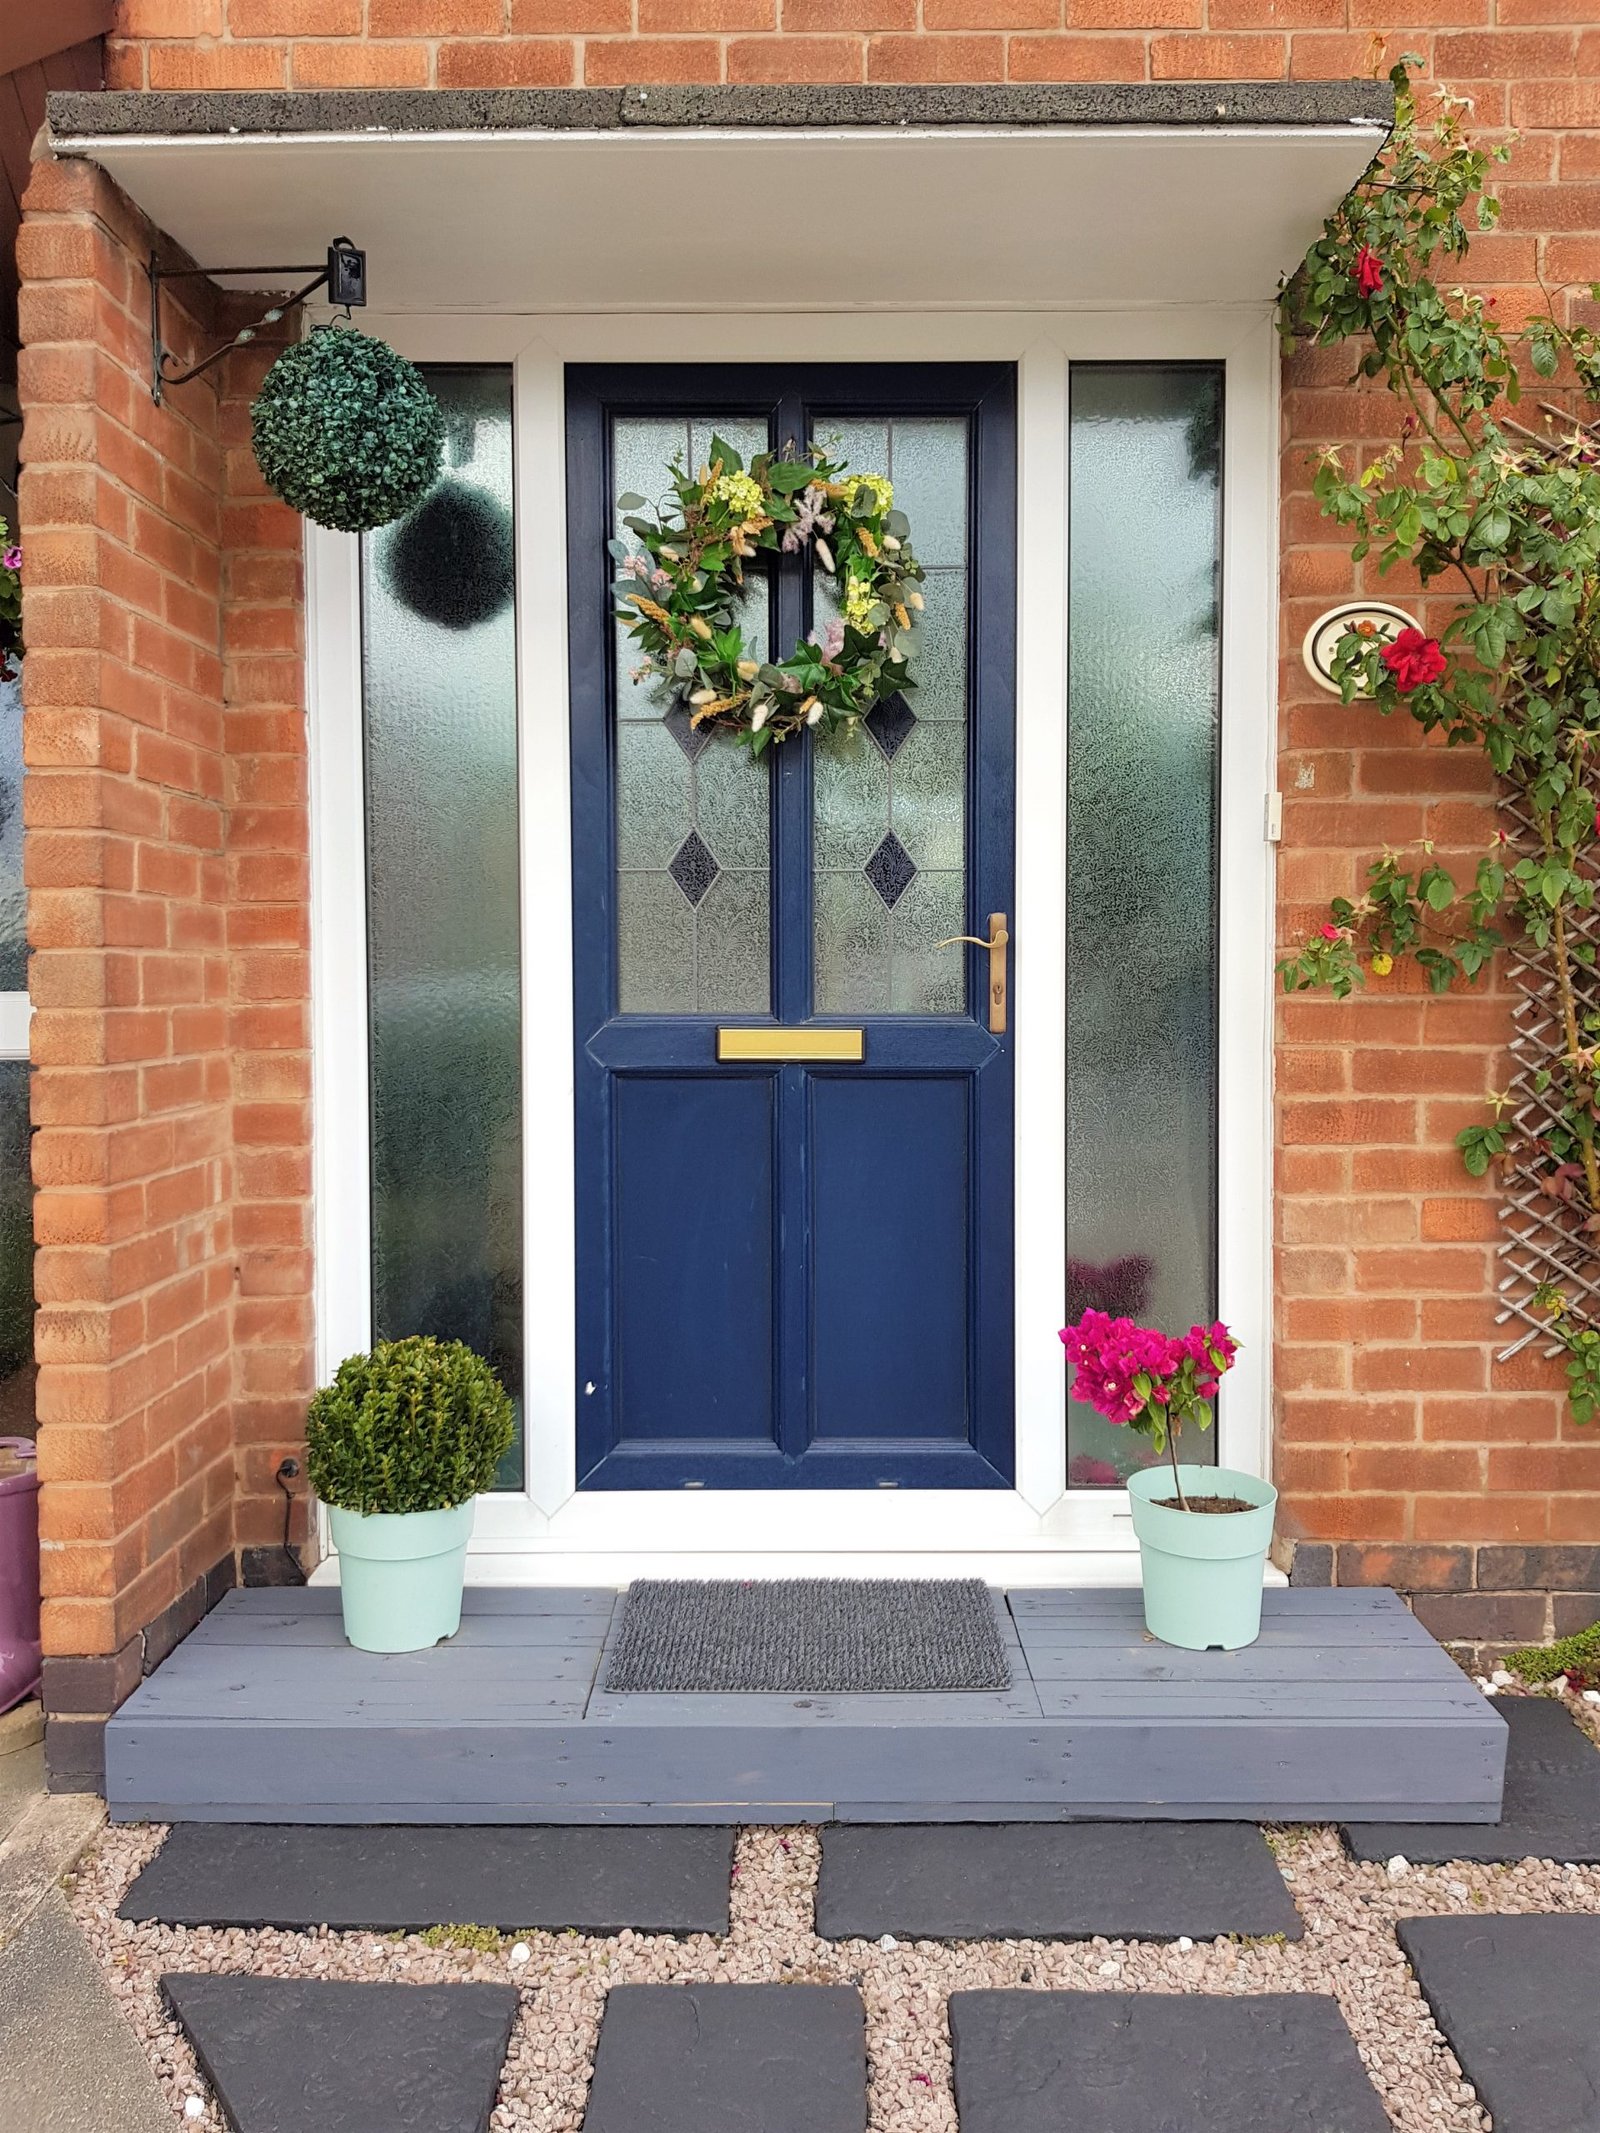
DIY Wreath
Here it is, the last piece of a puzzle – my DIY wreath and how I made it. I did a quick tutorial on my Instagram first when I made the wreath. I decided to use the same pictures, as they have little explanations written on them. It might be helpful, although there is nothing difficult in here. Anyone can do it. As I already mentioned, I only used what I already had, did not buy a single thing in preparation for this project. If you need to buy your products, I found some similar items for you:
- plain willow wreath (if you want to use exactly the same wreath, try this one, but you might find it easier with something like this
- selection of artificial foliage and dried flowers (I collected mine over the years and mostly they came from Ikea (see their selection here), Homesense and the rabbit tails came from Ebay) or try this artificial eucalyptus garland which will make this DIY wreath even easier to make
- glue gun (there are some cheap glue guns you can buy but if you want to invest in something that you will be able to use for a very long time than I can’t recommend this Ryobi glue gun enough: it’s strong, powerful and cordless which believe me is a massive bonus, just make sure you buy the battery too)


The Result – Front of the house makeover and my DIY wreath
After hanging my DIY wreath on the door I decided to refresh the little roof above the door with white paint (which I already had). I then added few plants and that’s it! That’s all I did to give this little space a makeover. It wasn’t planned really and I did not spend any money (apart from buying few new plants). Next plan is to paint the door as it has seen better days. But I need to do a little bit of research on what paint best to use and then actually get that paint. So you’ll have to wait for my next post to find out more.
For now here’s a little reminder of what I did and how the front of our house looks like now…

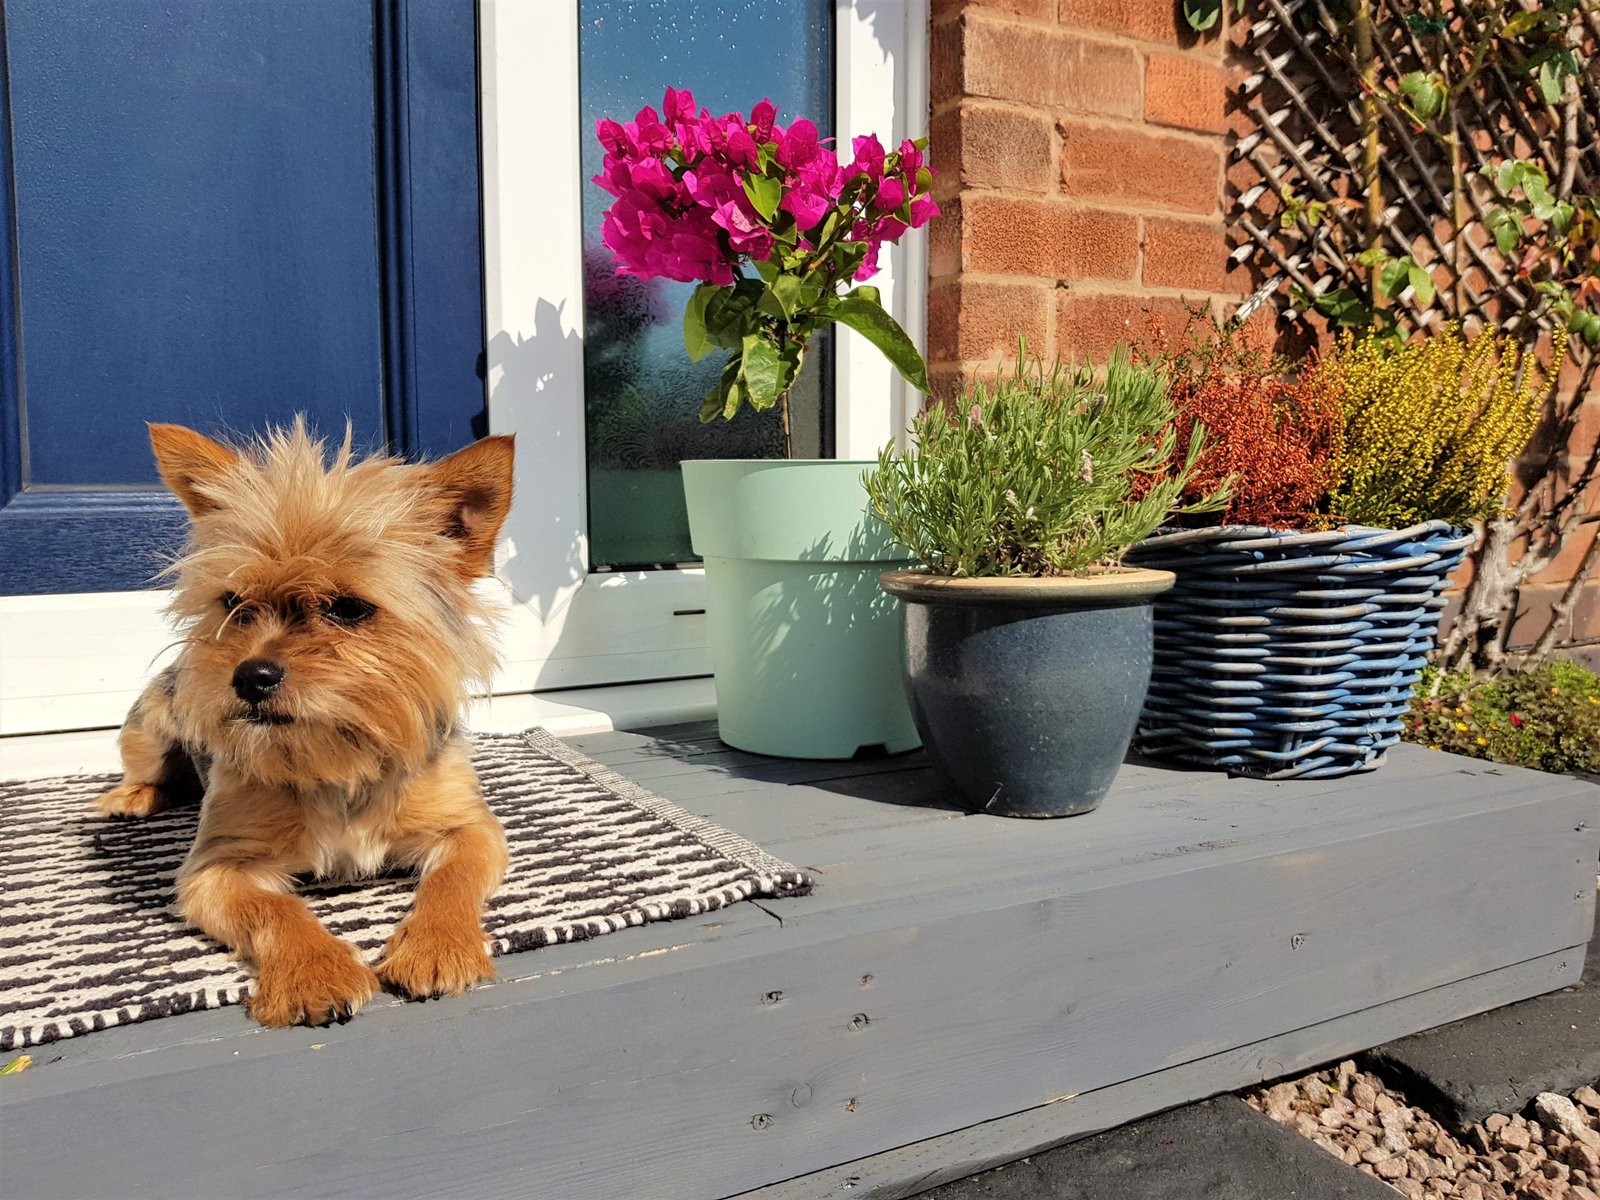
Lilo (yes, she’s named after a cartoon character from “Lilo & Stitch”) loves the new step and I think we all have to agree that she is the best addition to this little space…