Are you tired of staring at your dull, grey walls? Are you not a big fan of wallpapers? There is a quick and simple way to add drama to your internal walls. I tried sponge painting couple of years ago and I was hooked. For me, it is by far one of the best wall painting techniques. And I new straight away I had to paint another wall with a sponge.
Fast forward two years and I finally had the chance to showcase my inner creativity by sponge painting a wall in my son’s bedroom. Hooray!
But first things first. This is not a step by step guide.
Sponge painting is very intuitive. It is very easy to achieve good results. But it is also very easy to get carried away (like I did) and spend countless hours on going back to the point where you liked it. So in this blog post I will not be holding your hand every step of the way (not literally obviously, I wouldn’t be able to do that anyway). Instead I will tell you about all the things I did wrong. And hopefully that will save you from making the same mistakes I did.
The colours
There are no set rules on what and how many colours you should use when sponge painting a wall. Few shades of the same colour or analogous colours will probably work best. But if you’re a fan of colour, why not try using complementary colours instead? One thing you have to remember though is that some of that colours bill blend together. Unless you wait for the colours to dry completely before adding another colour, it is unavoidable. And blending the colours together is also kid of a point of all this sponge painting. So take that into account when deciding on a more colourful palette or you might end up with a poo on the wall… (And believe me, by “more dramatic look”, I did not mean that)
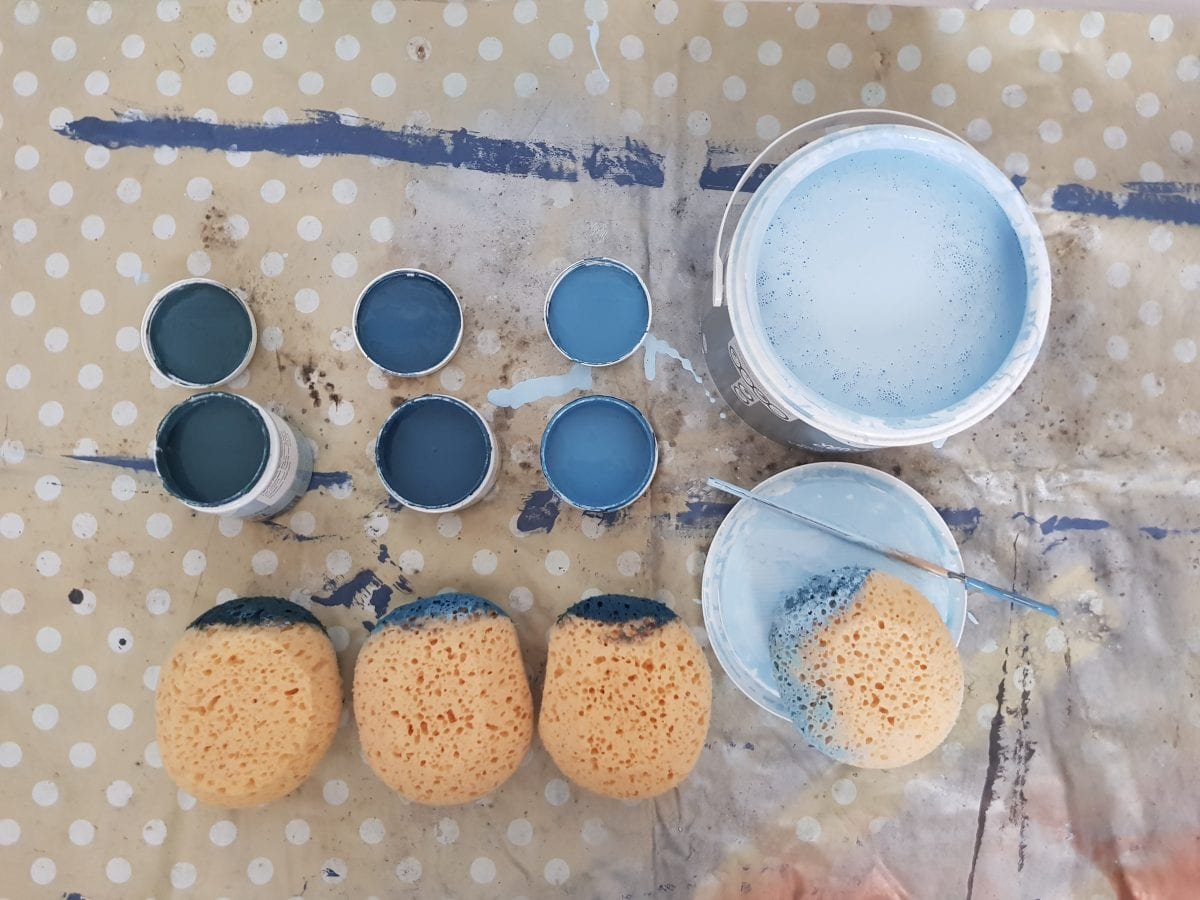
Tip! Don’t buy full size paint tins! You won’t need much so paint sample pots are more than enough. Try Valspar paint as they can literally mix any colour you ask for and their sample pots are really generous.
Sponge painting – how to start
Whichever colour palette you choose – start from the darkest colour in your group. It is much easier to keep control of the colour when adding lighter shades on top. How do I know that? Because I didn’t and it cost me few more hours fixing it. So take my advice, because – well, it’s a good advice! Obviously for your first colour you don’t have to use a sponge. In fact you should use a roller or a brush at this point as it will take less time. When that’s done – you have your base colour (which, remember, should be the darkest one). Now you can start the actual sponge painting.
Have a plan!
Or better still – make a drawing (on the paper, not on the wall) of what you want to achieve. This will help you enormously. When sponge painting a wall you will go through many stages. There is a pretty good chance you will like most of them (because they all look good on a small scale, whole wall – not so much). So remembering what your vision was at the start will help you decide when to carry on and when to stop with he paint. And as a proof – here are few stages from when I was painting my son’s wall. I liked them all at the time and was considering changing the course. I’m glad I didn’t. (Apologies for the quality of the photos but some of them were taken very late at night – yep, if you don’t have a plan, you will end up with a brush in your hand well past your bedtime)


Sponge painting – preparation
Preparation is a key! You don’t want to end up running around the house with a sponge dripping with paint just because you forgot to open the other colours. Yes- other colours! Make sure that all of your paint tins are open and ready to use before you start. Ideally you want to pour the paint into containers. It will make it easier to dab the sponge in paint. Especially if you use tester pots as these are too small for the sponge. Trust me – been there, done that. (As you can see from the photo below) Also make sure that you have a separate sponge for each colour to avoid paint mixing. That way you can keep the paint that’s left for another project.
When it comes to choosing the sponge – go for the ones with bigger holes in them. They will create more interesting pattern. And most definitely don’t buy any special craft sponges. They cost few times more and do exactly the same job. I’ve tried them both – so you don’t have to!
The technique
This is actually the easiest part. Most likely you will find your own technique within the first hour or so. But just to make things a little bit easier, here’s what I’ve learnt:
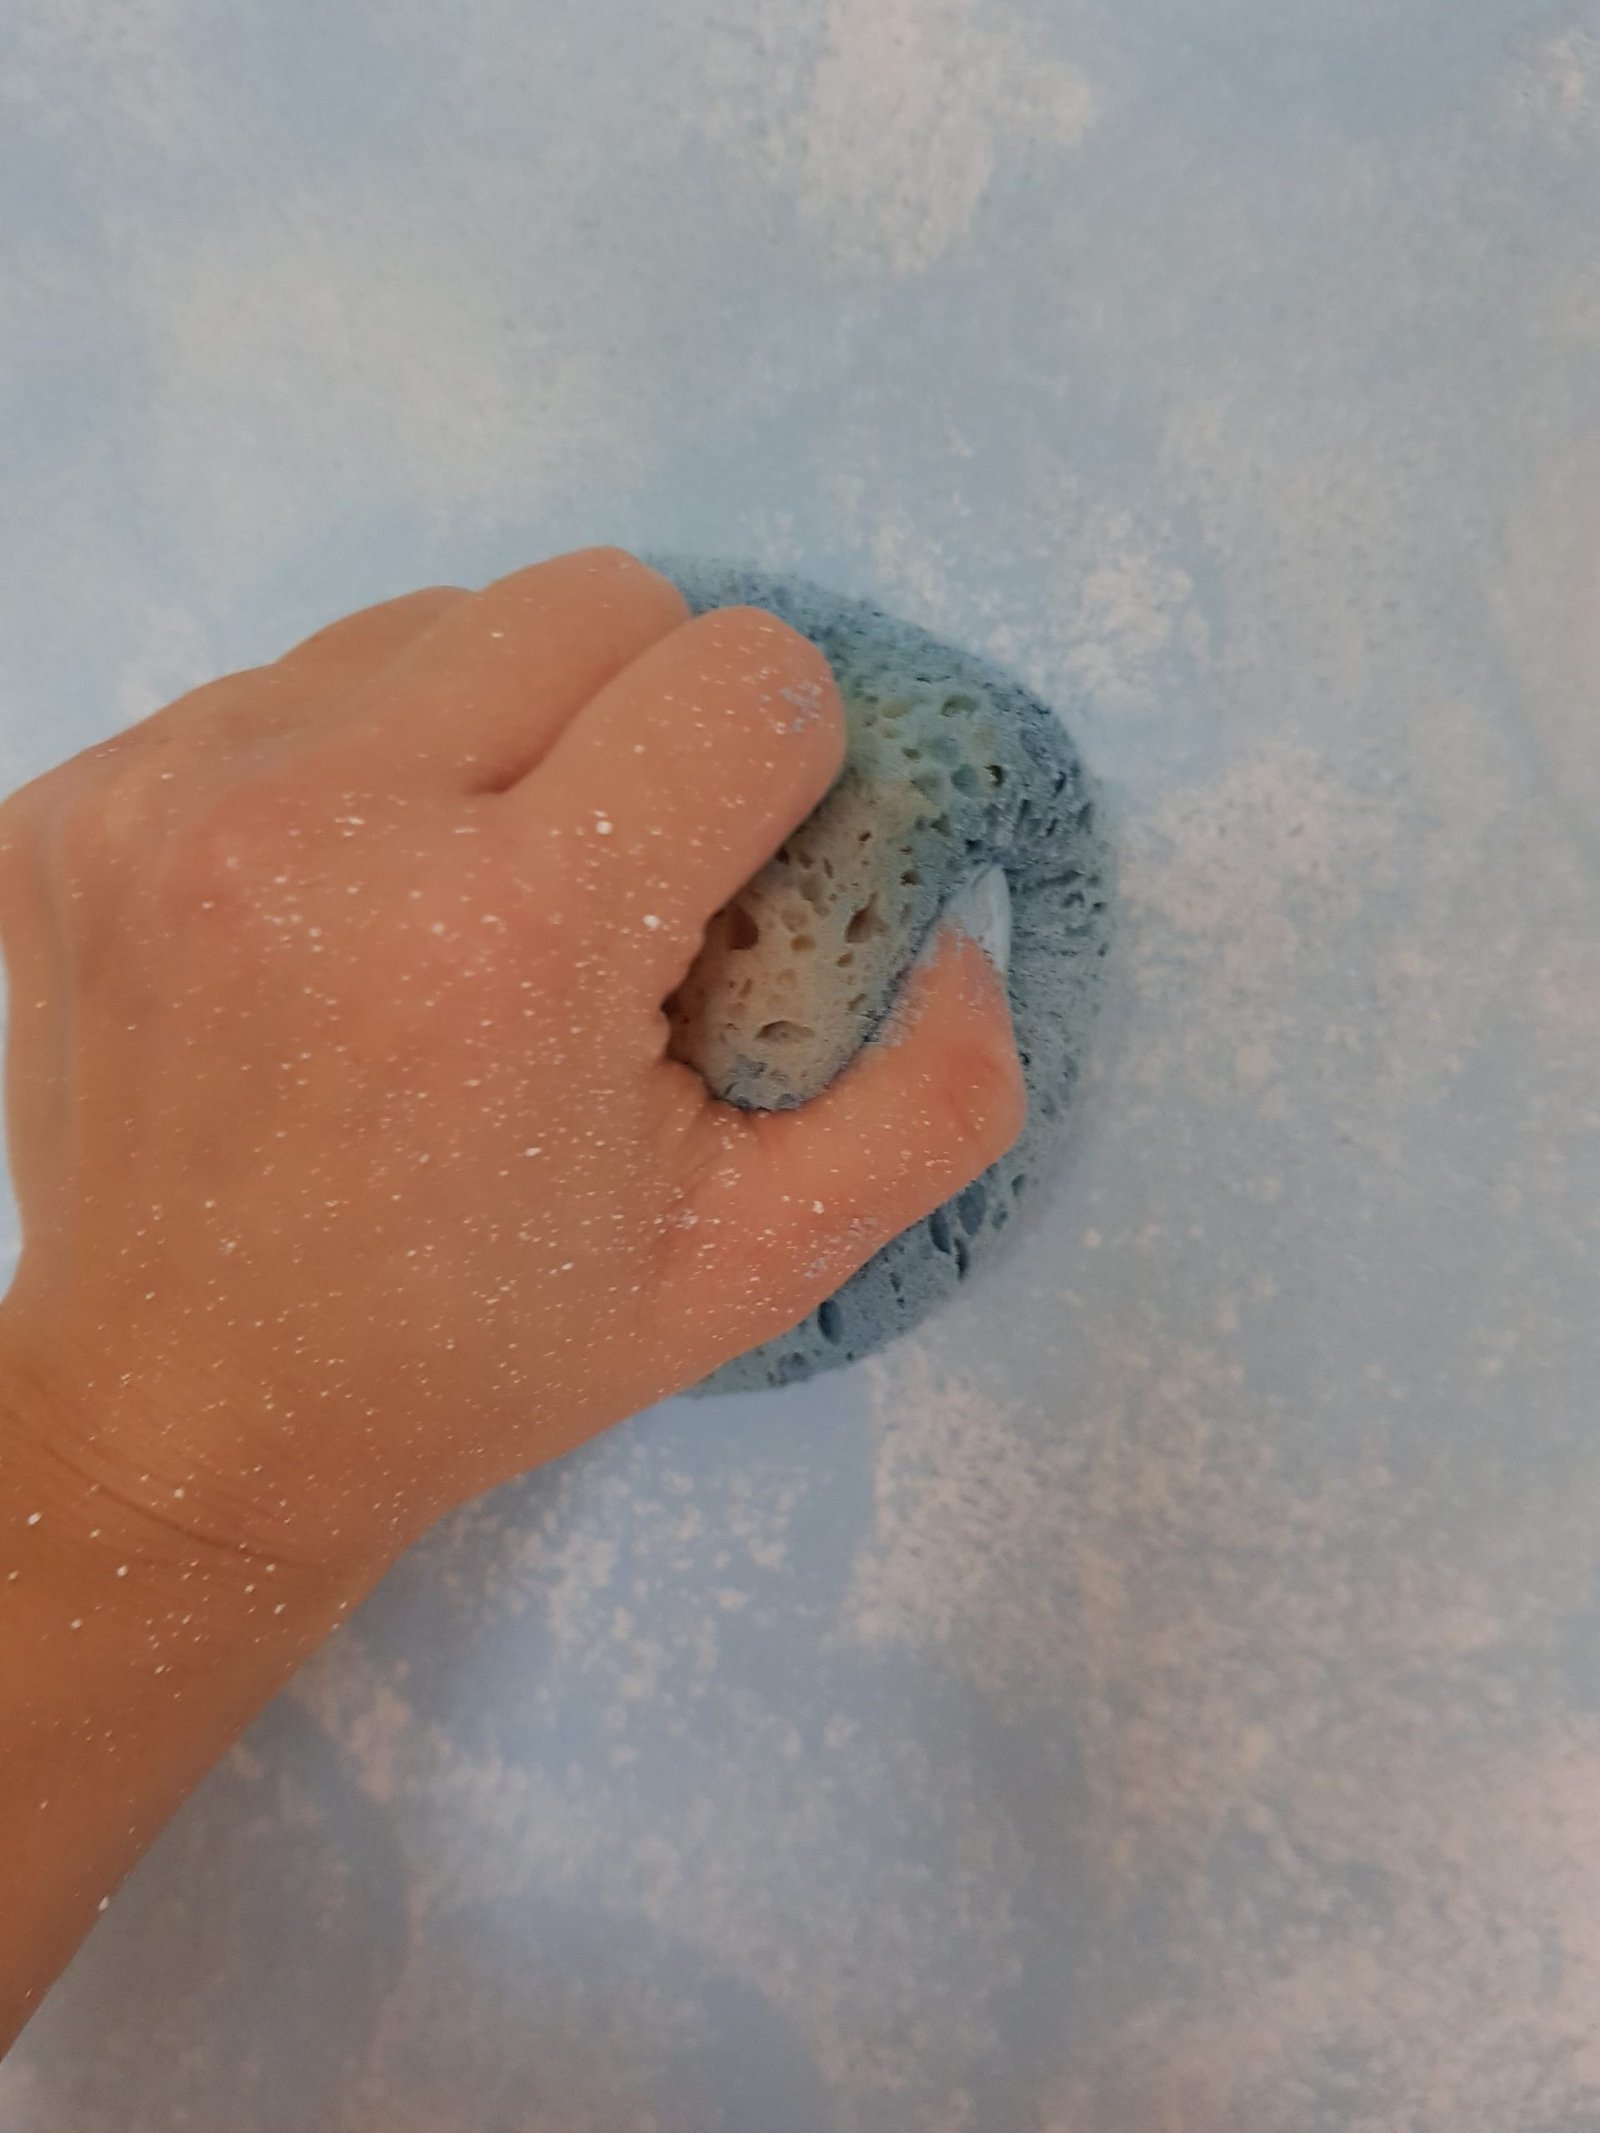
- Don’t soak the sponges in paint – just dab them in paint making sure they don’t absorb too much paint to avoid leaking
- If it happens that there is too much paint on your sponge don’t press it too much on the wall, instead make few marks (dots) with it before starting to blend the paint together
- Start with the darkest colour, ending with the lightest at the top
- Make different patterns by changing the technique – dab, press, twist the sponge, make circles with it and every now and again try rubbing it on the wall (but only when the sponge is almost dry)
- Use all the techniques at the beginning so that you know what results they bring for you and if it is something you had in mind – if it isn’t, it is easier to change it at that stage
- If possible paint the wall in a daylight to avoid disappointment. In case you find yourself still painting after it gets dark, leave the sponges for the night and start with a fresh eye in the morning. I carried on for another few hours after it got dark (because I didn’t have a plan), only to decide in the morning that I didn’t like it!
- You can either use one colour at the time and then add another when you’ve done the whole wall or you can paint your wall in stages, where you work on one corner of the wall with all the colours first before moving on to the next part of the wall – whichever works for you because you’re suppose to
- Have fun with it! Don’t get stress out if you think you’ve messed up, just carry on adding more paint. If you’ve followed the above, then you won’t have to worry about having too much paint on the wall


One more tip
When you finish sponge painting the wall and you think it is a little bit too dark, instead of adding more layers, give the wall a slight white wash with the sponge. Lightly dub the sponge in the lightest paint, then rub the excess of paint into the edge of the tin, making sure that the sponge is almost dry. Then very gently skim the whole wall with the (ALMOST DRY) sponge. Don’t start in the middle of the wall, start somewhere less visible.
And that’s it. Painting walls with a sponge is really fun and easy way of adding interest to any wall in any room. So try it!
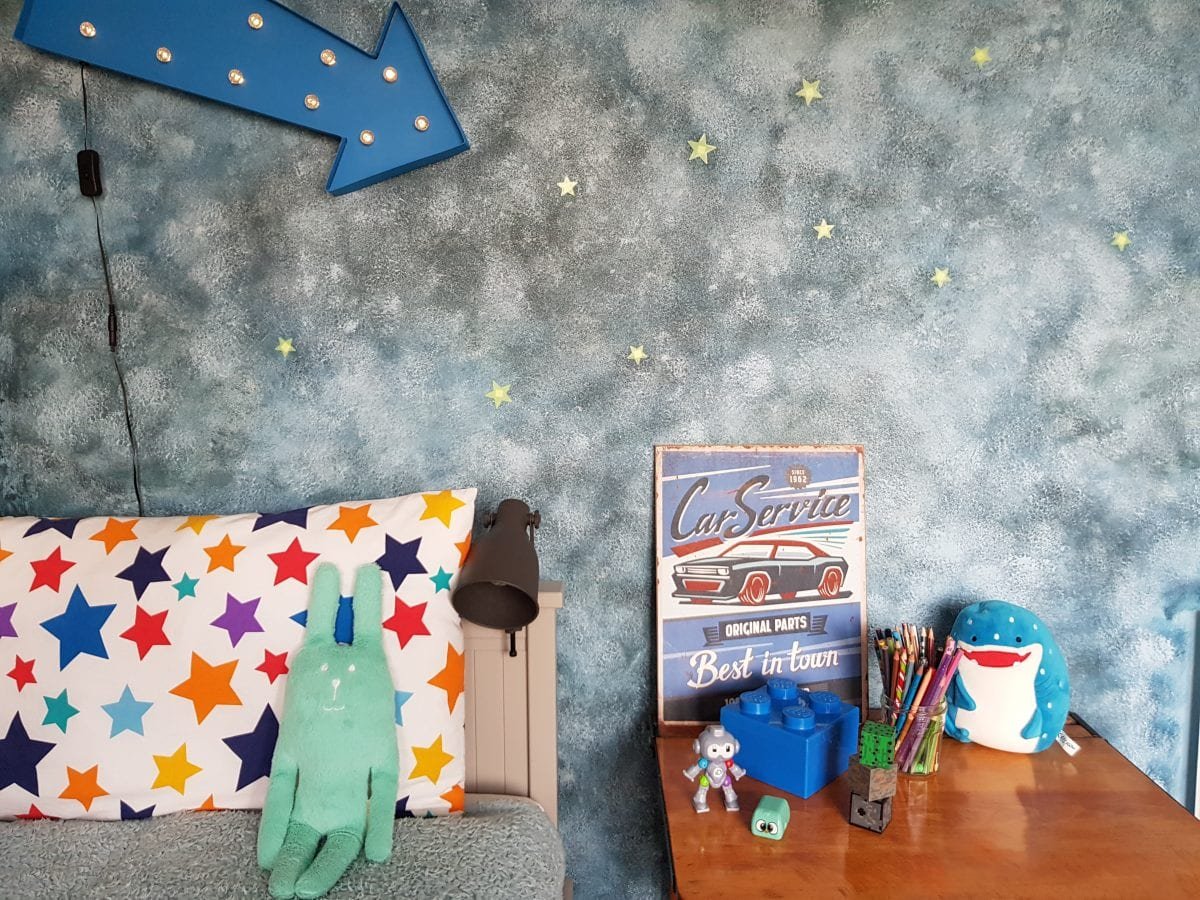
As I went for a “stormy sky” kind of look, I decided to add some “glow in the dark” stars. I mean they’re rather useless at glowing (unless we leave the main light on for the whole day), but they look rather cool on that wall. Don’t you think?

This project was part of my son’s bedroom makeover. If you’ve missed my post about how to build a pallet board wall you can read it here. I have another big fun DIY planned for this room before I can do a makeover reveal on the blog. But the true is that the room is so small, there won’t be much left to show anyway. Ohh, joys of living in a tiny house! Till next time!

Even our dog approves! (or maybe not, because she’s not looking at the wall…)
