For the past couple of weeks I’ve been planning, making and building an outdoor sofa out of wooden pallets. It is finished now (on the blog soon) but it made me realise that I have never posted about a different project that I did at the end of last year. (I guess life just happened) The pallet board wall that I’ve created in my son’s bedroom is definitely something worth writing about. And as I’ve posted some photos on my Instagram and it even has been featured in a magazine, I think it would be a shame not to give it a mention on my blog. Especially that it is super easy to do, inexpensive and so damn effective!
And now let’s move on to how to make it…
What you need to build a recycled wood wall?
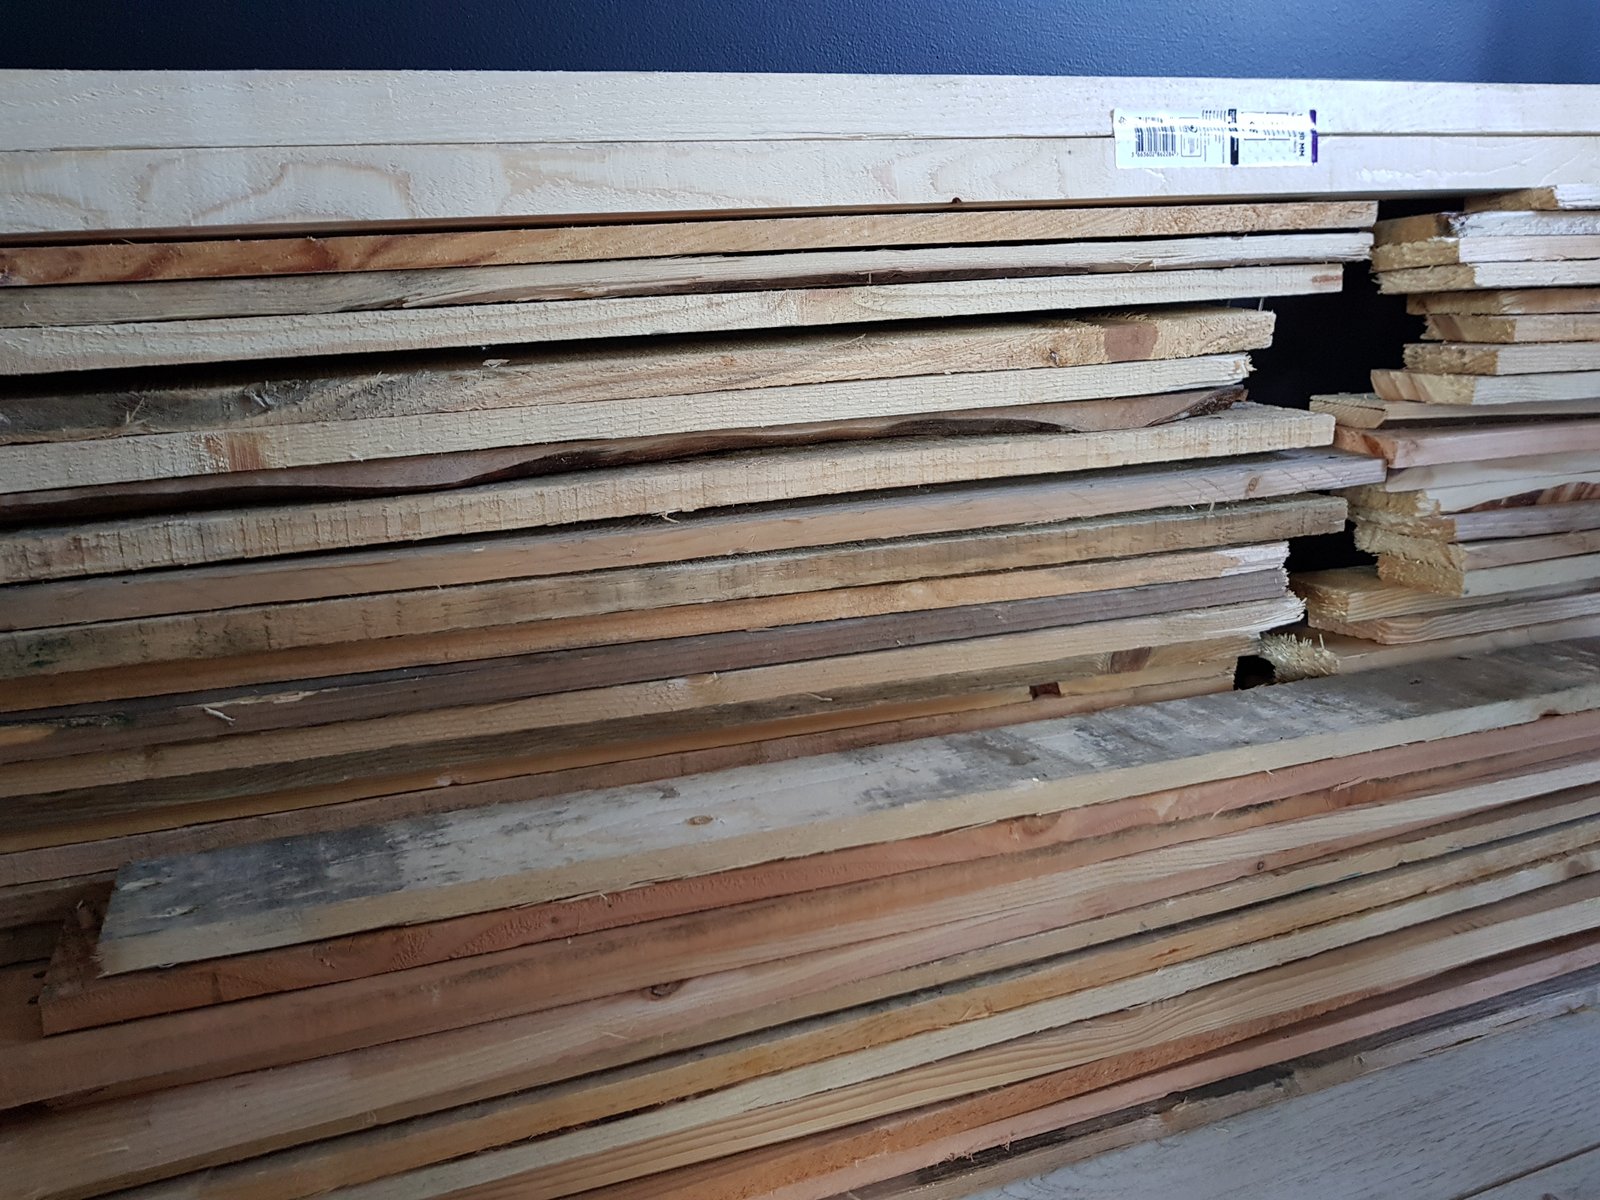
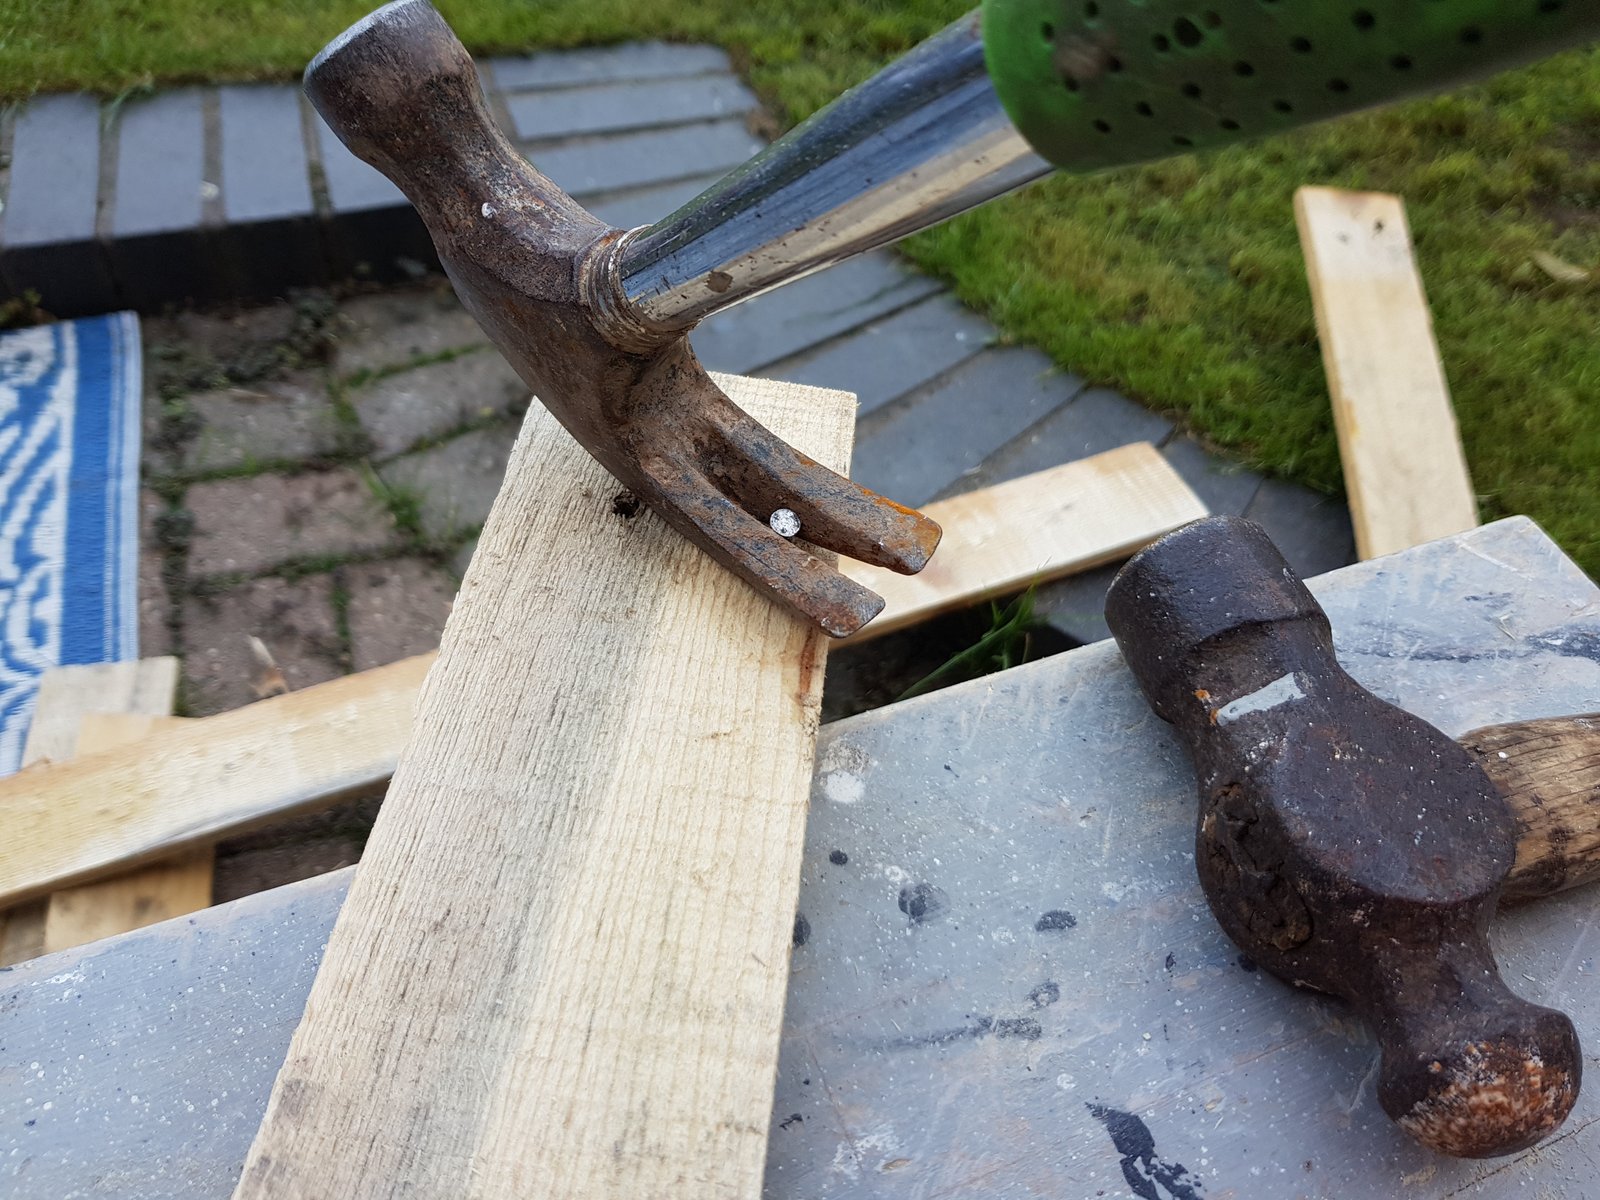
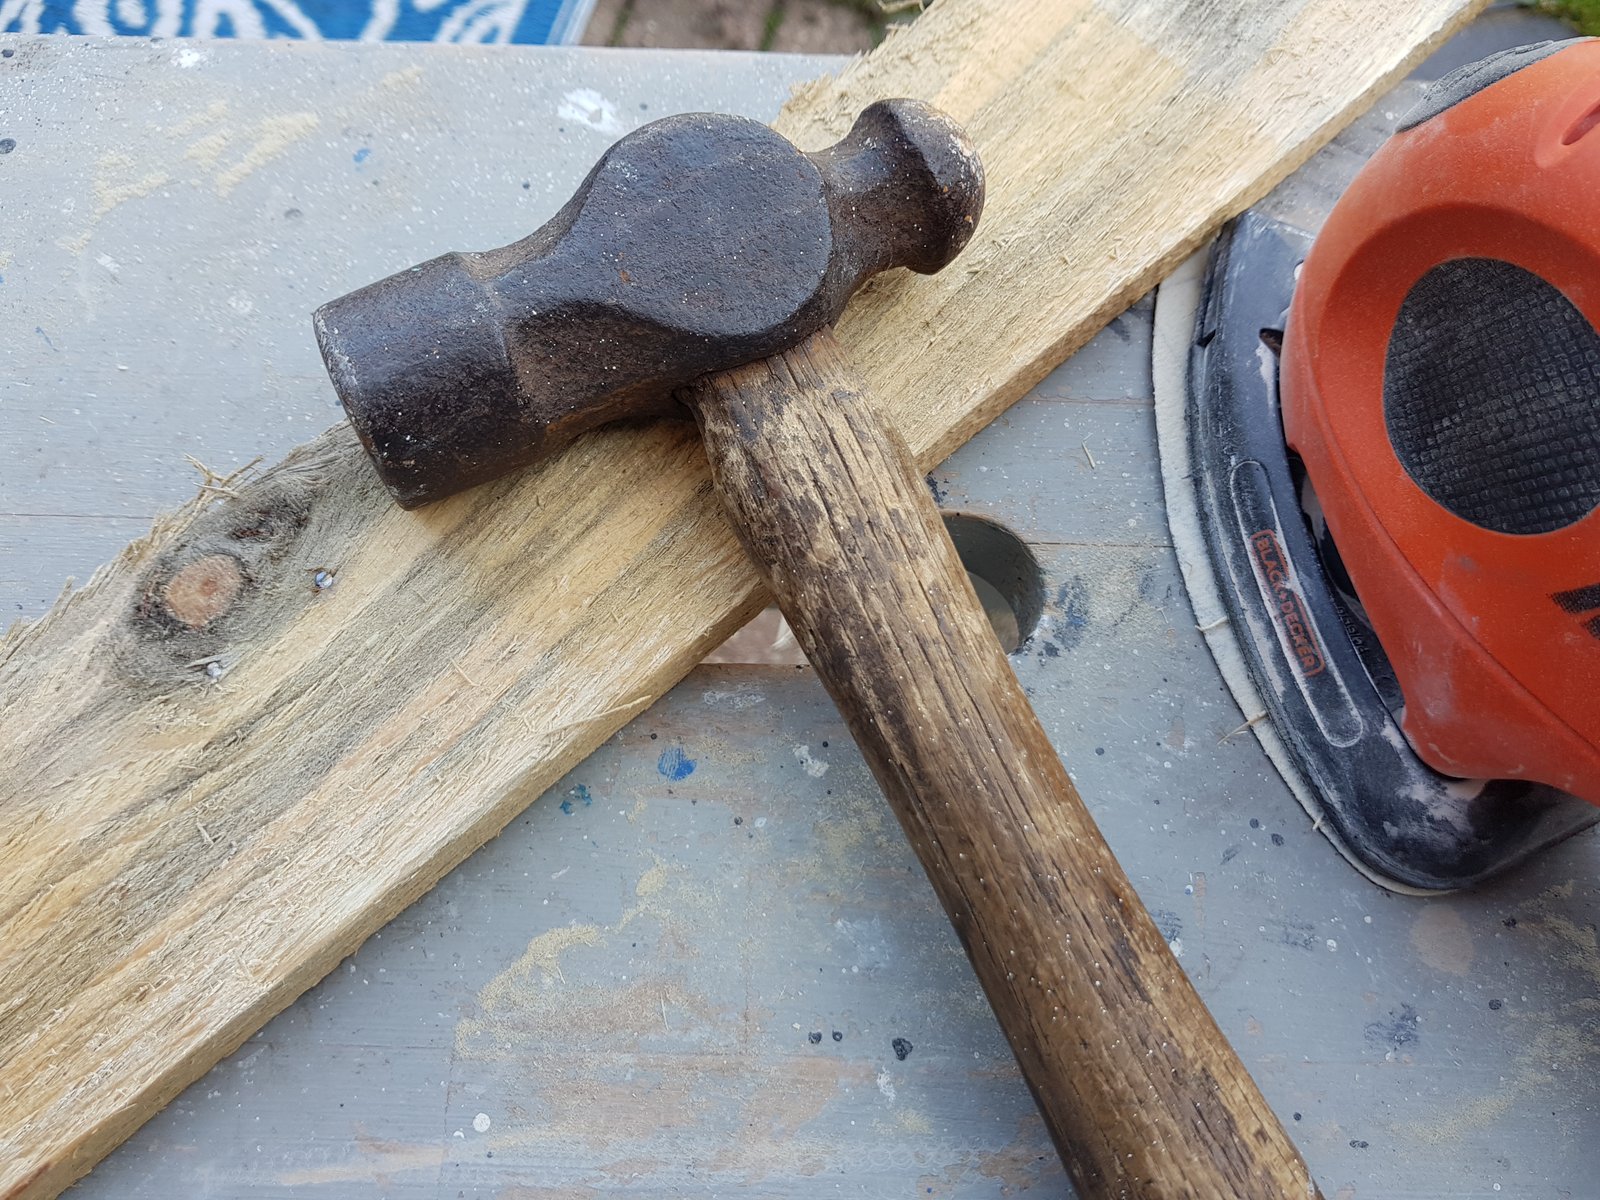
So obviously you need wooden pallets for this project. Or even better – pallet boards. I got mines on Ebay and they cost me about £20 for the lot. They were already de-nailed which saved me a lot of work (and time) So if you’re dismantling your wooden pallets yourself, remember to check for any nails. Ideally you don’t want any old nails ruining the look of your newly built pallet board wall. But if there are a few you can’t remove, just hammer them deeper so they become less visible.
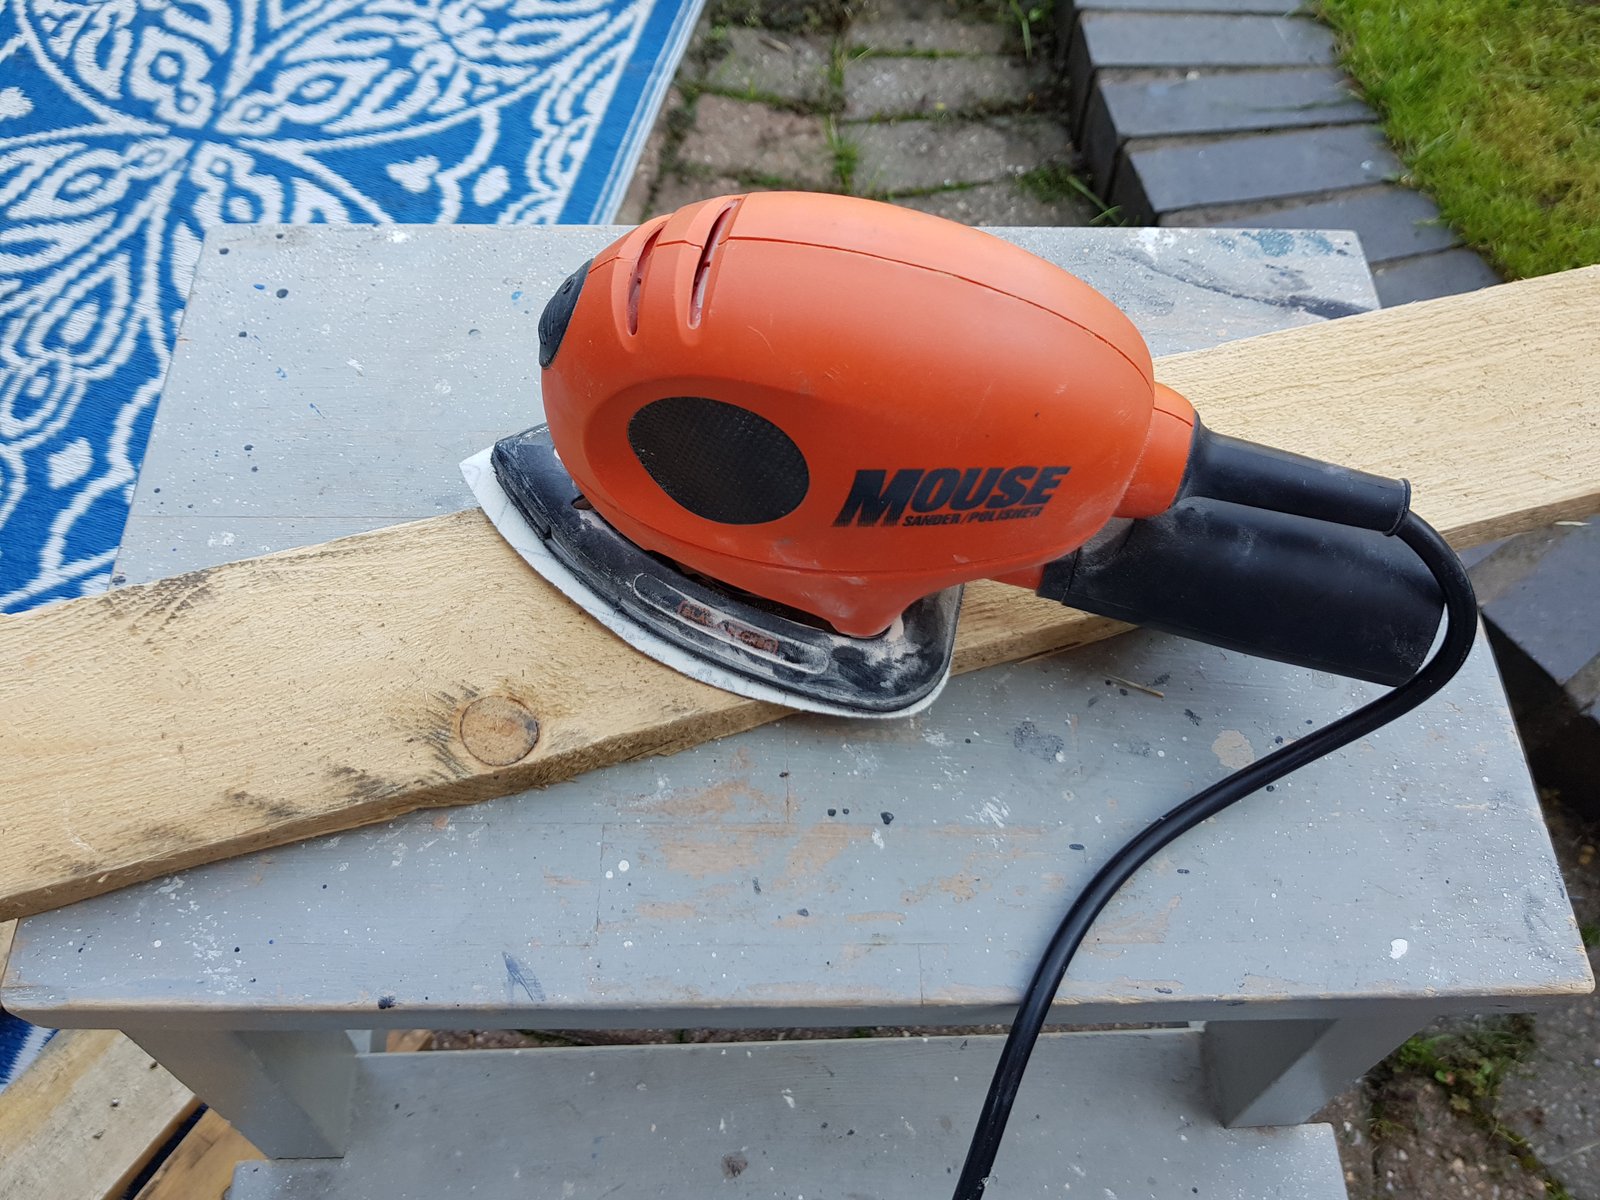
For this project you will also need some sanding paper, but ideally a sanding machine as this will speed up the whole process. The sanding paper shouldn’t be too coarse, but not too fine either. But to be honest it will all depend on what condition your pallet boards are.
The next thing you will also need to build a pallet board wall is some wooden slats. These are needed for building a frame to which you will then attach the pallet boards. You could use the same pallet boards for this but ideally you want something narrower but deeper. Don’t try to skip this part because you will regret that later when all the nails meet the resistance of the brick wall. But if it is a stud wall and you know where the studs are or you have a stud-finder (yes, there is such a thing) you could potentially attach your pallet boards directly to the wall. But this is not how I’ve done it so I won’t be giving you any tips on doing that!
Now, for this project (done my way) you will also need: a drill, screws and plugs and nails (lots of them). And of course an electric jigsaw or something you can use to cut the wood. And if you think a manual saw can do, think twice because there is a lot of cutting!
How to build a pallet board wall
Preparing the wood
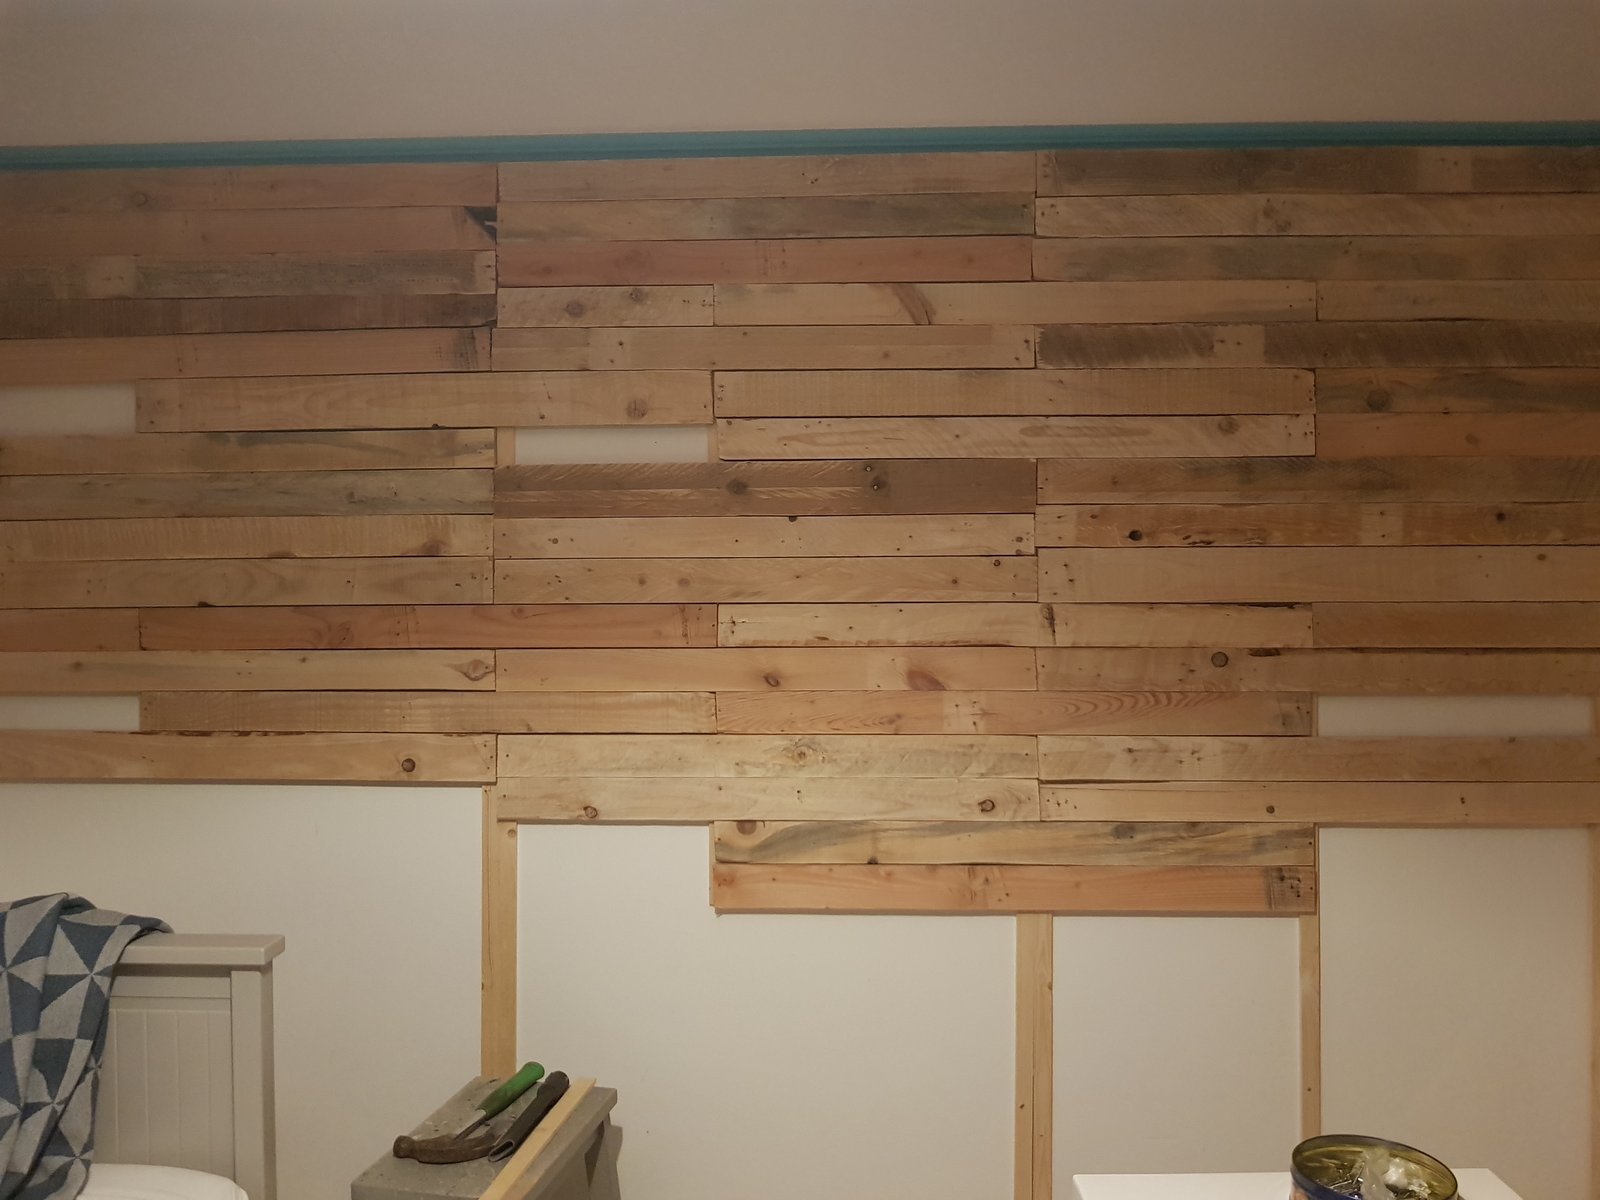
The first thing to do is to prepare the wood. As I mentioned earlier it is crucial to make sure that there is no nails in your pallet boards and any nails you can’t remove (and believe me, there will be some) need to be hammered down, which will make them less visible and what’s more important – less likely to damage your sanding machine.
Because it is rather difficult to measure exactly how many wooden pallets you will need, just make sure you have plenty. You probably need more than you think. And if you have too many, leave them for another project, like an outside wooden sofa!
So when all the boards are de-nailed, they need to be sanded down. This is to assure you don’t catch your fingers on your newly built pallet board wall. The true is – you want your wall to look rough, but actually you want it to be smooth at the same time.
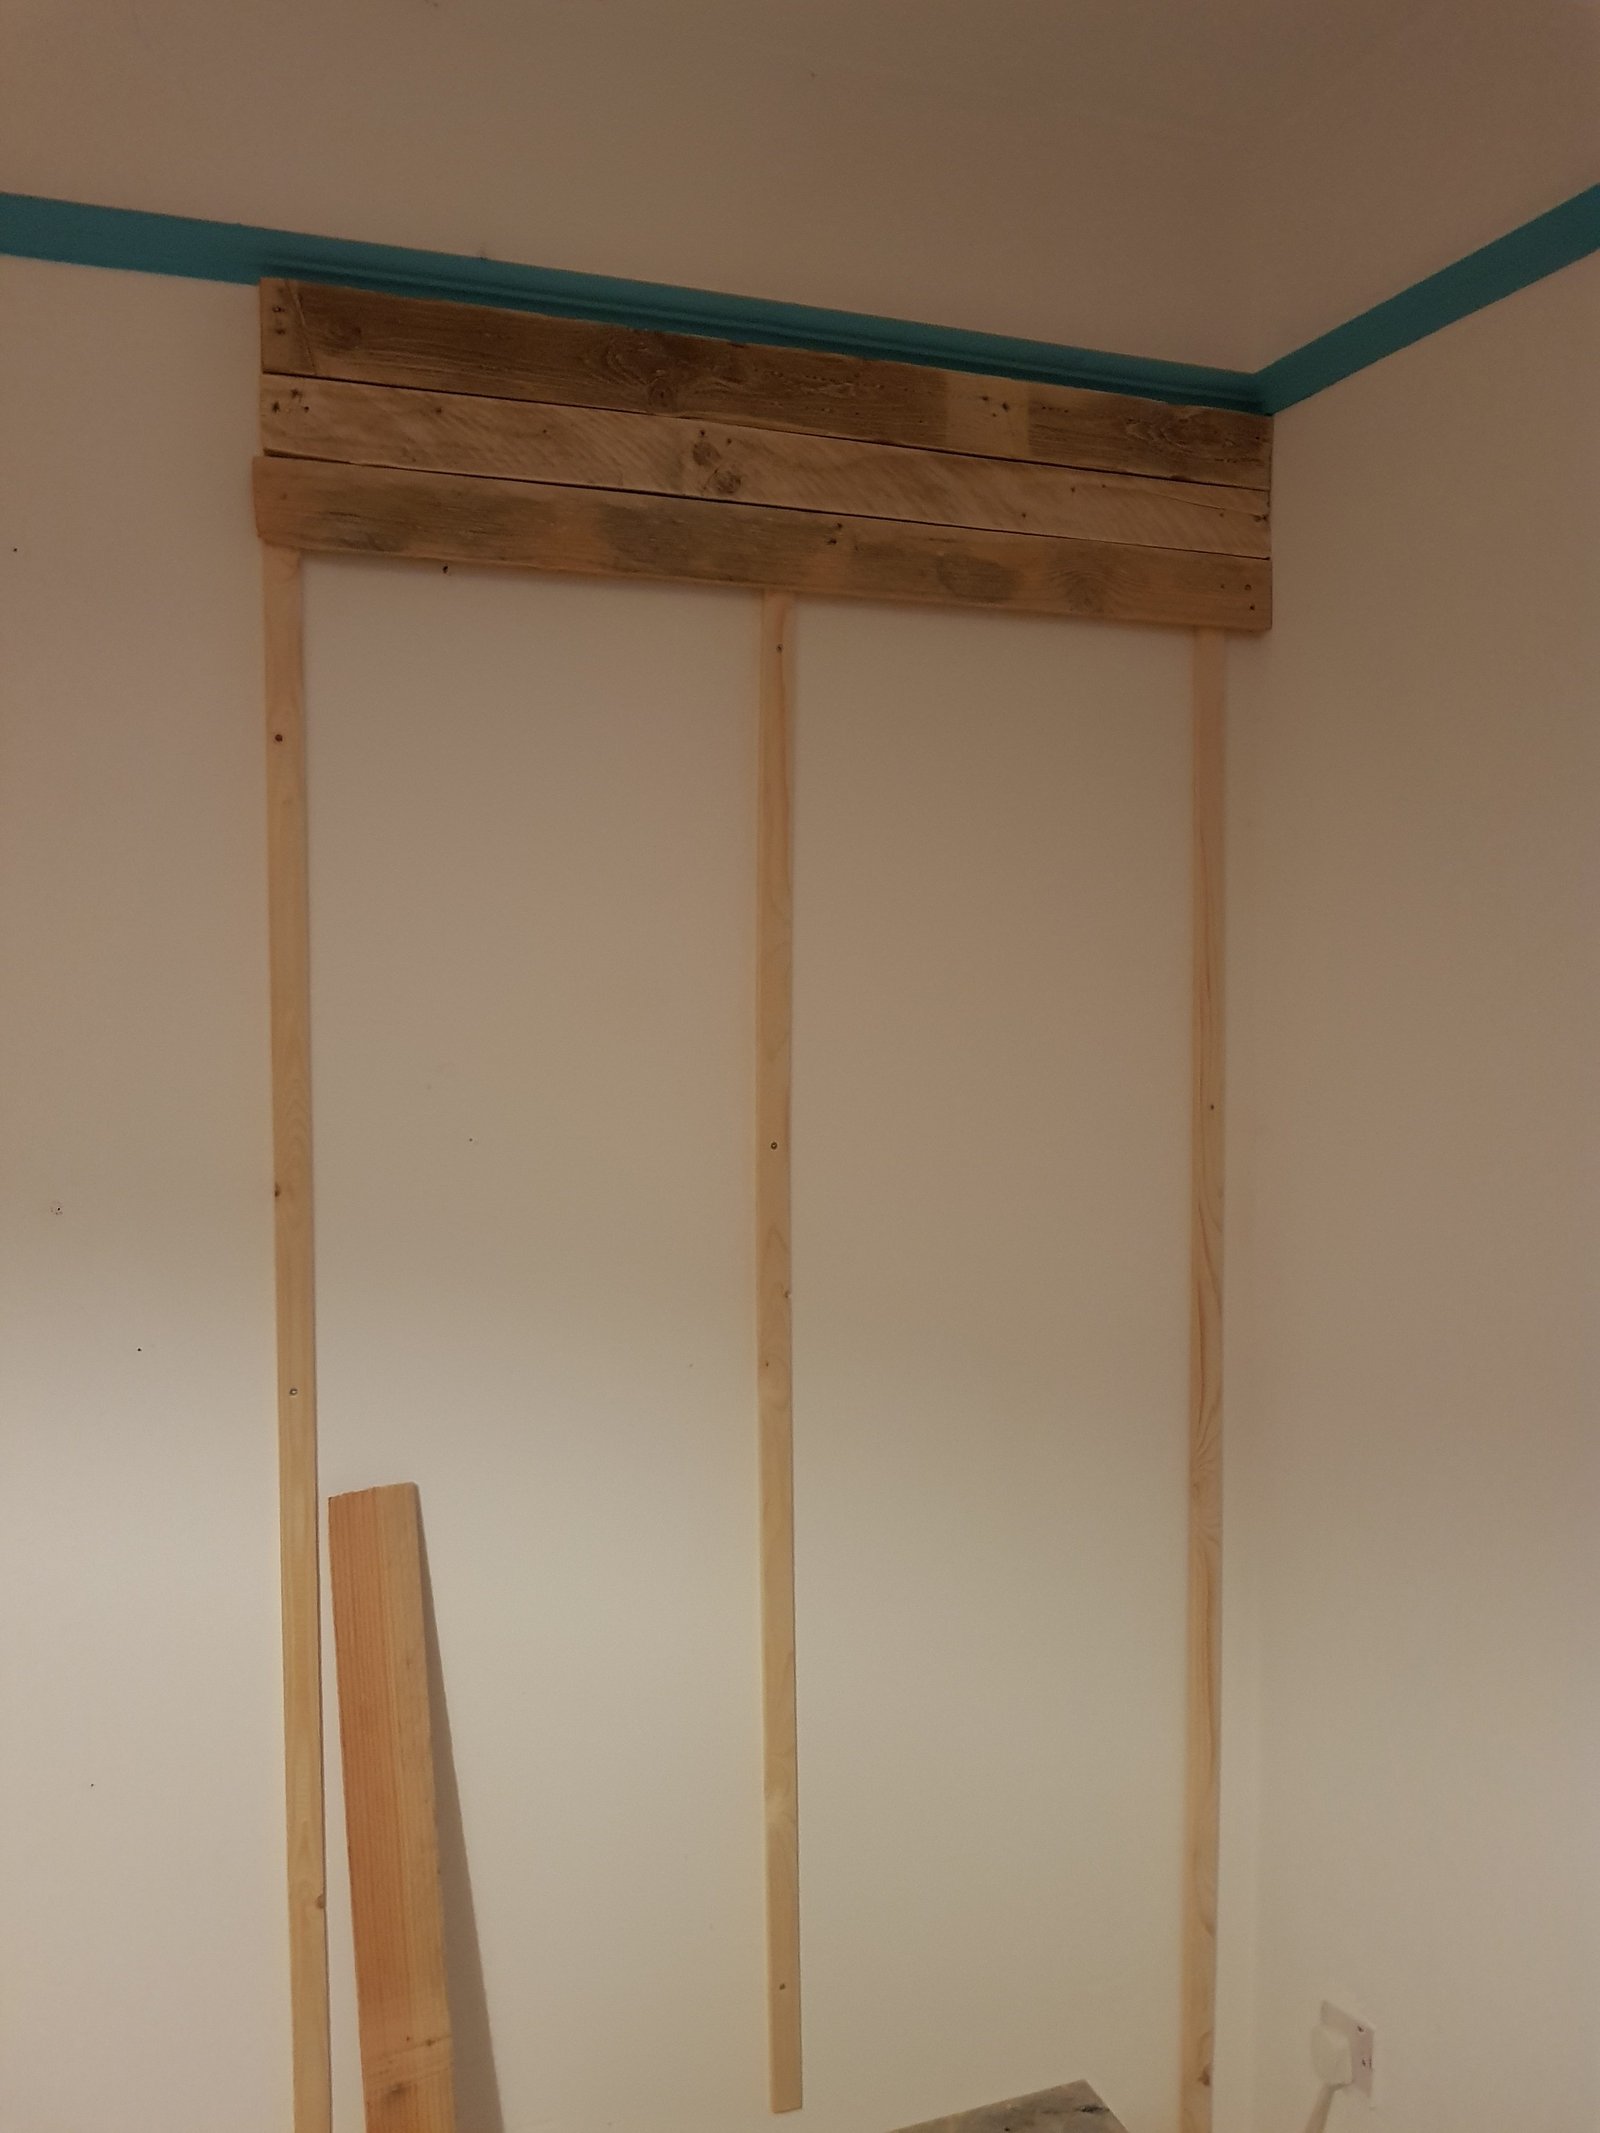
Building a frame
Then when all the boards are prepared you can start building a frame to which you will be attaching them. It is important at this stage to determine the look you’re going for. Do you want all the boards to be the same length? Do you want them in nice neat rows? Or are you going for more industrial style with all the boards in different lengths and sizes?
I’m gonna assume that if you’ve decided on using pallet boards for this project and you’re still reading my guide, you’re not that bothered about nice and neat 😉

Also when you start building the frame you have to make sure that the gaps between each wooden slat are no bigger than the size of your smallest boards (or how you want them to be). Otherwise you will have nothing to attach them to. (And that’s something I didn’t think about so I let you learn on my mistake, you welcome!)
Once you’ve decided on the position of the wooden slats you can start attaching them to the wall. But remember they are there to support the whole pallet board wall so they need to be attached properly. Use a drill for that!
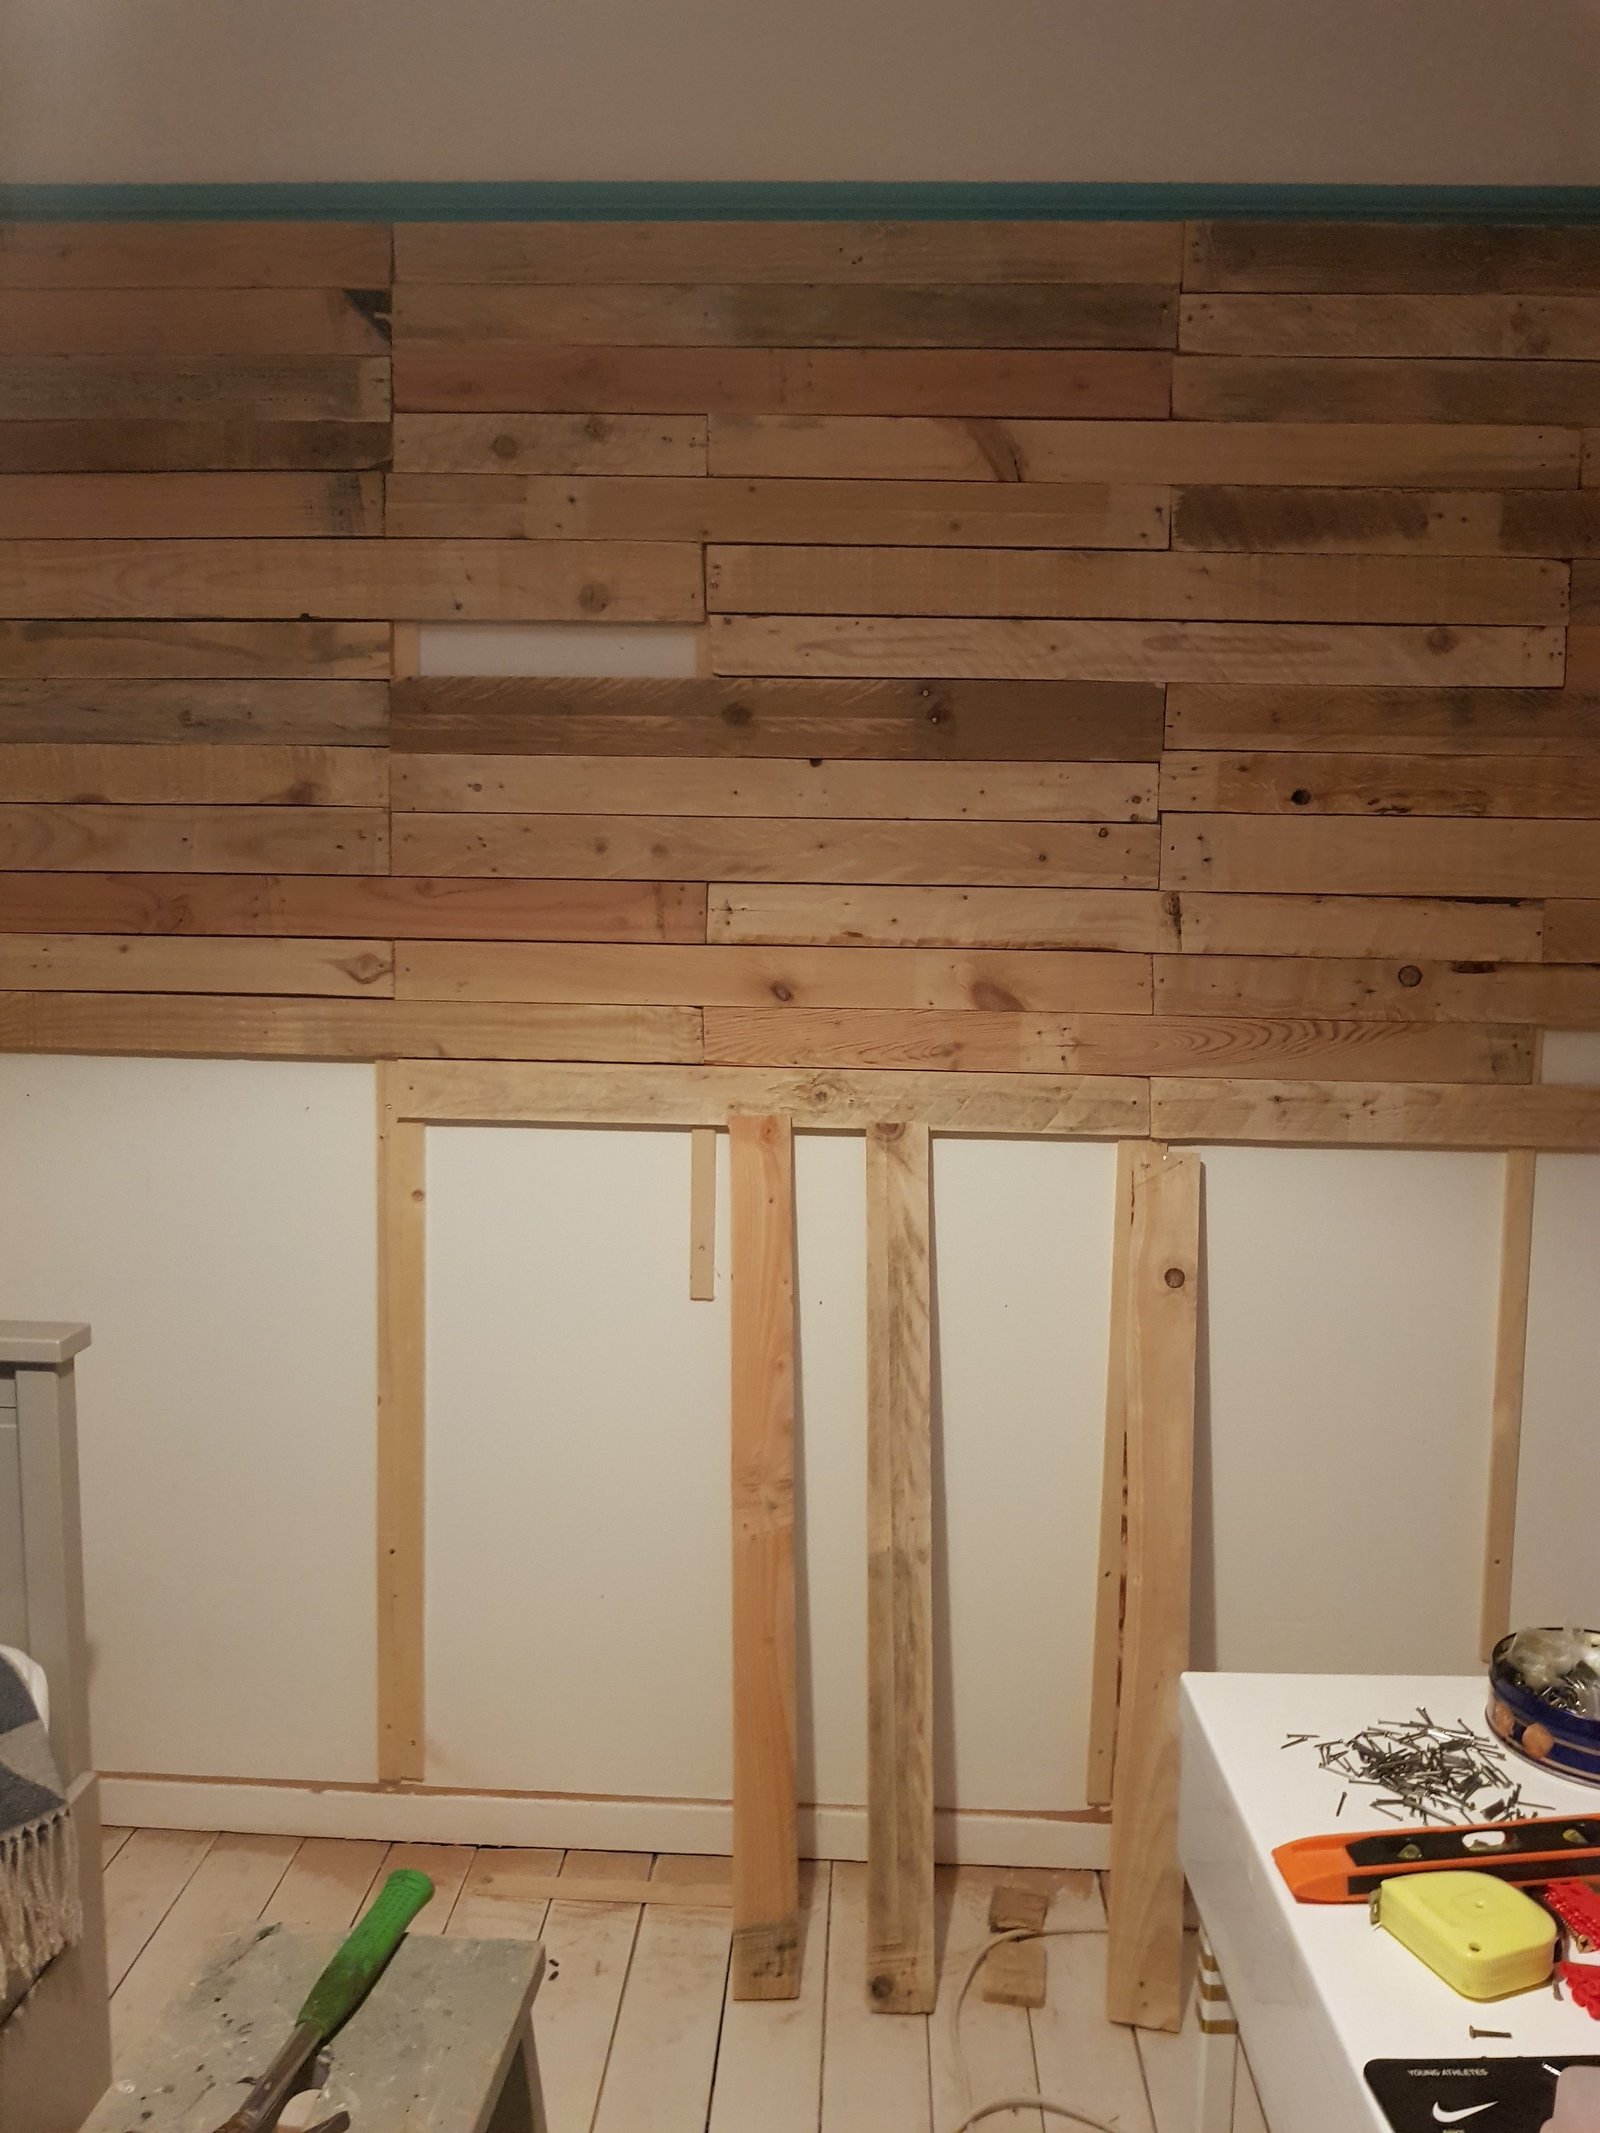
Attaching the pallet boards
When they’re all on the wall you can then start playing with your pallet boards. Start from the long ones (these are the ones in their original size). Also, start from the top working your way down. This way, even if you run out of boards towards the end, you can hide it with the furniture. Besides, it is very likely that the last row of the pallet boards will have to be narrower and cut lengthwise unless you decide to leave a gap.
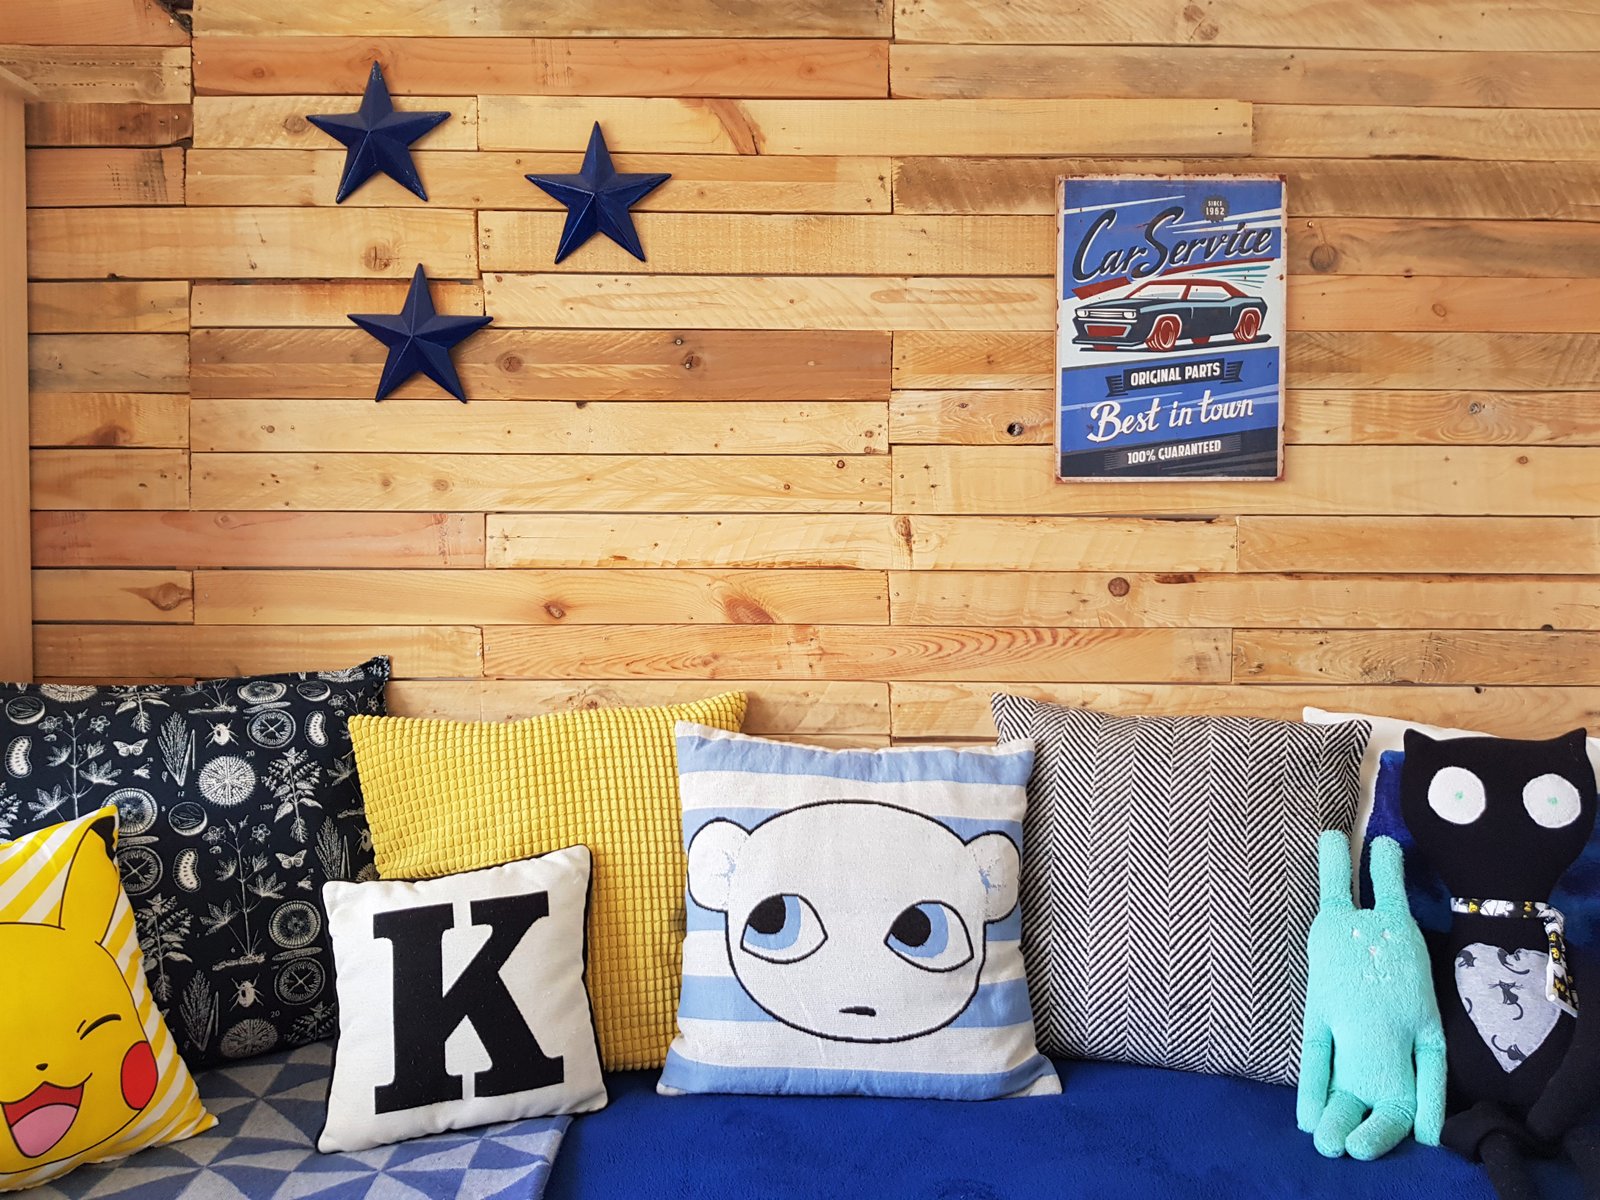
I decided on a very random order of my pallet boards on the wall, which, although it looks, is not the easiest way to do it. I started at the right top corner of the wall and slowly moved to the left and down at the same time. If you would like more organised look, start from the middle top of the wall and work your way down first. Most of the pallet boards were left in their original size (because I’m lazy) and only few were cut short. This gives an impression of the wall that’s been fixed over time. Obviously that doesn’t mean I only used the jigsaw couple of times. Although most of the boards are long, some of them needed to be cut only by 1 or 2 cm. So, as I’ve already mentioned – there was still a lot of cutting!
Matching the boards
As you’ll work your way through your pallet board wall you will find that some of the boards will fit better than the others. And some of them won’t fit at all. If that happens, just try another board, and another, until you find the perfect one. Or until you cut one to size!
To attach pallet boards to the slats on the wall you can either use normal nails (if you want the nail heads to be visible) or headless nails if you’re going for less industrial style.
Just a little warning… it will get noisy! As much as you can cut your boards outside (also noisy), the nailing has to be done on the spot. So go and apologise your neighbours in advance. I knew that our neighbour likes to have a nap during the day so for the few days it took me to build the pallet wall I tried to have a break in that time and finish in the evening. Thus the poor lighting on the photos.
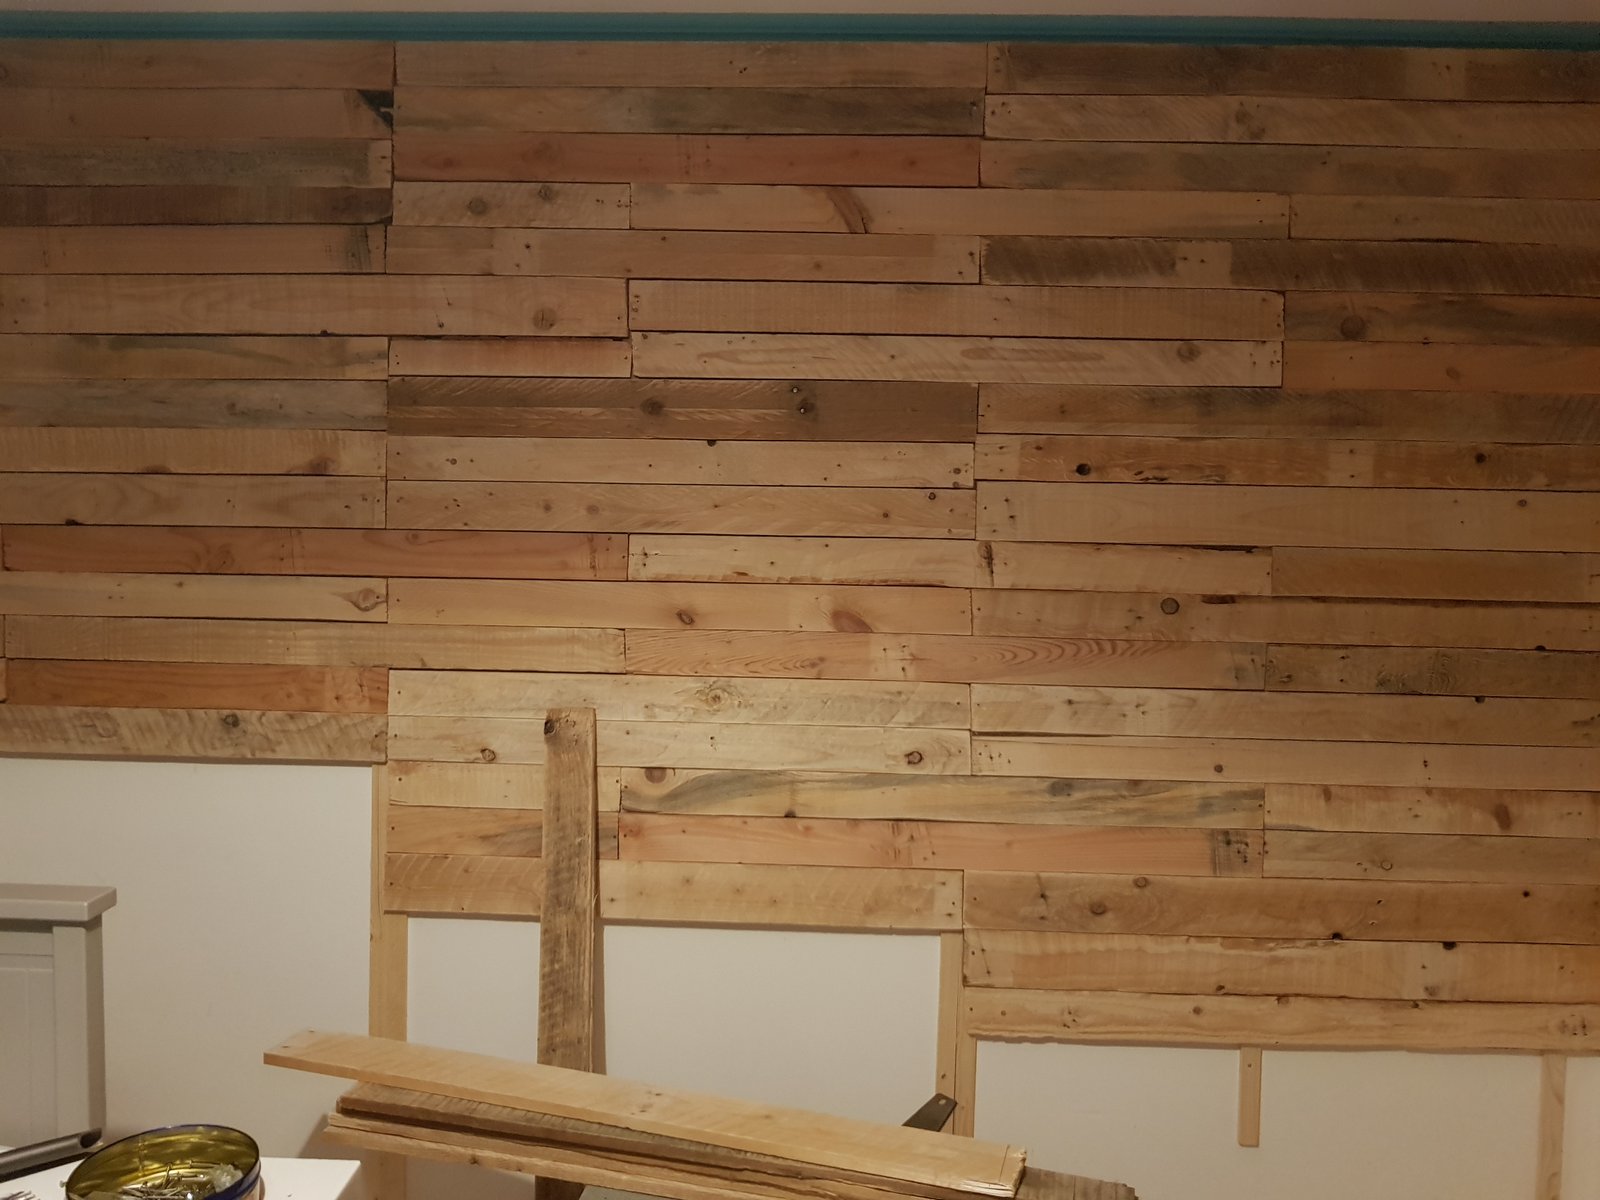
Once you start nailing the pallet boards you will find your rhythm. If there is nothing to attach the board to, and you really want it there (because you know that’s the perfect place for it) just add en extra slat, but a shorter one. Use at least two nails for every board, one on each side. Simple right?
Finishing the look of the wall
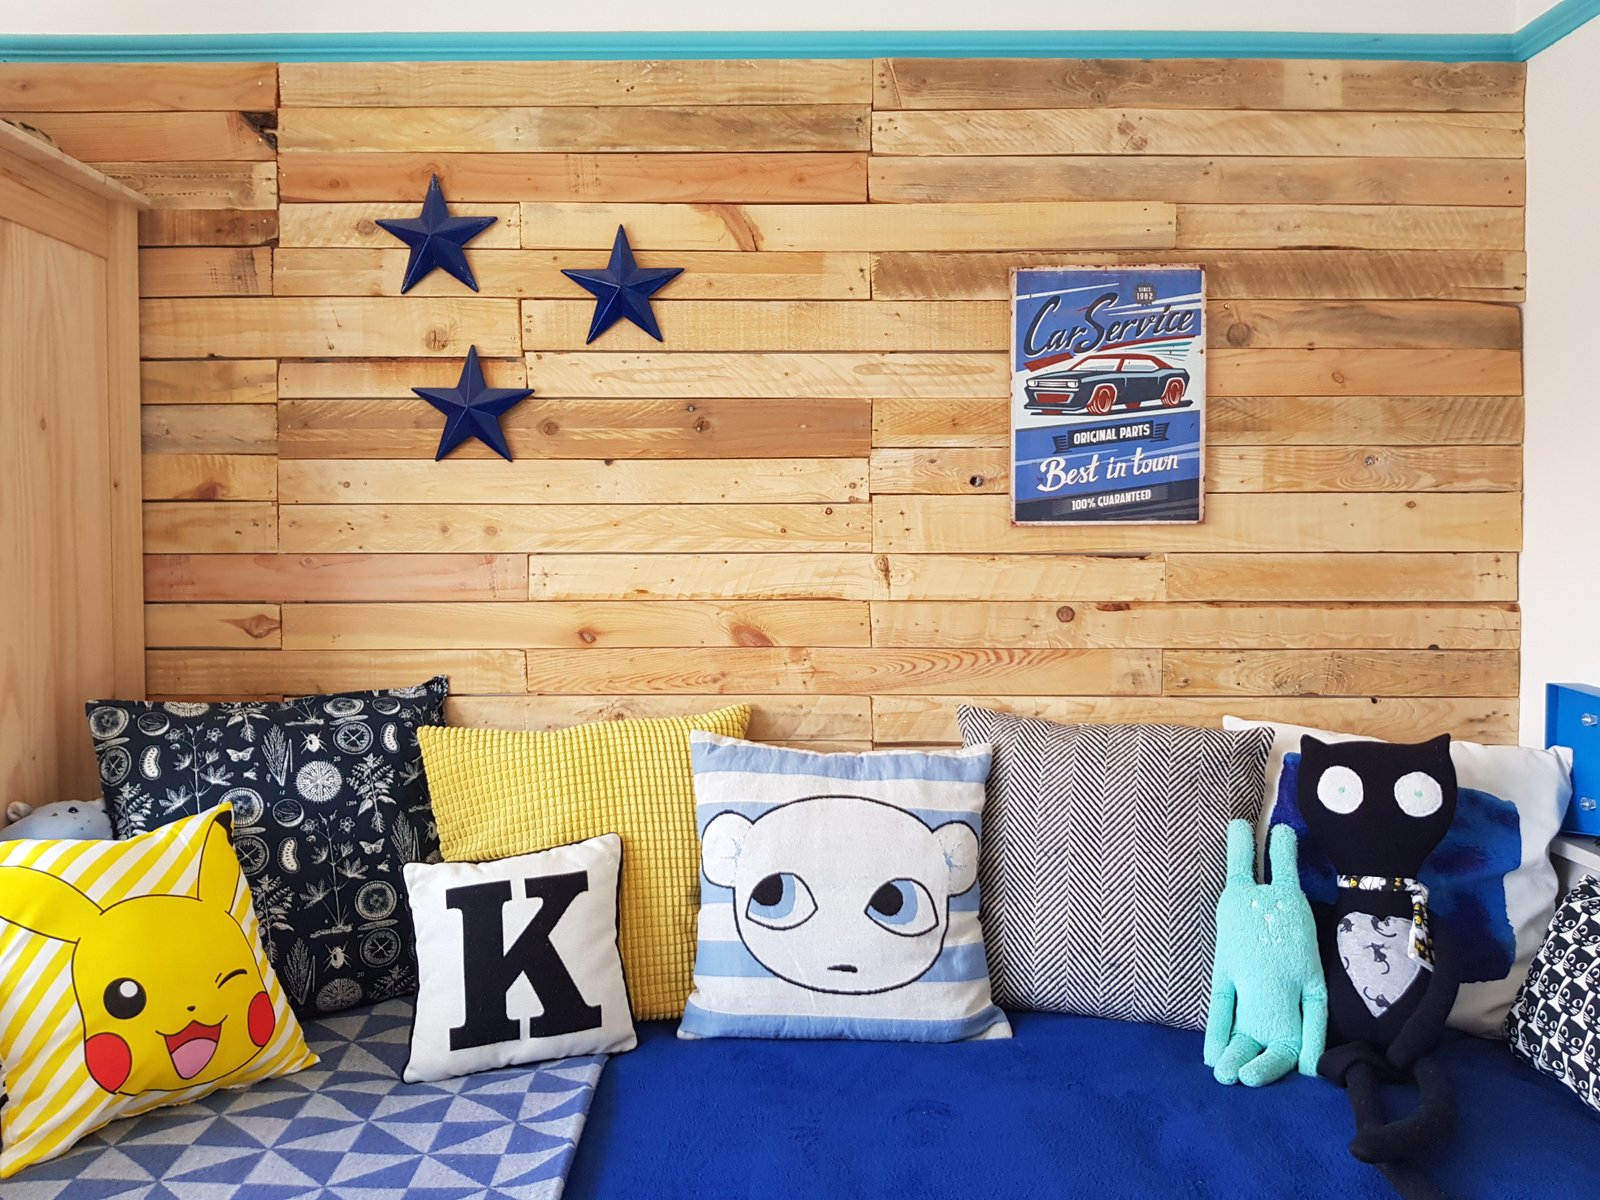
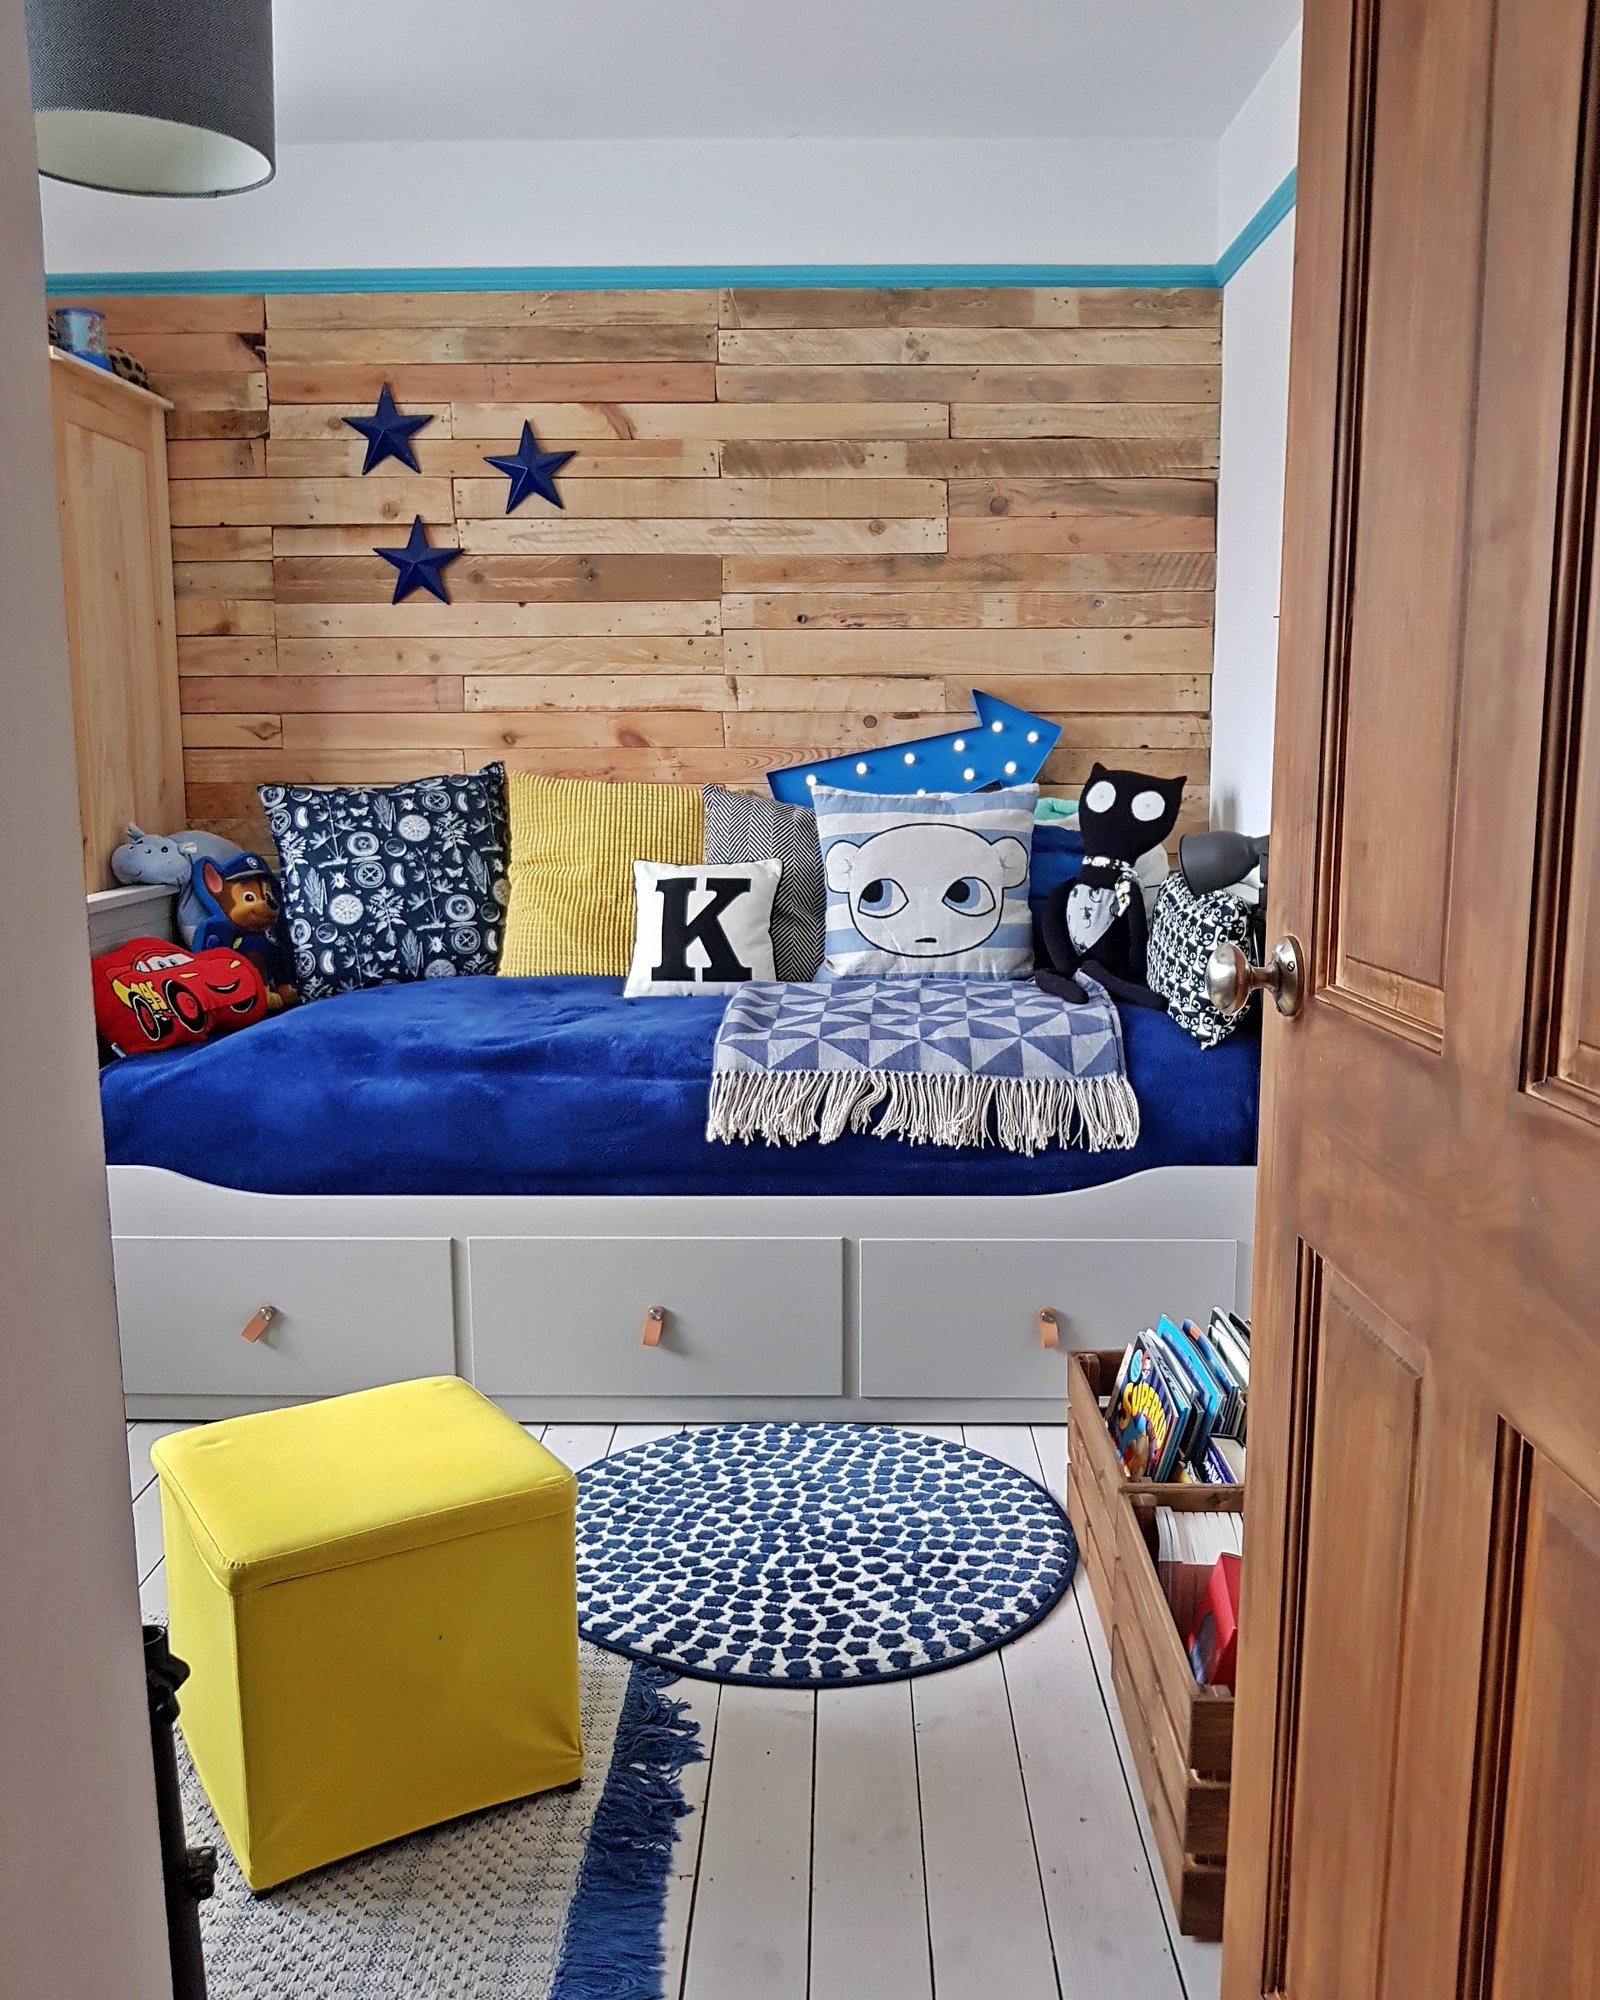
Initially I wanted to paint some of the boards to add interest and more colour to the room. After all – it is a kid’s bedroom! But I loved the natural look of the wood so much, I decided to leave as it is. Besides, I can always paint it later (which I’m sure I will do).
The true is – this was my first time when I attempted cutting wood and building something out of it myself. And although my pallet wall is not perfect (neither I wanted it to be) I think, it looks rather cool! And all this for less than £30!
And if I can do it, you can do it to!

Related News