Old wood has become so popular in the last few years that the prices of old pieces on internet are just bonkers. What is more, often it is cheaper to buy new rather than old wood. Not that long ago europallets, scaffolding boards or just pieces of old wood were given away for free. Now you have to pay for them so much that even your piggy bank would run away to the woods. Not to mention the prices of hardwood furniture. So you settle on something more piggy bank friendly, and decorate your house with MDF boxes. Nothing wrong with that. But if you’re still dreaming of that old wood dinning table you’ve seen in a magazine, you need to stop dreaming and roll up your sleeves! Because if you can’t afford it you have to make it! Well, fake it to, but who cares?
Hardwood or softwood?
There are two types of wood: hardwood and softwood. Hardwood is usually darker in colour. I’s heavy and much more durable (thus the name hard-wood). Furniture made of hardwood last many years but are also more expensive.
Softwood, as the name suggests, is much softer, thus less durable. It’s more affordable than hardwood but it lacks that rich wood colour and texture that hardwood can offer. But that could be easily changed with vanish, stain or wax. Although all those products are good for staining, none of them will make your wood look old. And for this reason I’ve decided to mix things up a little to create my dream old wood looking table…

Like it? Then keep on reading…
How to make wood look old?
Preparation
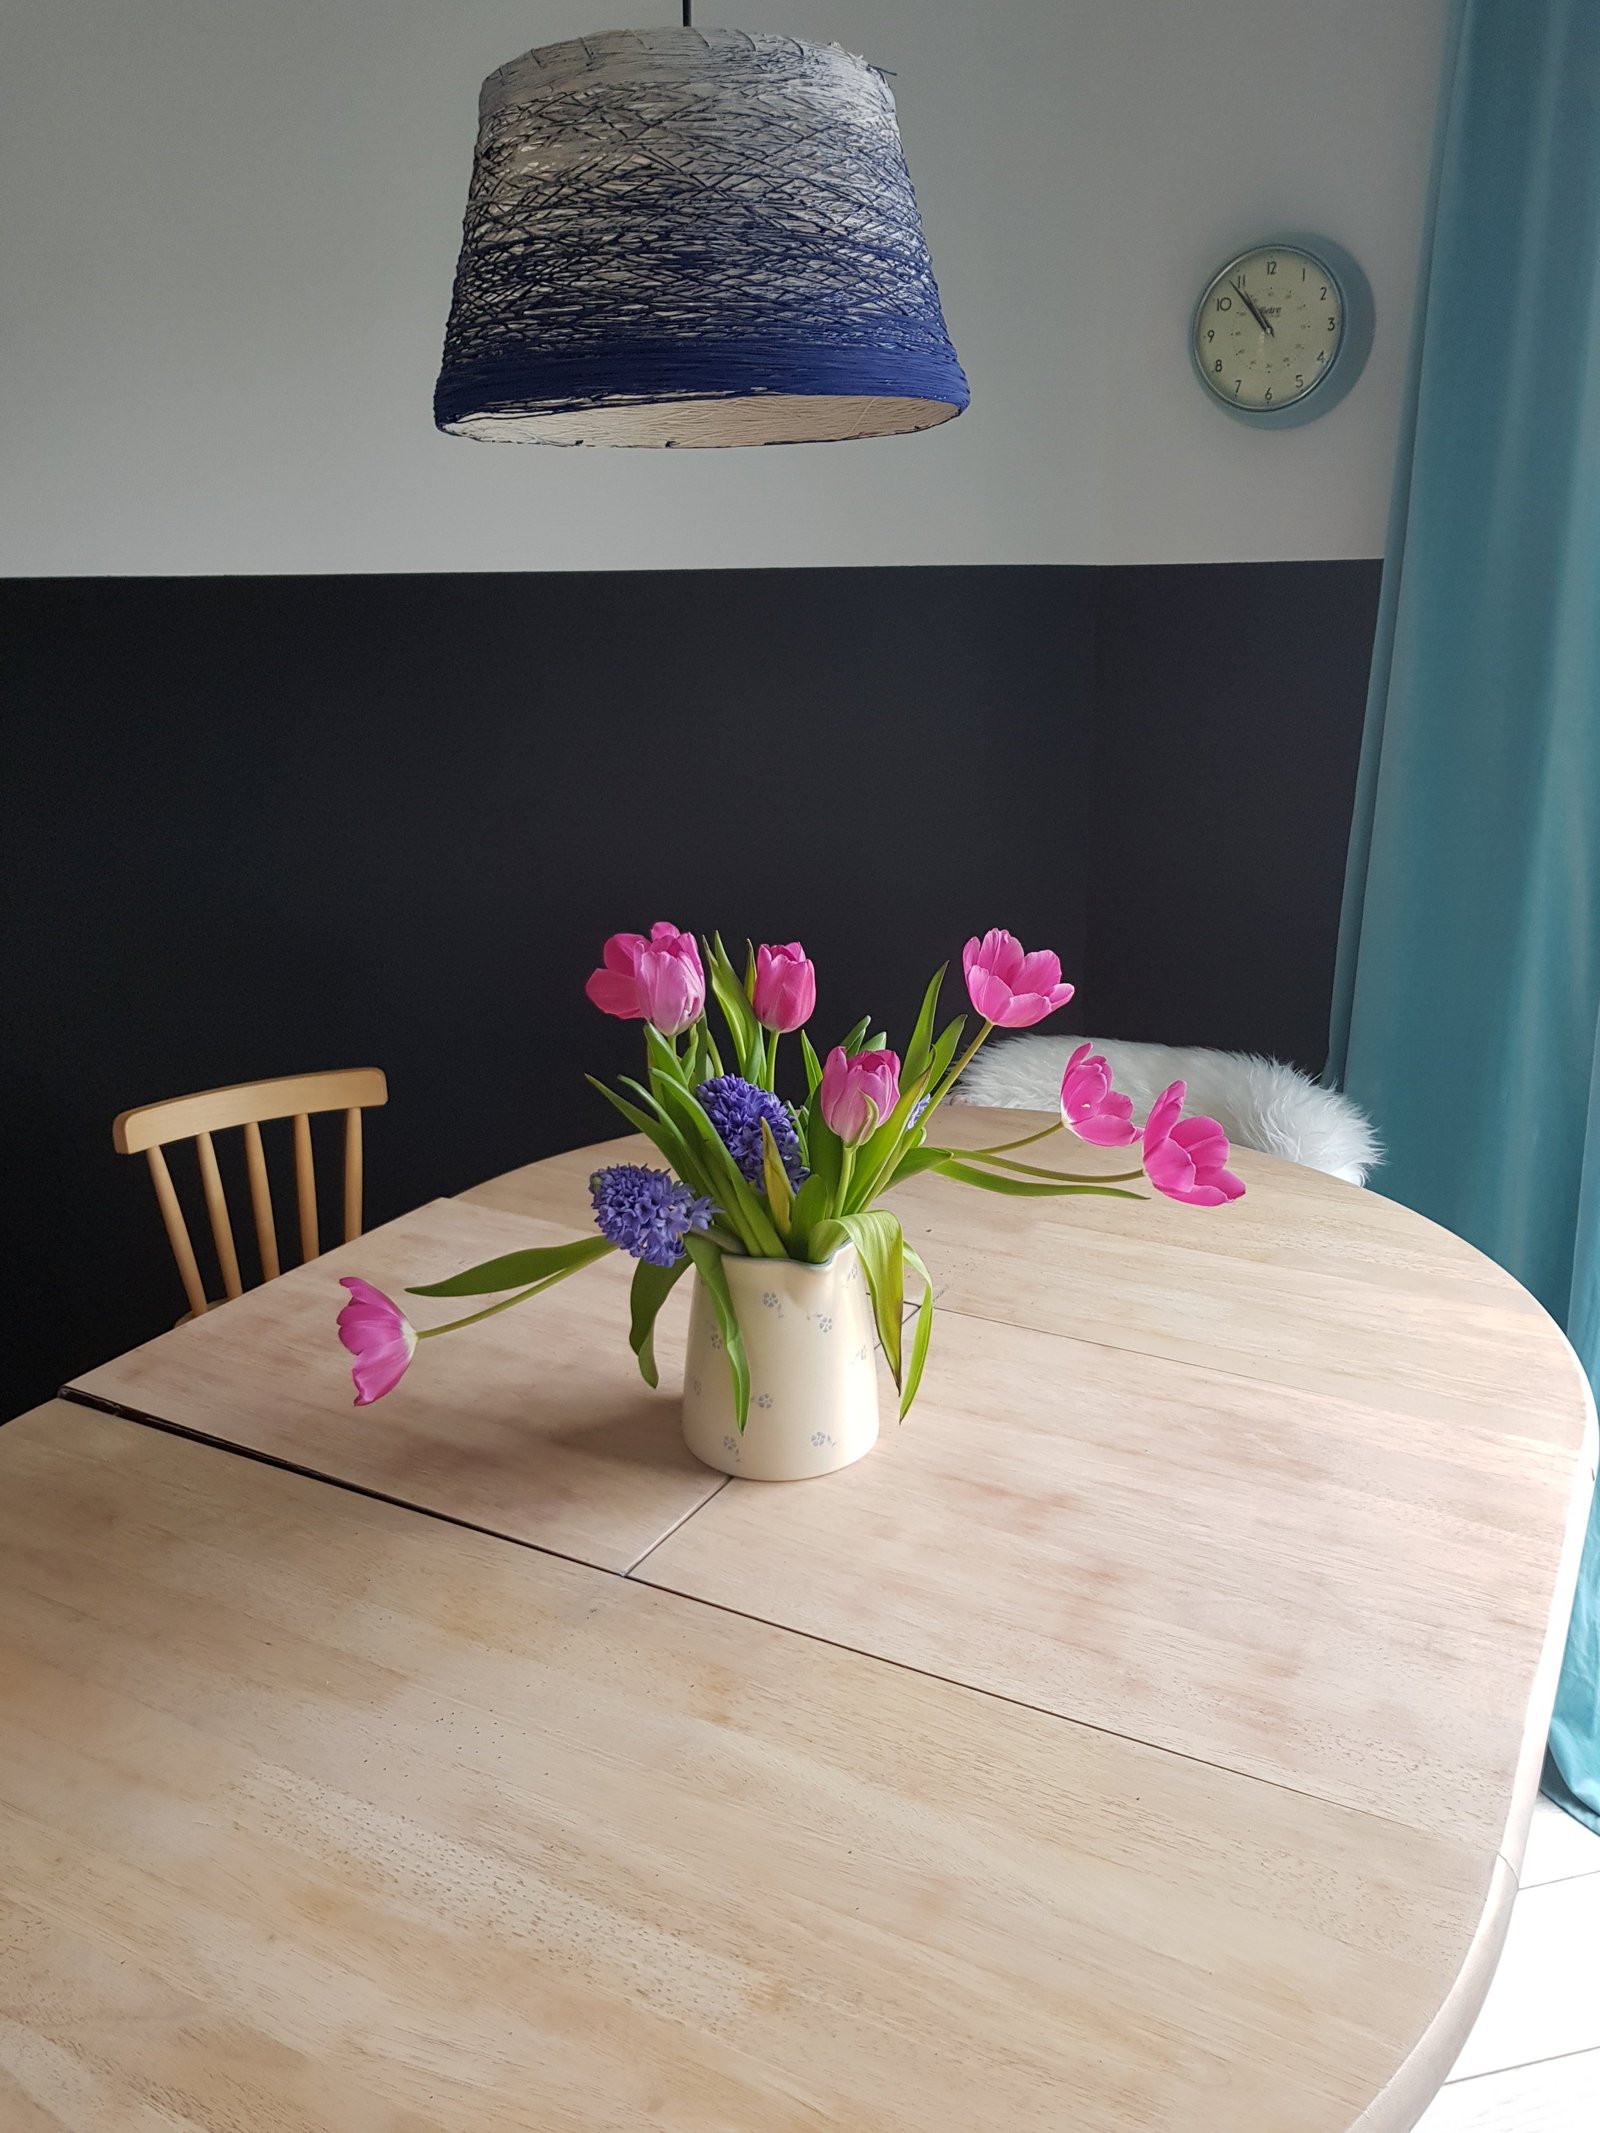
First things first. Preparation is a key! Something I often forget about. This project was no different so I’ll let you learn on my mistakes. My dinning table is extendible. As great as this may seem (and is) we rarely use that function and I often even forget about it. And that’s exactly what happened when I was waxing the table couple of years ago. I forgot to wax that middle part of the table. That resulted in explaining to my guests on those few occasions why my table was waxed in places and still unfinished in others.
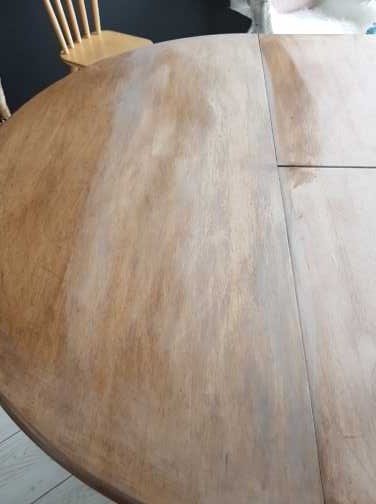
Fast forward couple of years and this time I actually remembered to extend the table before working on it. I decided to give my table a little sand down to even out the differences. But I did not realise how hard it is to get rid of wax! So the lazy side of me decided not to sand right down to the bare wood. A decision I then regretted for the next two days (that’s how long it took me to fix what I did wrong).
When working with bare wood, the wax will sink into the wood quickly. When applying wax on already waxed or polished surfaces, they will prevent the wax from sinking in making it just sit on top of it instead!
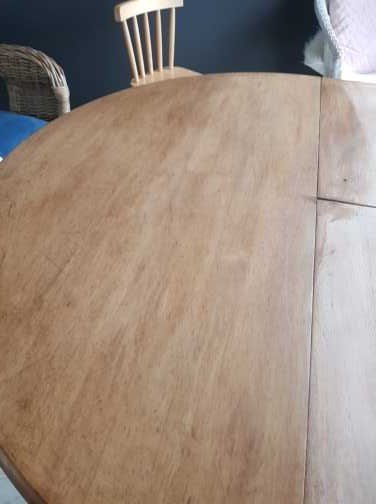
Here’s our table before
What you will need
Of course you will need something to work on, either it’s your table (like I did), chest of drawers or just some new softwood boards (which you can then use as your shelves). You will also need a dark wax, a clear wax, old white chalk paint (that’s for creating slightly white washed effect), a wax brush, a paint brush and some lint free cloths. This may seem like a lot of products to buy just for one little project, but if you’re an DIY addict you probably already have everything you need in your tinker box. If not, just buy smaller pots of wax and paint and they will be more than enough.
Creating an old wood effect
Like I said preparation is a key. But if your wood has some wax on it and you can’t seem to remove it, don’t worry, it is still doable. It’s gonna take longer, but it is doable. So the best way to start it by applying some dark wax with the wax brush. If you don’t have a wax brush, you can use a lint free cloth instead. But remember that while a brush distributes the wax on the wood evenly, cloth is just really smudging it all over and most of the wax will stay on the cloth anyway (trust me, I started without the brush)
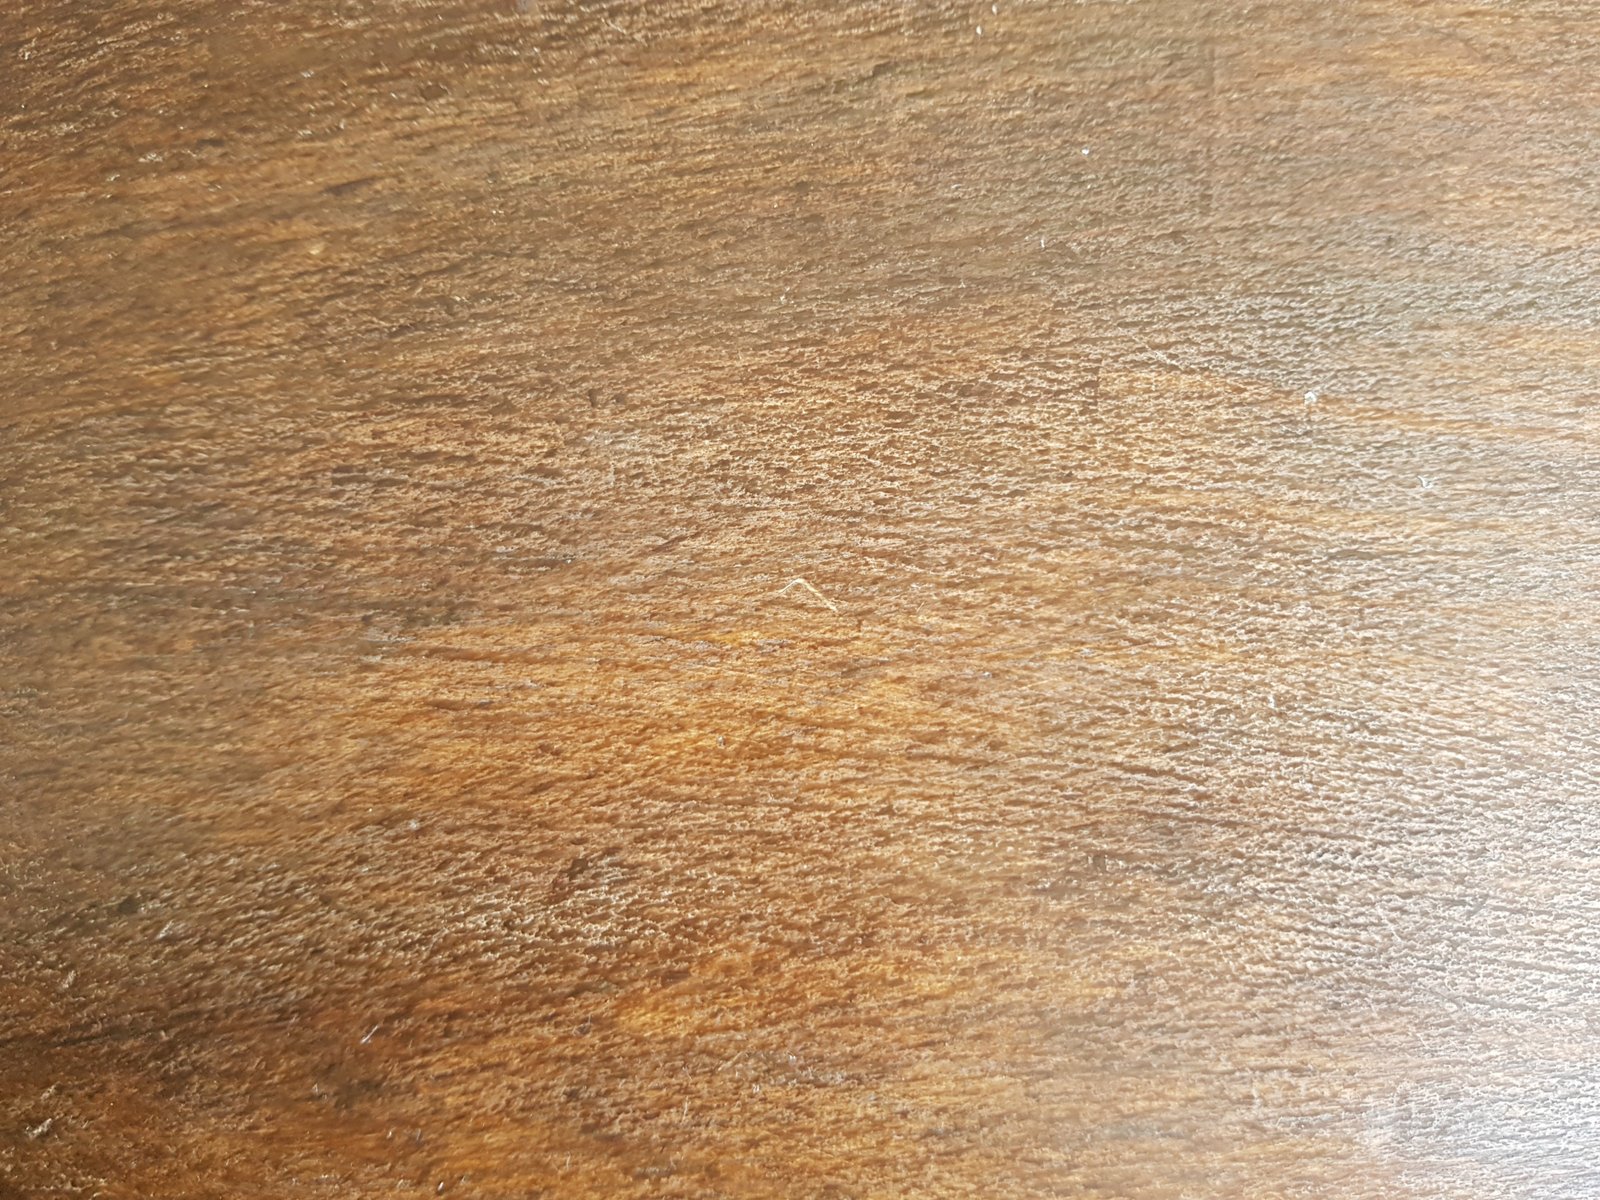
So, anyway, start applying the wax with the grain of the wood until it’s all covered. Dilute your white paint with water so it’s quite runny. Now, depending on if you’re working on a bare wood or not, there are two ways. With bare wood you can apply the diluted paint straight after and when the wax is still tacky. It will sit on top of the wax in most of the places. Wait until is almost dry, but before it dries completely. Wipe off the excess paint and that could be it. Or you can repeat the precess if you want richer tones. You can apply few more coats of wax and diluted paint, but remember to protect the wood with clear wax when your old wood look.
Remember that applying too much products will result in them just sitting on top of the wood. This will make the item you’re working on less durable and even when waxed it will need good few weeks to harden.


Can’t get rid off an old wax?
If you’re working on already waxed surface, then you need to wait for that first coat of dark wax to dry before applying your diluted paint. If you apply the paint too quickly it may get mixed with the wax, making it difficult to wipe off the excess paint in case you needed to. Also it can result in creating a different colour than you were aiming for and looking a bit patchy (that’s exactly what I did, thus it took me two days, instead of two hours). But when it’s dry you can start with the white wash. And then if you’re still not happy you can repeat the process, remembering to leave it to dry in between the coats.
When you’re happy with the old wood effect don’t forget to apply clear wax for protection. And remember – it will need time to harden so be gentle with it in the meantime. My kids aren’t so the table already has scratches and marks. But I kind of like it, it makes the table look genuinely old… we all love it!

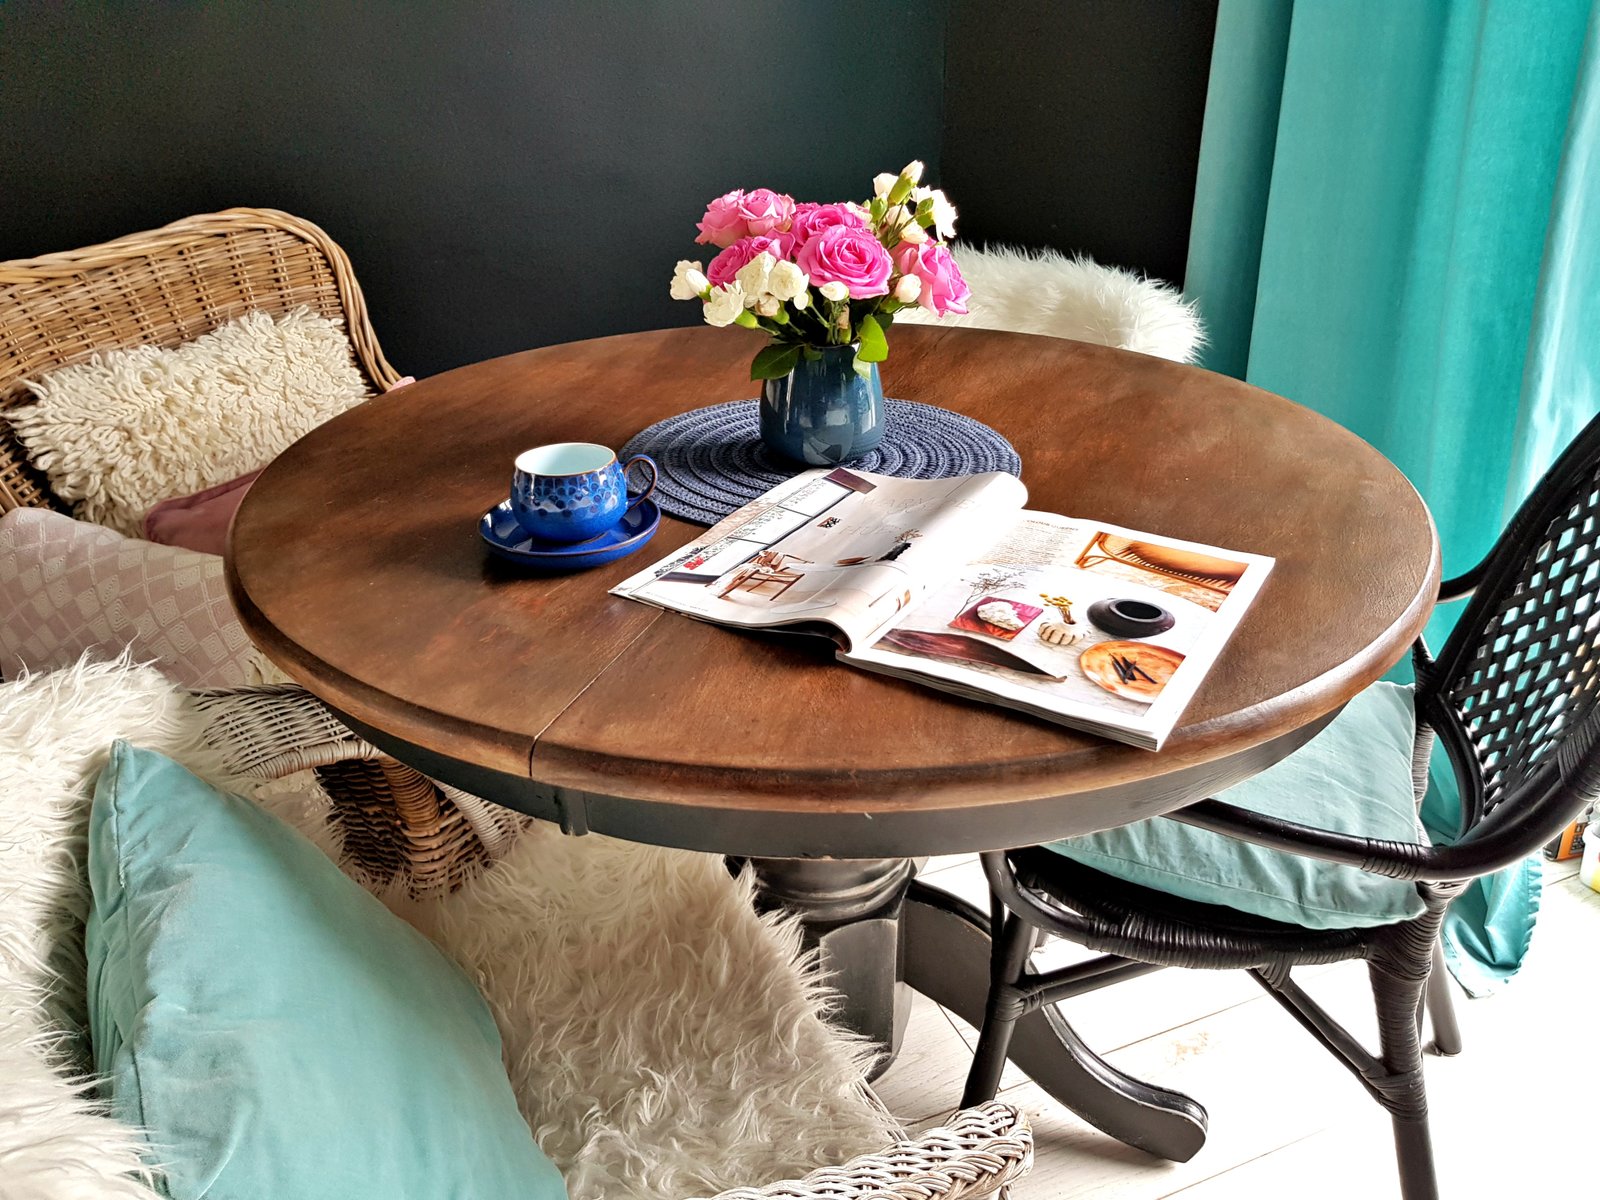
If you want to know how I’ve painted the rest of the table using chalk paint, go to my post here.
And if you want to check your nearest stockist of Annie Sloan paint go here. But if you live in or around Nottingham I can already tell you that your nearest stockist is Heidi’s in Beeston.

It certainly does the trick! My kitchen table will need a bit of a revamp in a few years (the wax is wearing off) so this is going to be helpful.
I like being helpful ? And glad you liked it ?
Great post Anne Marie!! It looks beautiful! I had no idea you could replicate an aged patina like that… Definitely bookmarking this for future reference. x
Thank you, it’s very nice of you. I’m glad you liked it and I hope it will help you with your project ?
A great tutorial and brilliant idea for fellow DIY-ers. Especially as “brown” furniture is often reasonable cheap at auctions and flea markets
Thank You Mary. I love making cheap stuff looking more expensive ?
Great job! It adds so much character to the table, love it and love the styling too.
Thank You Caroline. I’m really pleased with the effect ?
Wow. That’s really clever! The table does look so much nicer in a rich warm wood colour.
Thank you Fiona. I think it does look million times better ?
Like everyone else, my first reaction is WOW! It looks amazing now and I can’t believe that’s the same table! Beautiful job! xx
Thank you so much, I wasn’t actually sure about posting this so it is so nice to hear that people like it ?
Thank you so much Meera. It definitely fits with the style of my house better ?
Wow, I almost can’t believe it’s the same table. It looks great.
Thank you Stacey, I must admit, it does look completely different ?
I like the “after” so much better! Good job on this.
Thank you so much, I like it better too ?
Such a clever idea! lovely tutorial. Love how you styled it too xx
Thank you Anna ? that’s very kind ?
Basically you made your table look like my grandma’s dining table which is a totally different type of wood! Wow! So not only can you give it the ‘old’ look but also make it appear like a totally different wood variety. That’s so good. and I much prefer it like it is now, the last photo is sooooo good! (PIN!)
Thank you so much Jenny, you’re very kind ? I must say I much prefer it like it is now too ? And it does look like a completely different table doesn’t it?
Oh wow this toturial is trully amaizng thank you for sharing xx
Thanks Pati, it turned out different than I expected but better I think ?