Couple of weeks ago I was talking about how quickly Autumn is approaching (and the importance of pretty tea mugs). Here we are, almost ready to set our clocks back one hour to prepare ourselves for the winter months ahead. I’m such a sleepy head, I wouldn’t mind swapping my place with a bear and fall into a long, deep sleep… But no time for that! There are walls to demolish, kids to feed and door wreath to make! As the first two can wait, my attention last week was all on our front door. The abundance of fallen leaves and hanging flower baskets filled with dead flowers gave me an idea…
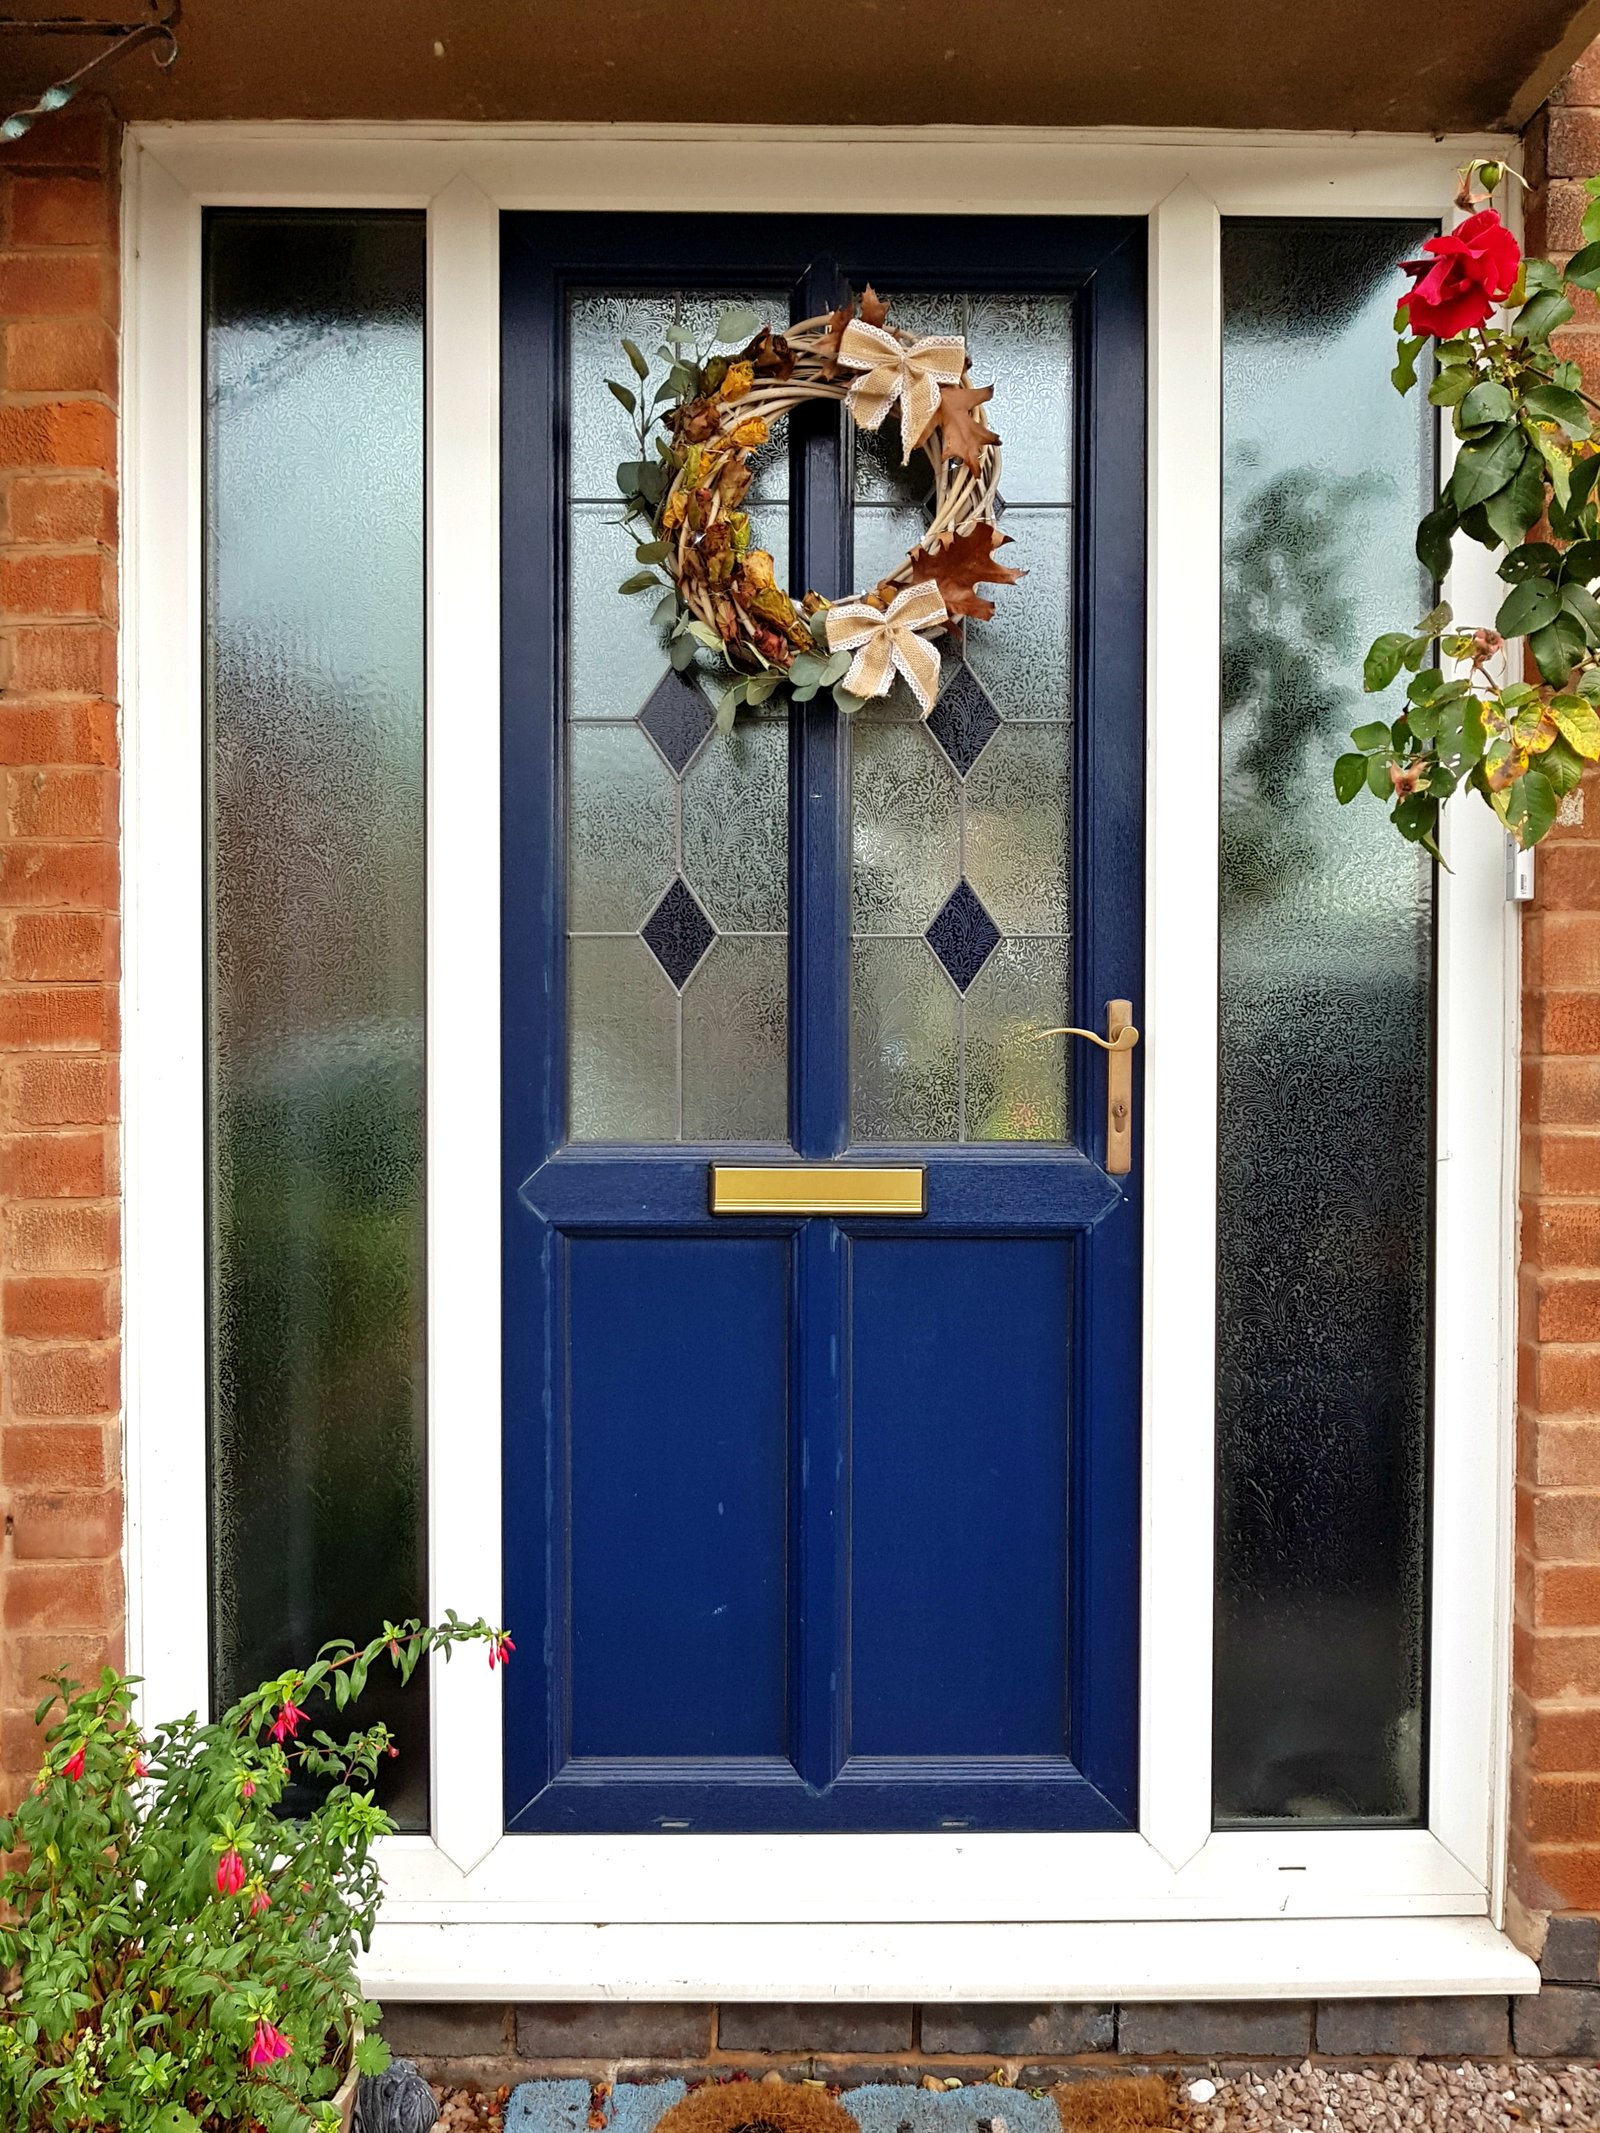
My DIY door wreath with leaf roses
The idea was to turn those full of colour leaves into autumnal roses and display them on my DIY door wreath along with some other decorations. And if you think that sounds like something very complicated, you couldn’t be more wrong! If you’re visiting my blog for the first time, then you should know I’m all about easy and budget friendly here! And if that’s what you’ve come for, that’s what you get! (no small print, ha!) So let’s get to the business. And this is how…
What you will need

a simple wreath (you can pick a rattan one up from Hobbycraft for just £2)
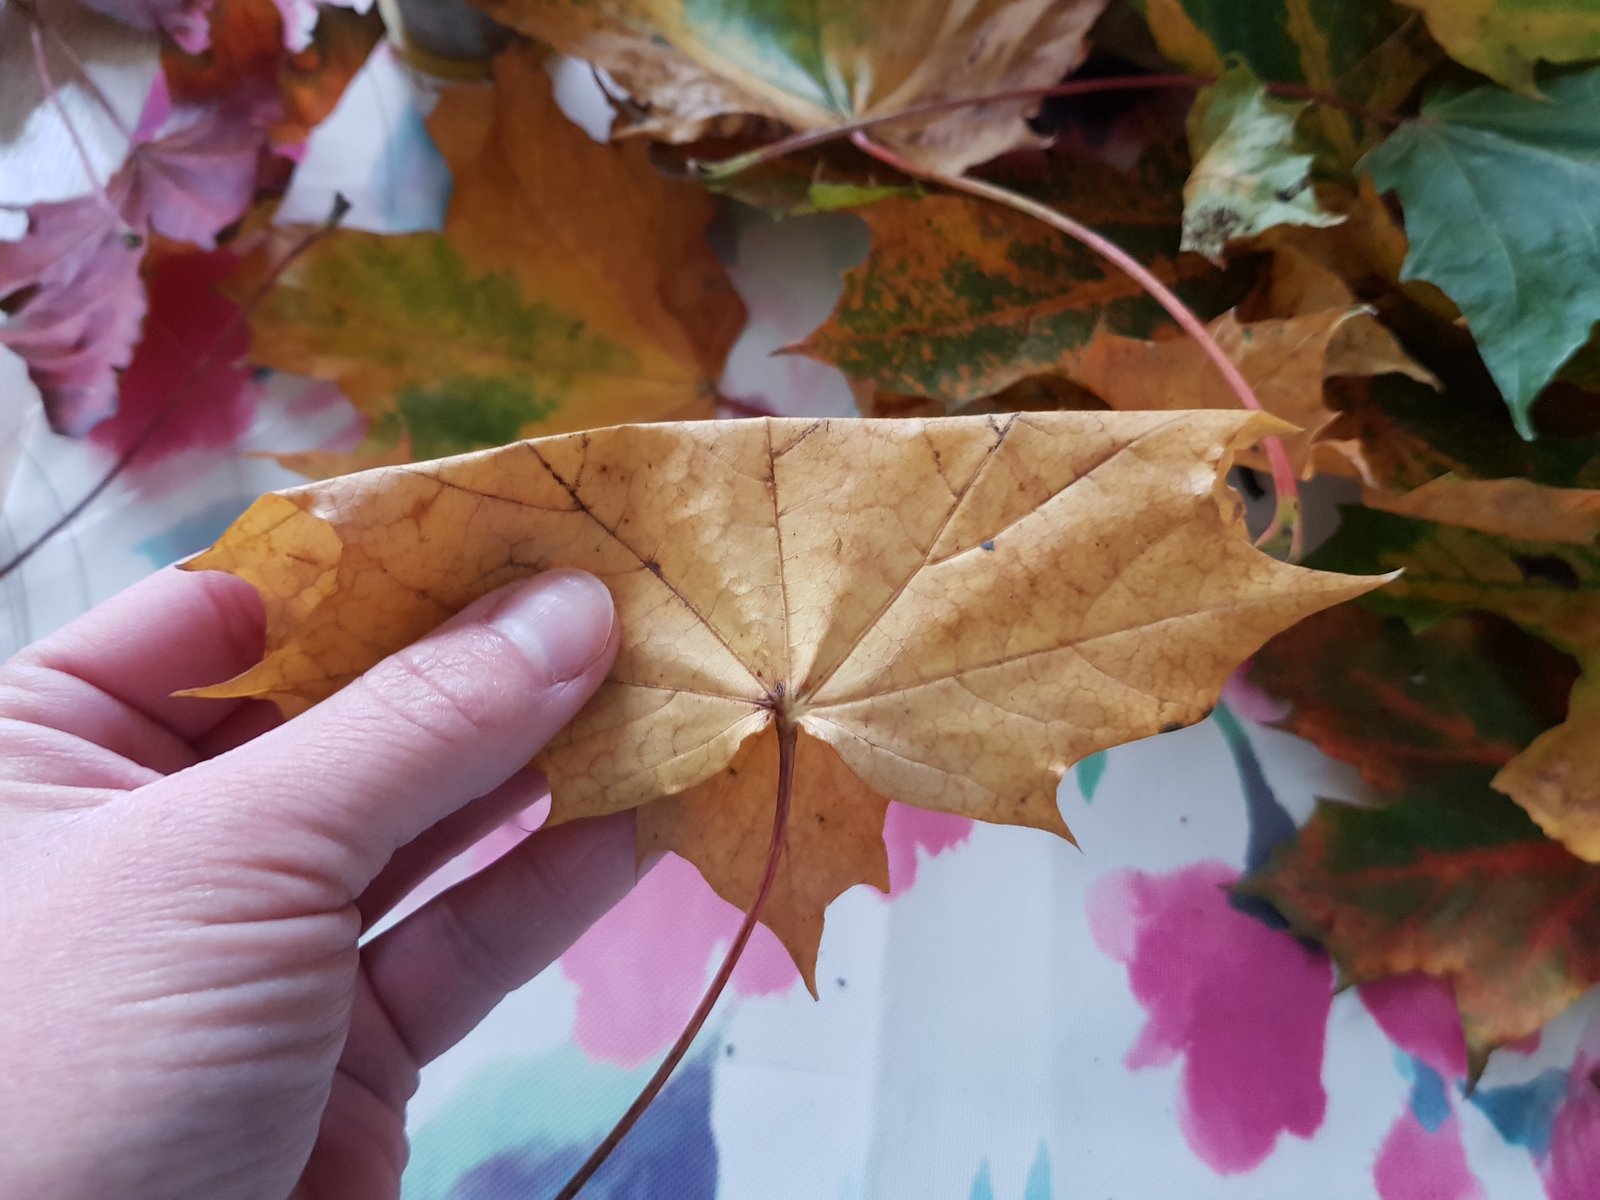
lots of leaves in different colours (you can pick them up from the park for free)
battery operated small fairy lights on a wire (optional, as it was never my intention at first)
some real or faux greenery ( I used one green faux eucalyptus from Ikea)
thin wire
some other decoration that you already have in the house
hot glue gun (optional)
And here’s how to make your very own DIY door wreath
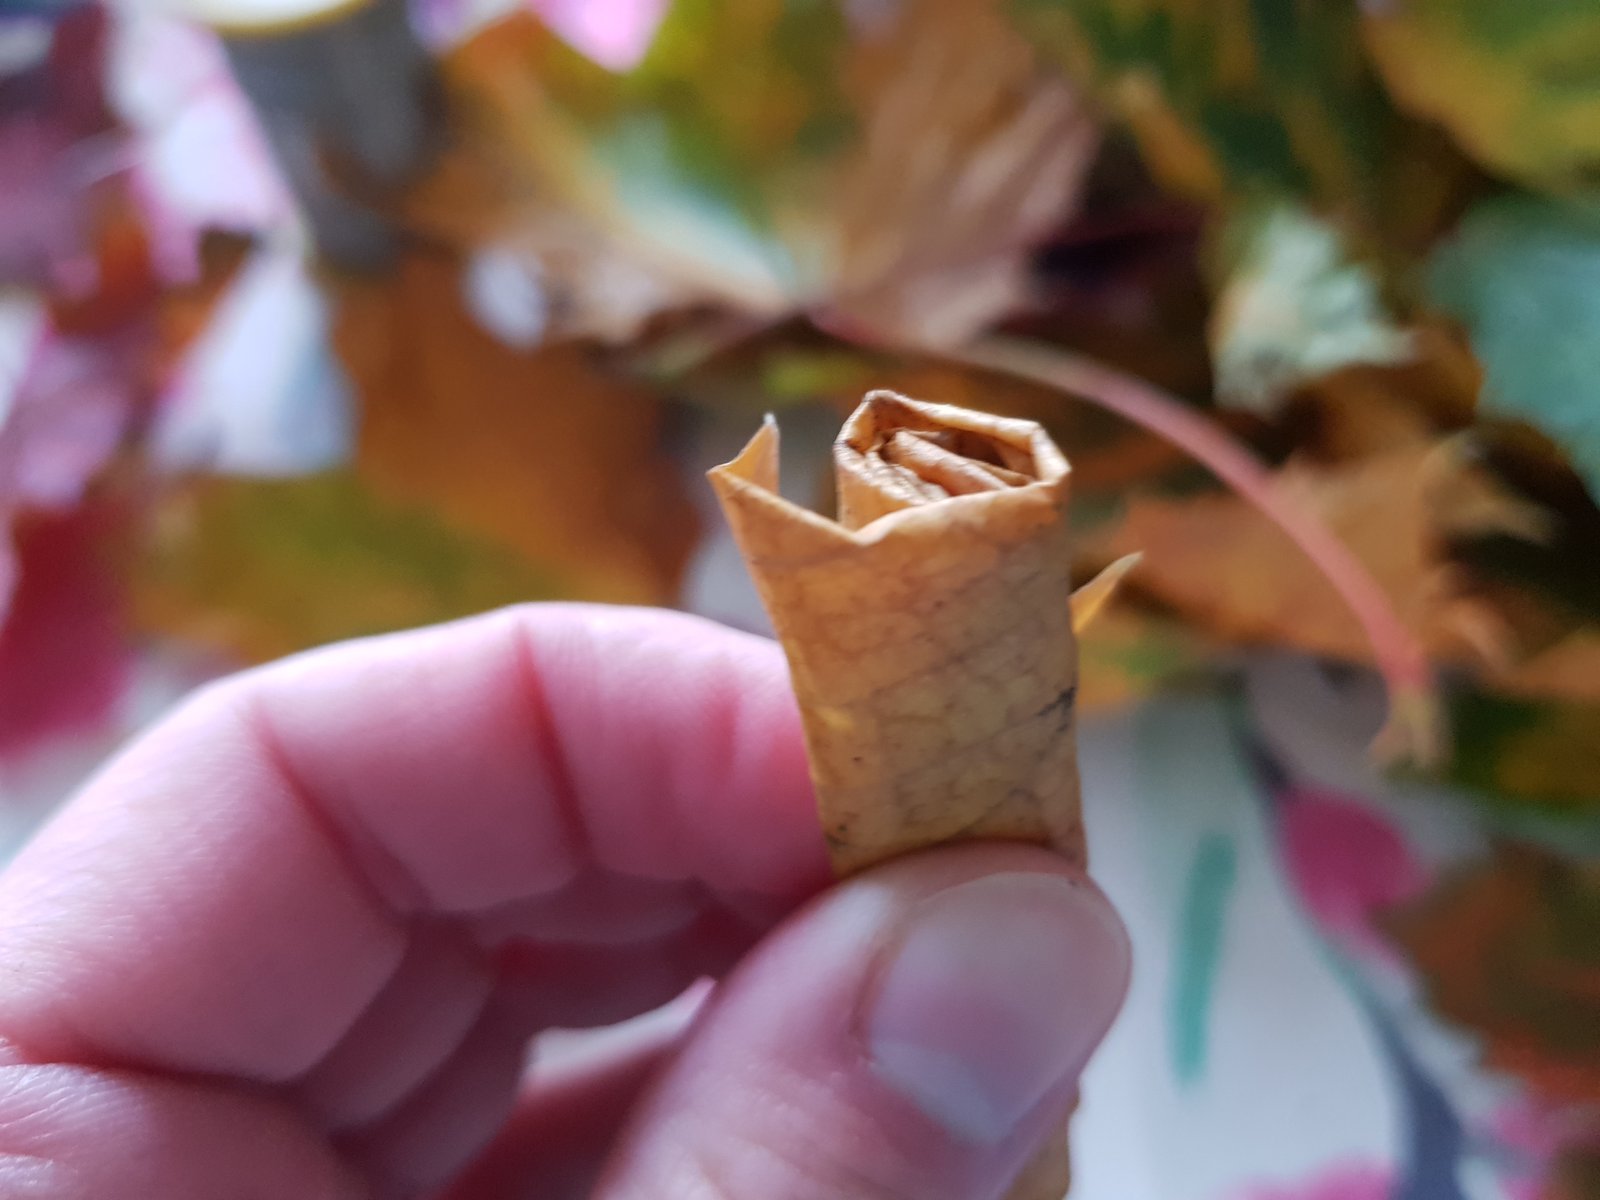
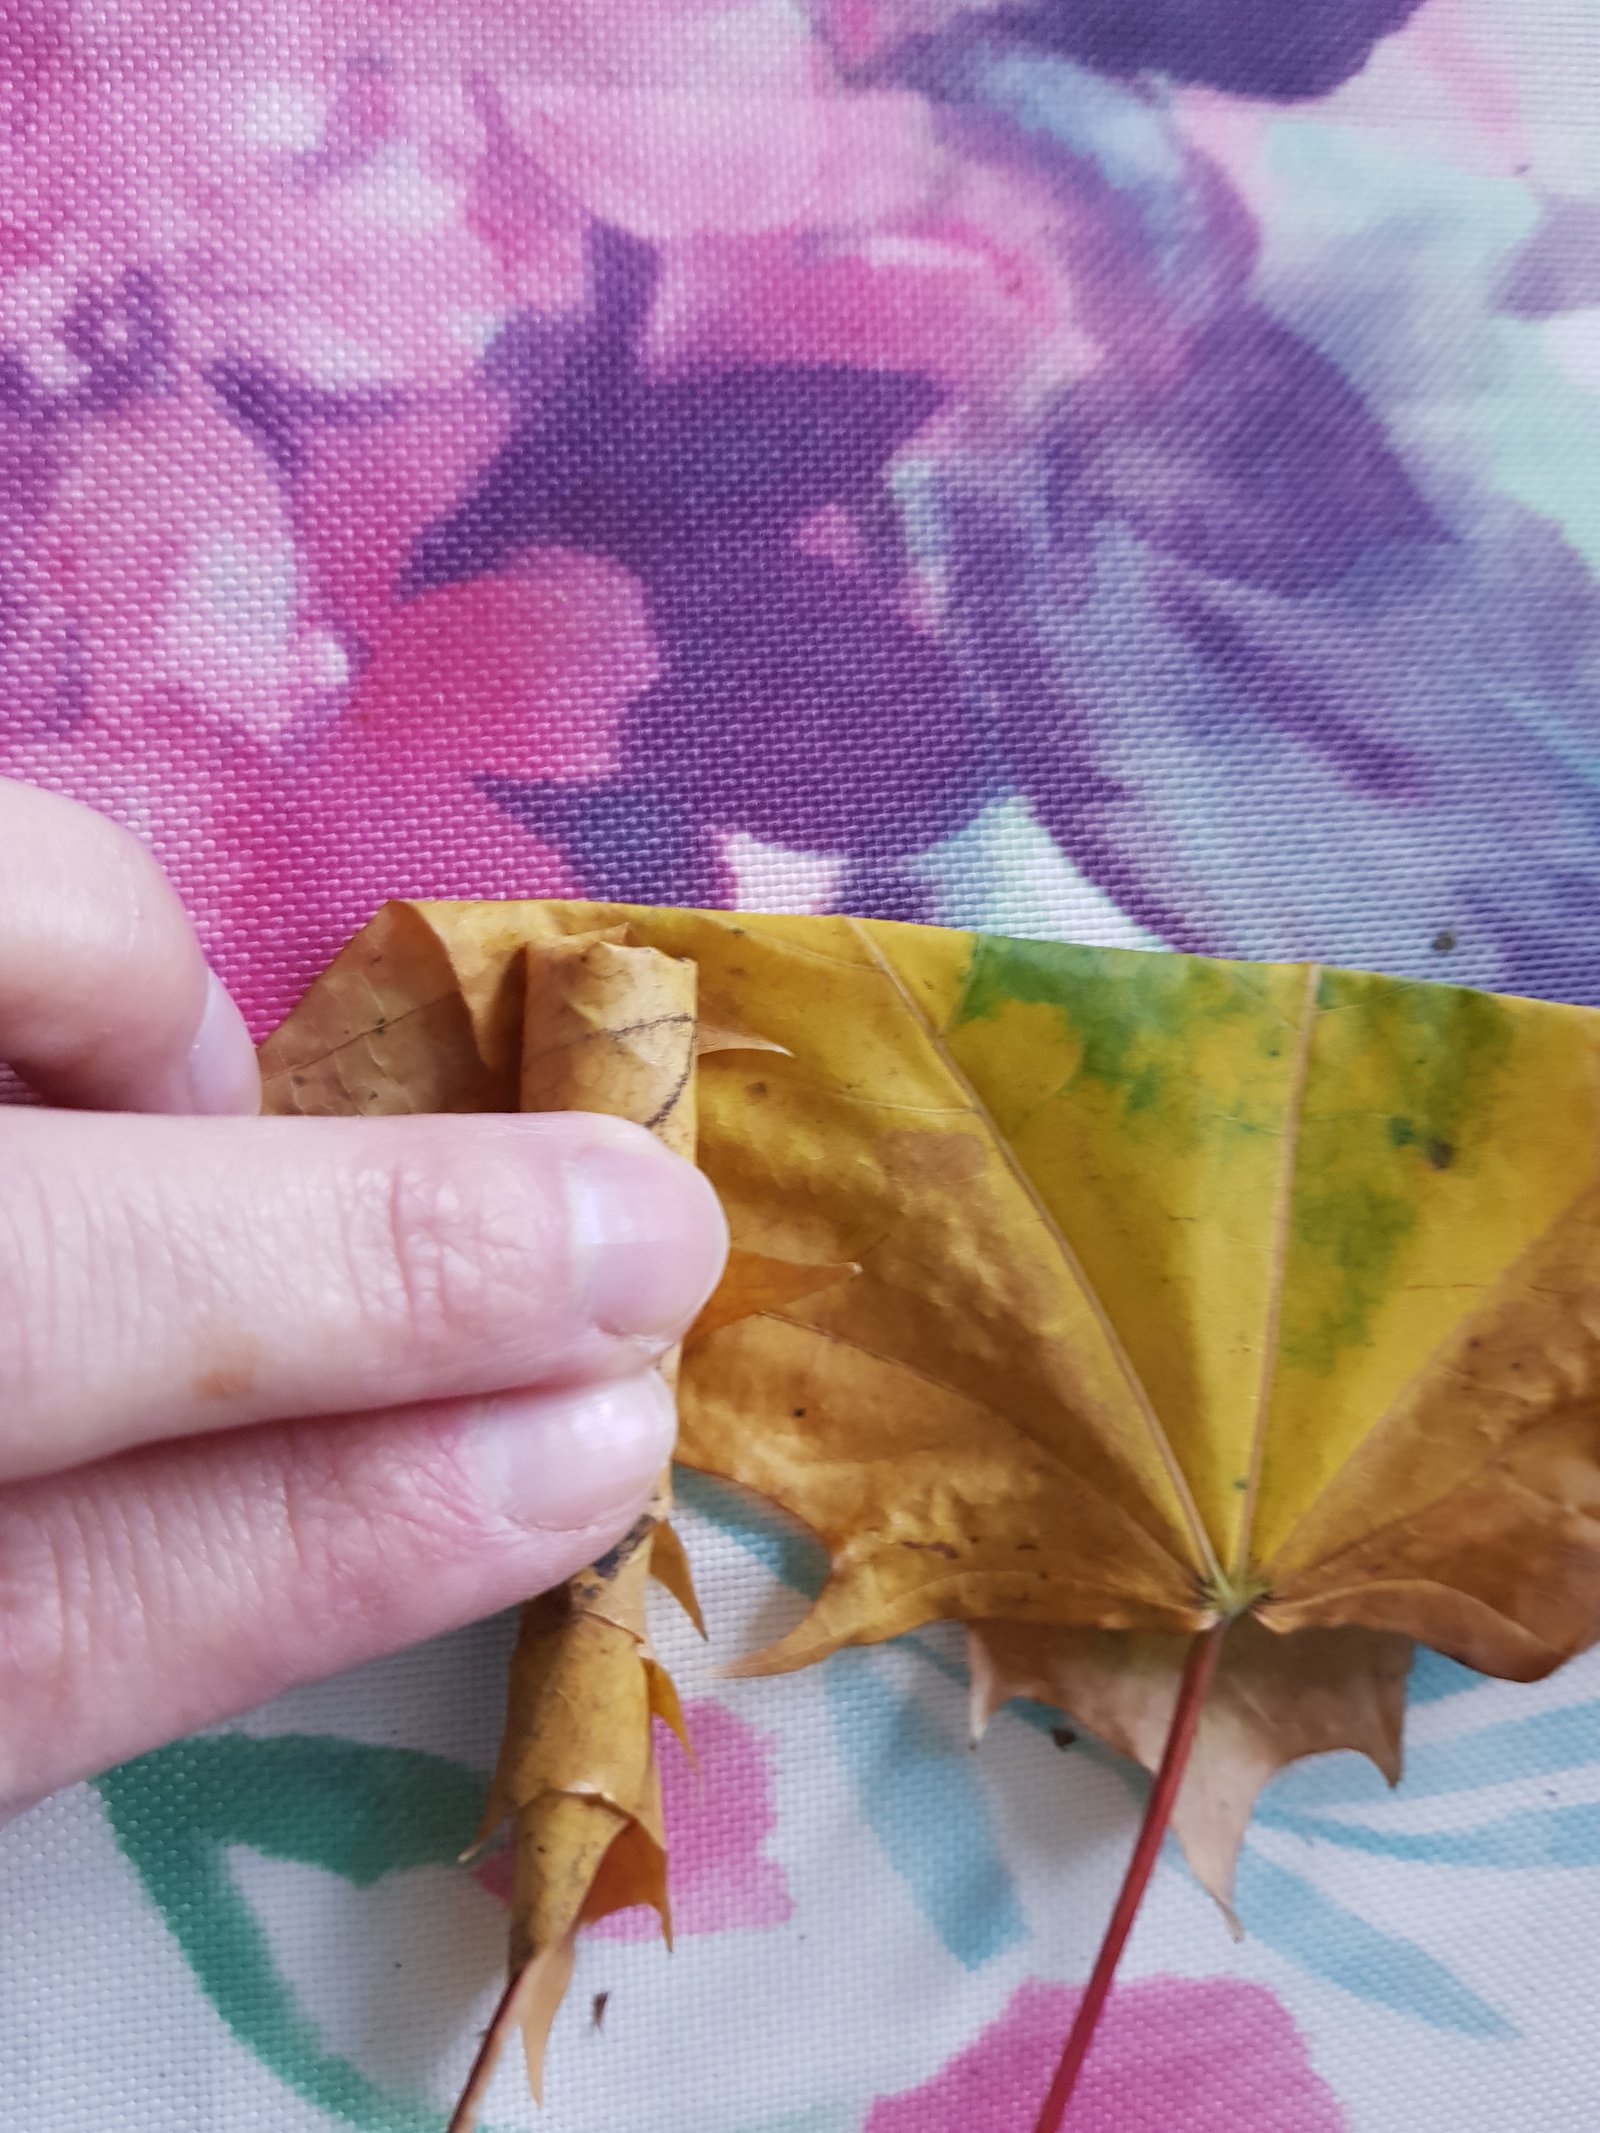
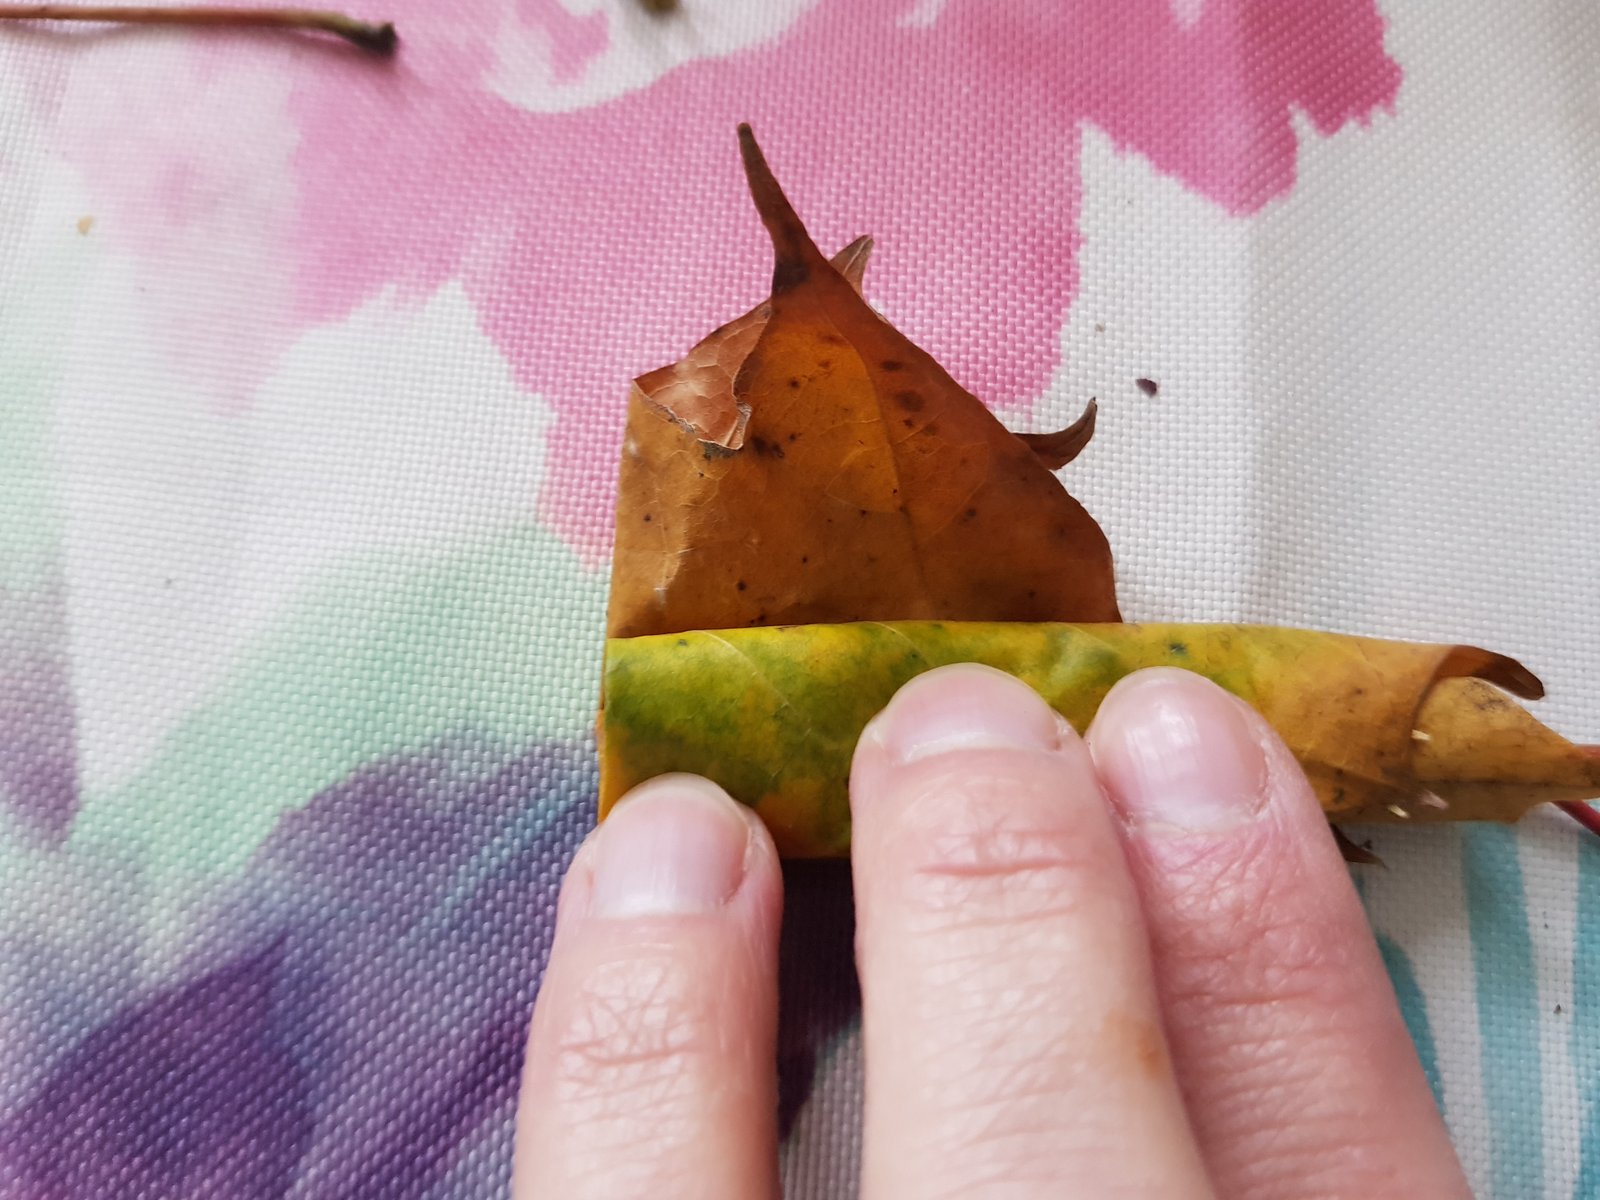
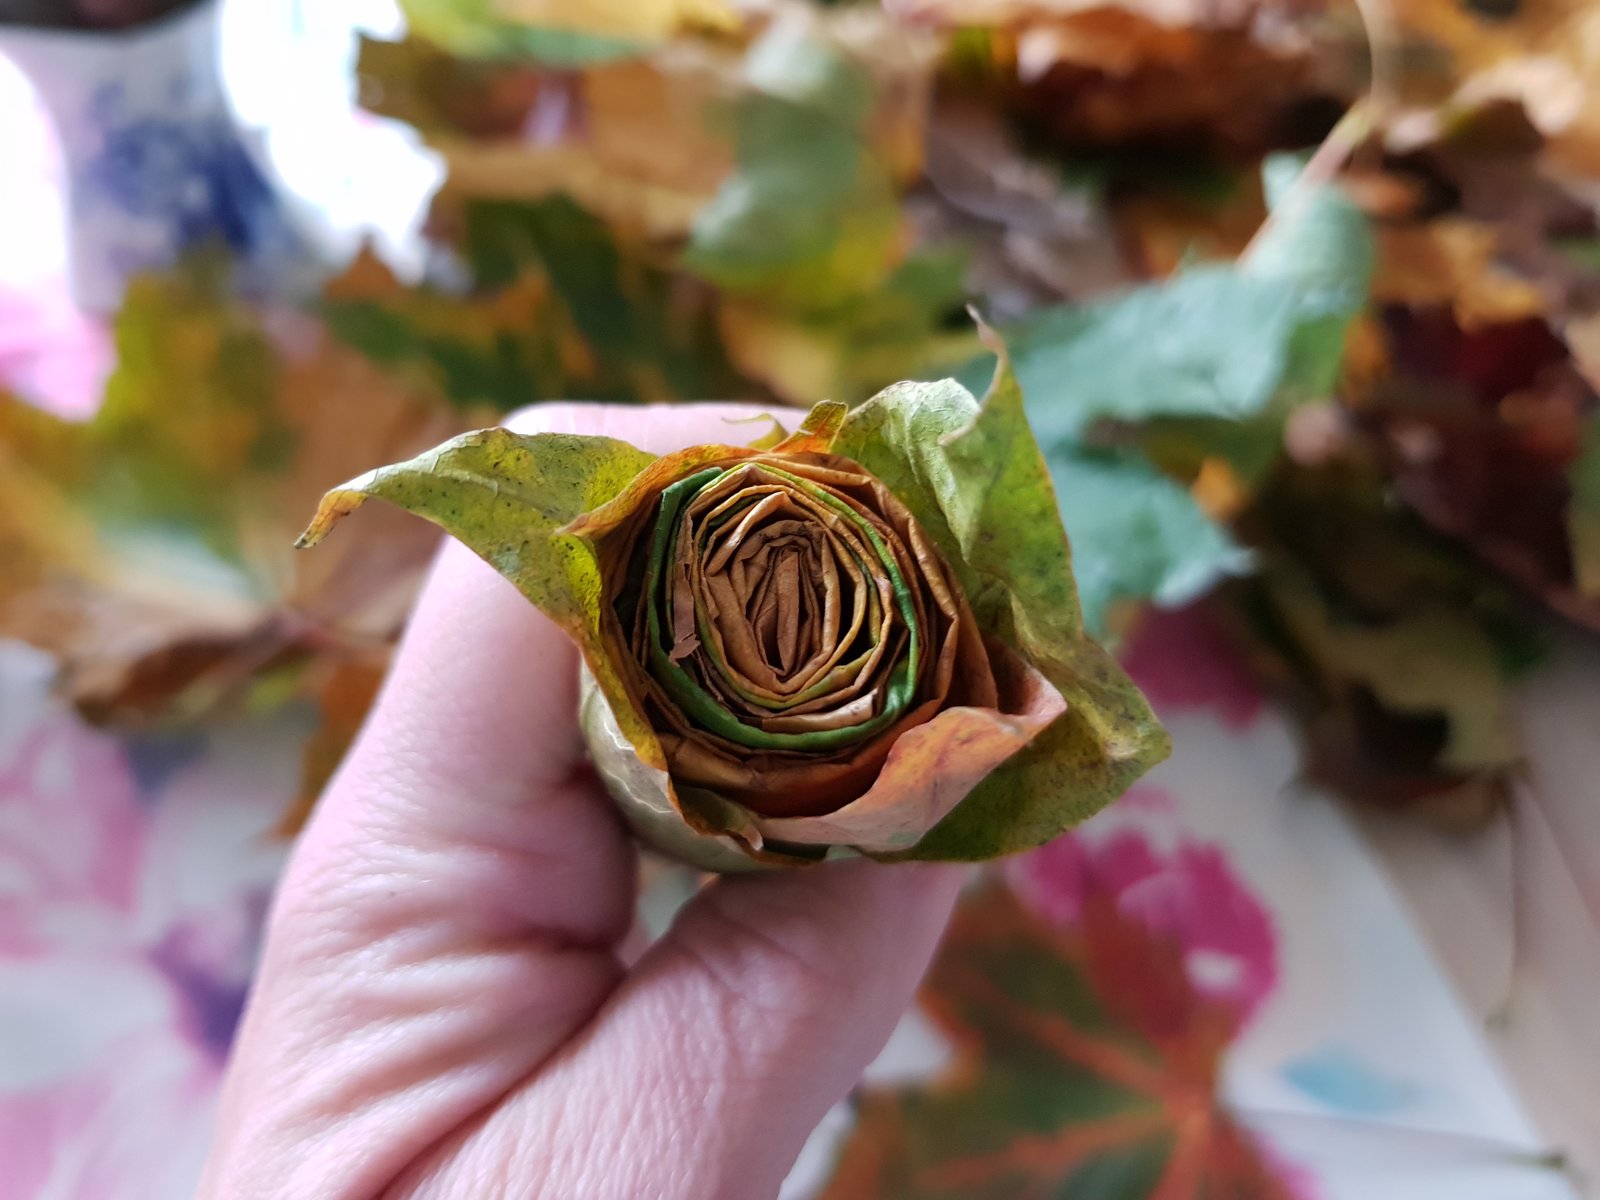
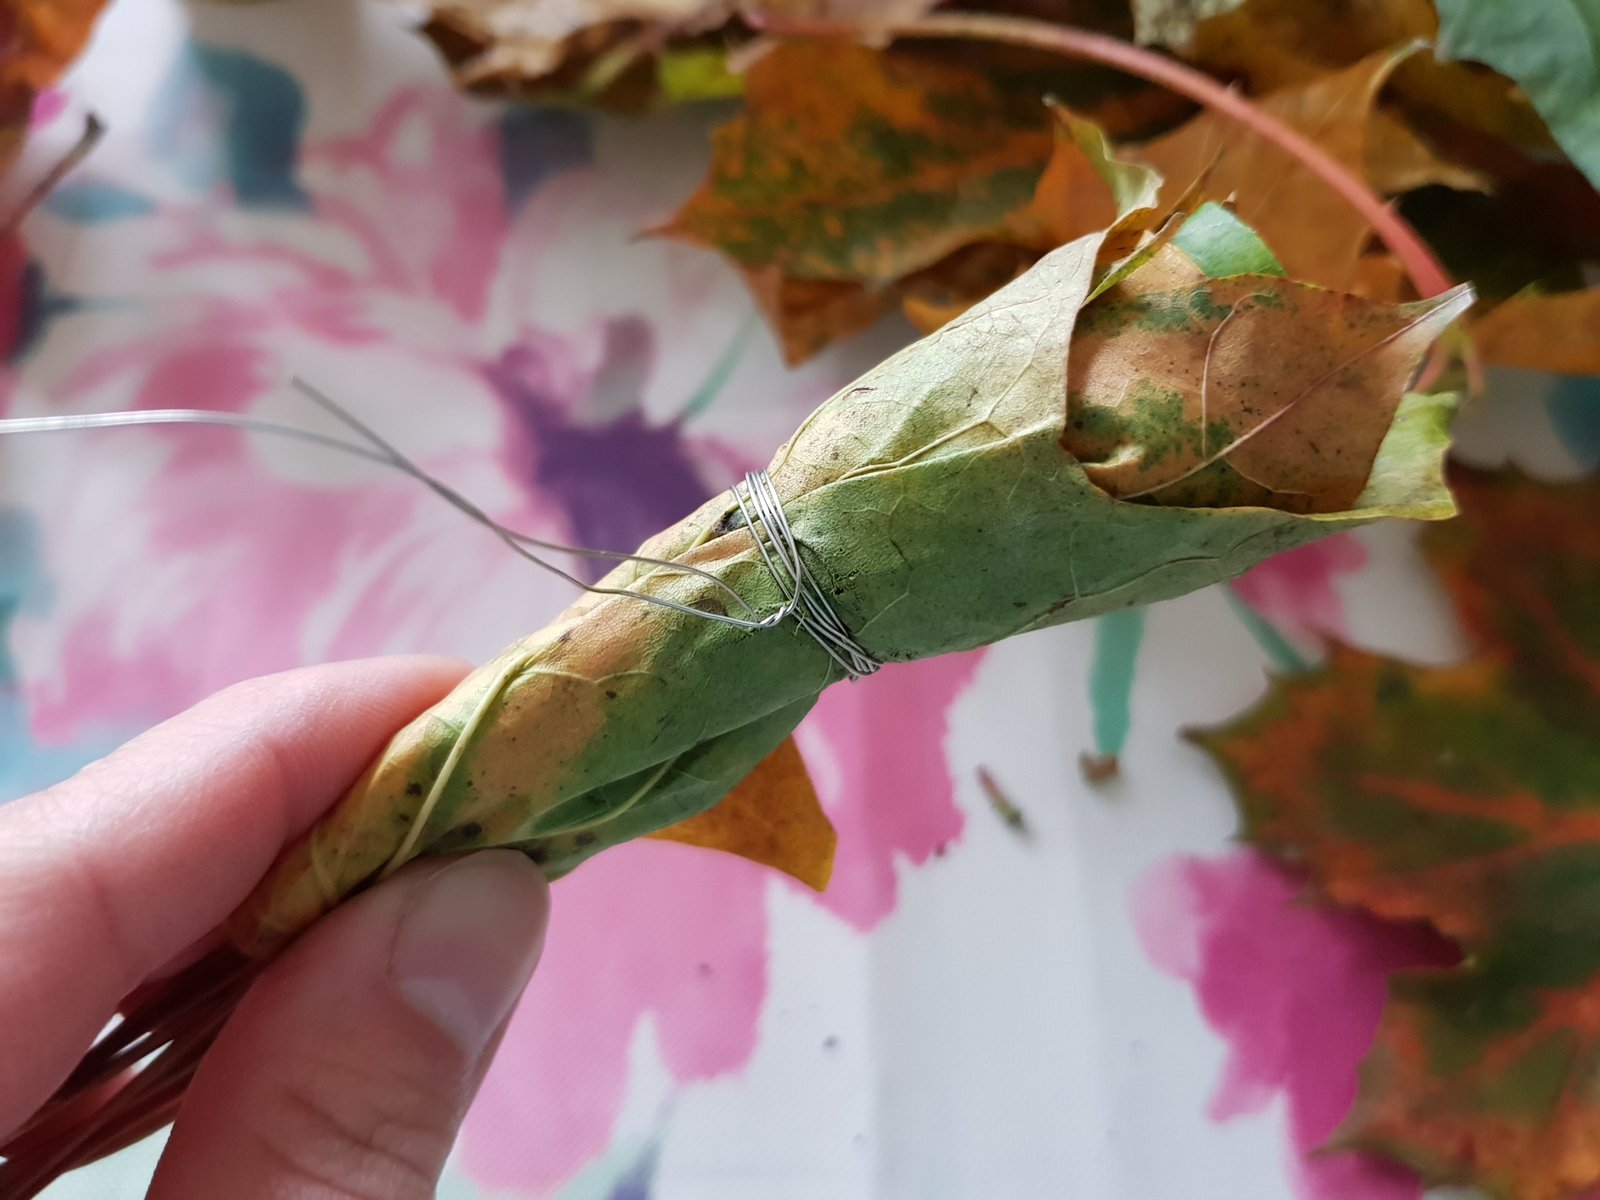
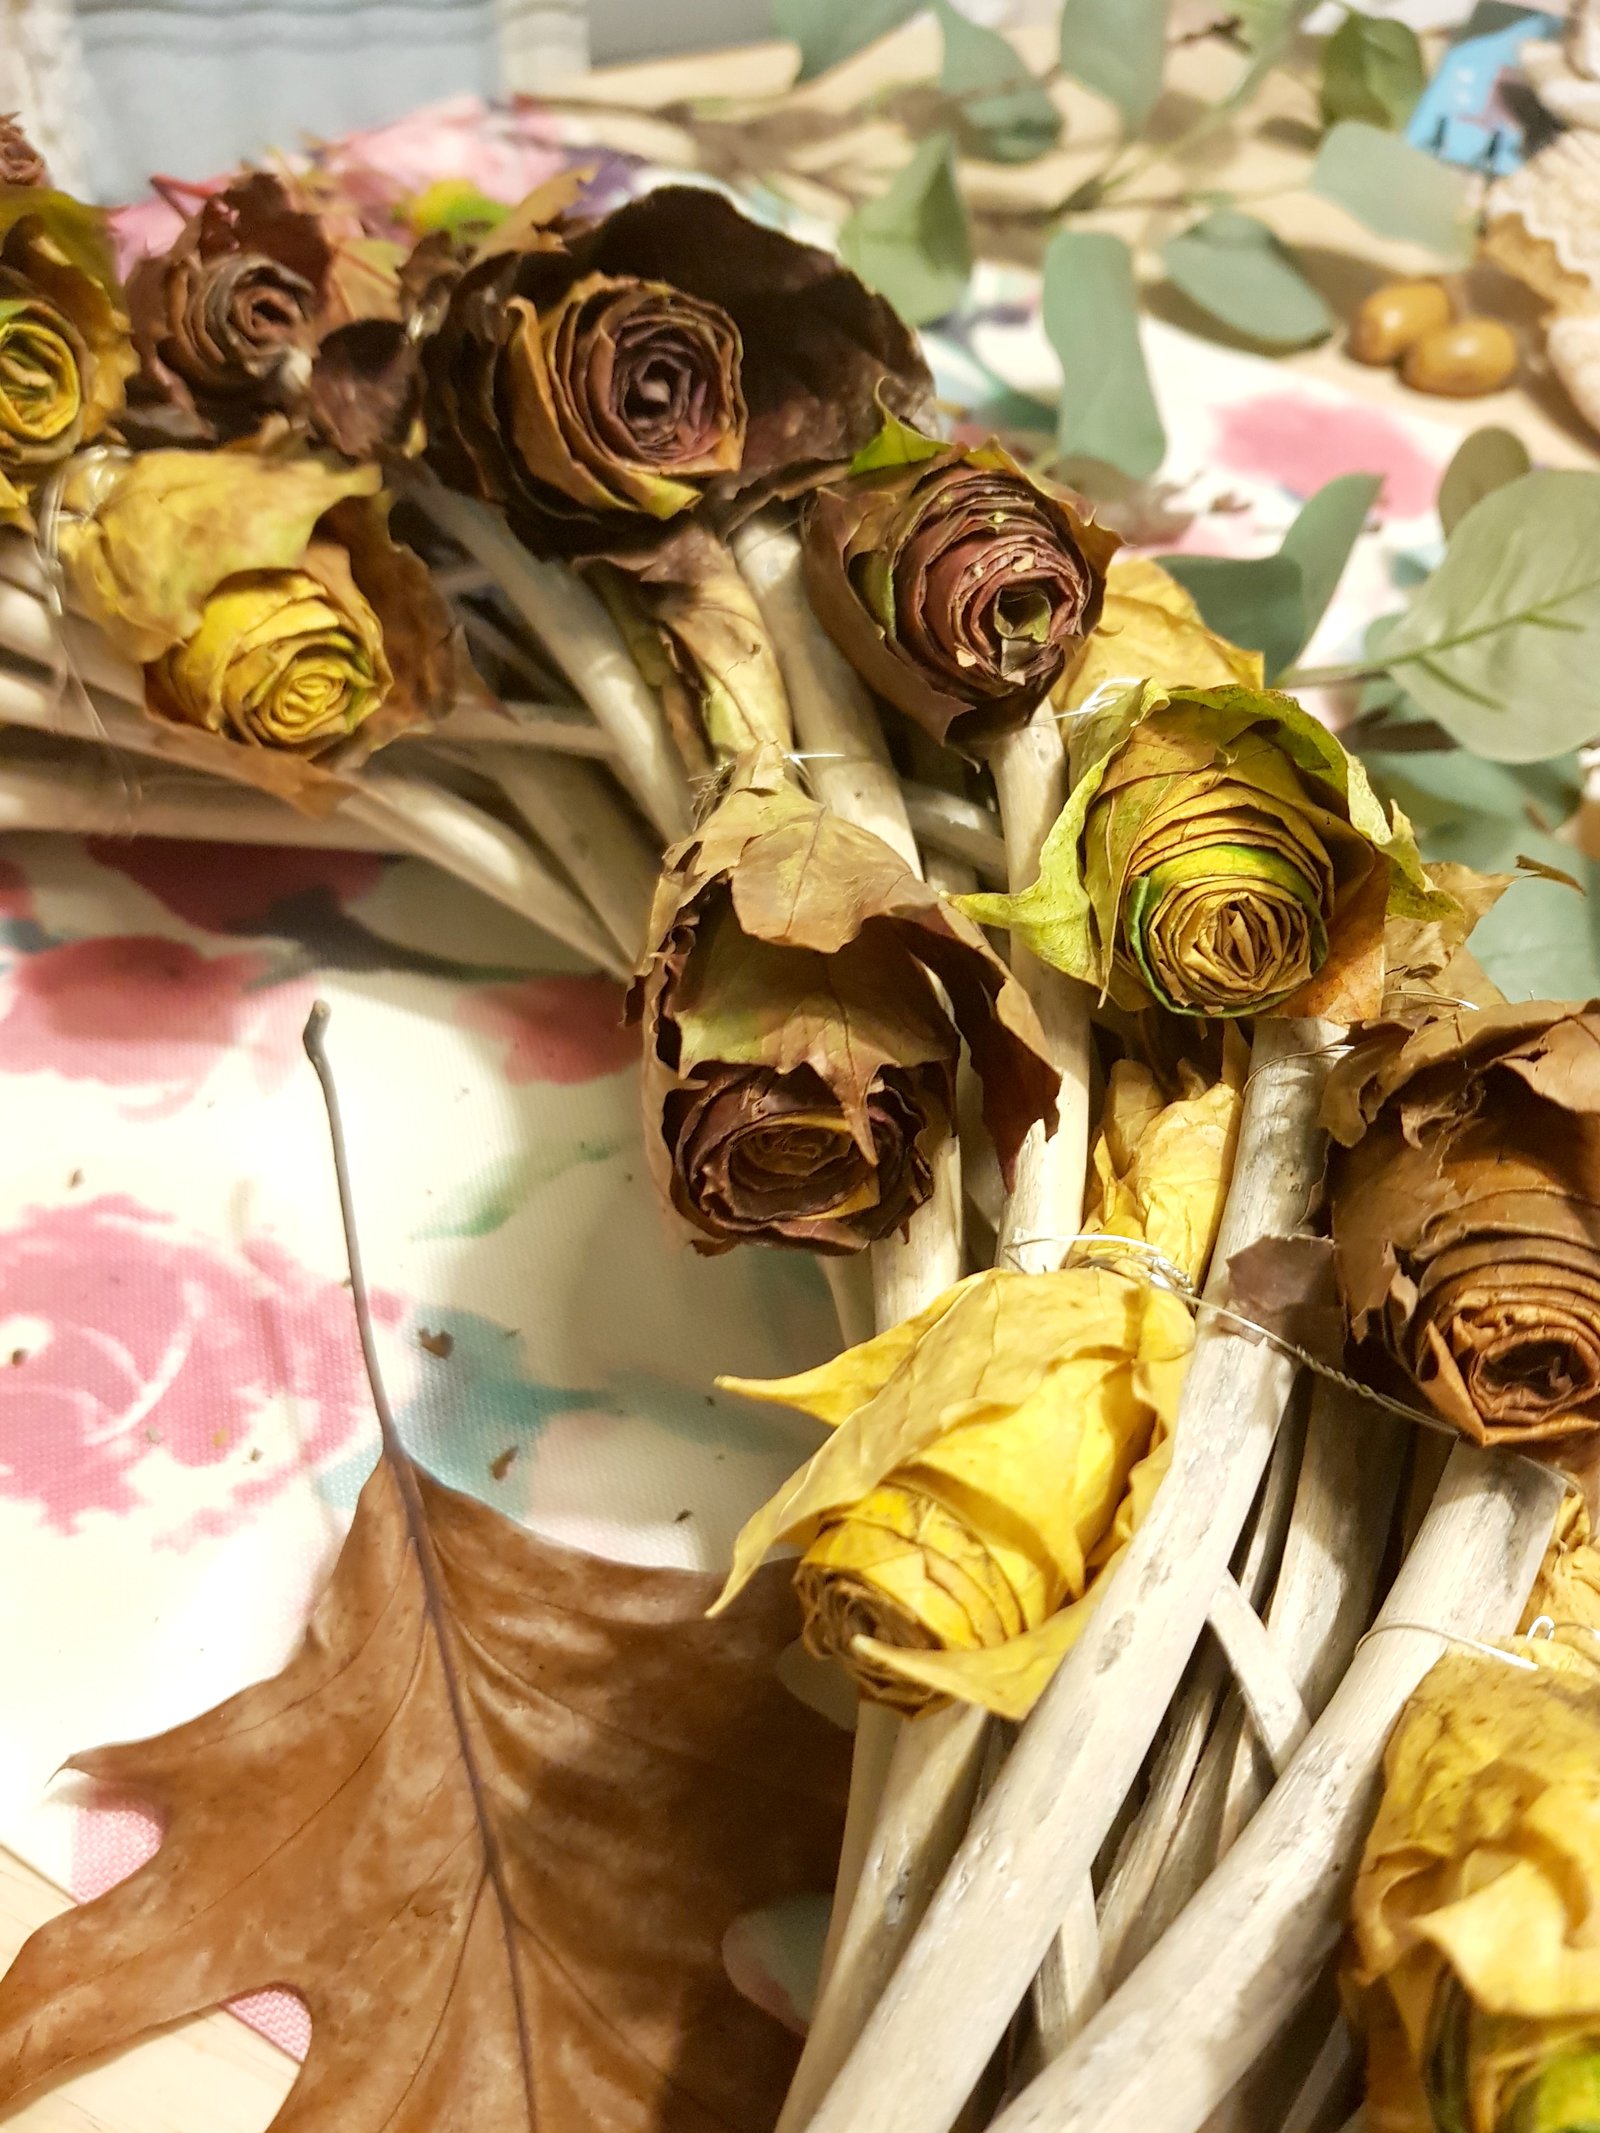
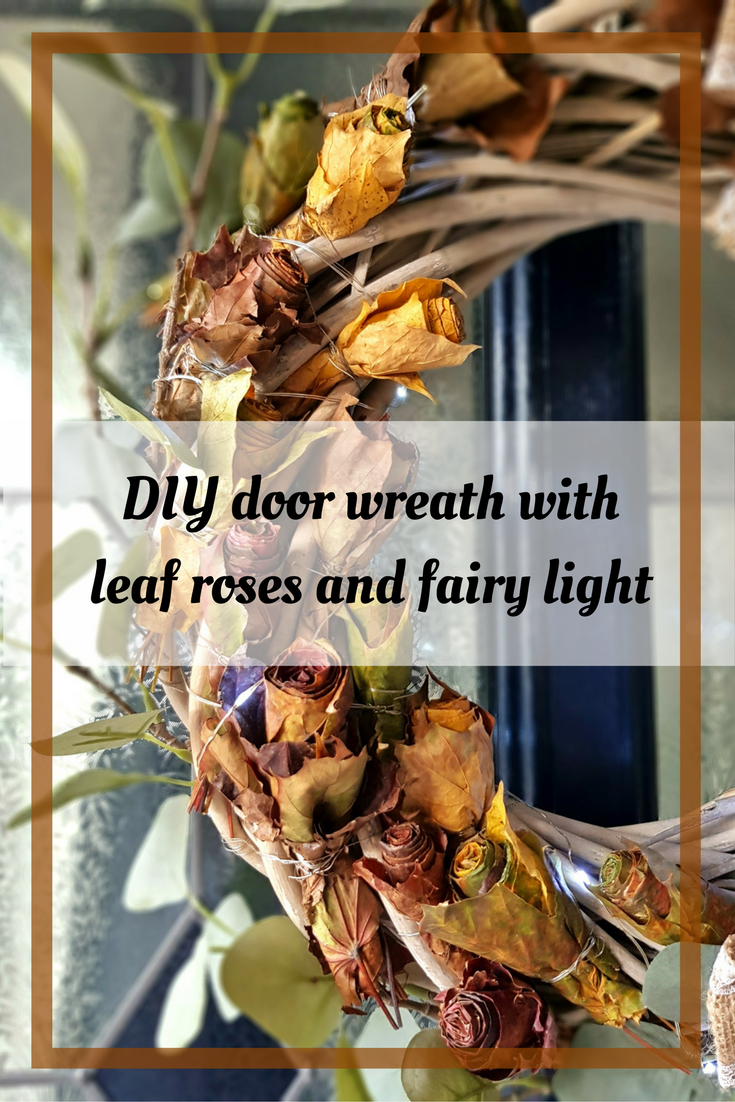
First you need to make leaf roses, but don’t panic, this is the simplest thing on earth! All you need to do is to fold your first leaf in half and roll it. Then fold your next leaf in half and roll it again. Keep on folding and keep on rolling baby! You will probably need between five and seven leaves to make one rose. But you mustn’t fold the last two leaves. This way you will create more realistic look, almost as if the petals were ready to fall… When you’re happy with your rose use a wire to secure all in place. See? I told you it was simple!


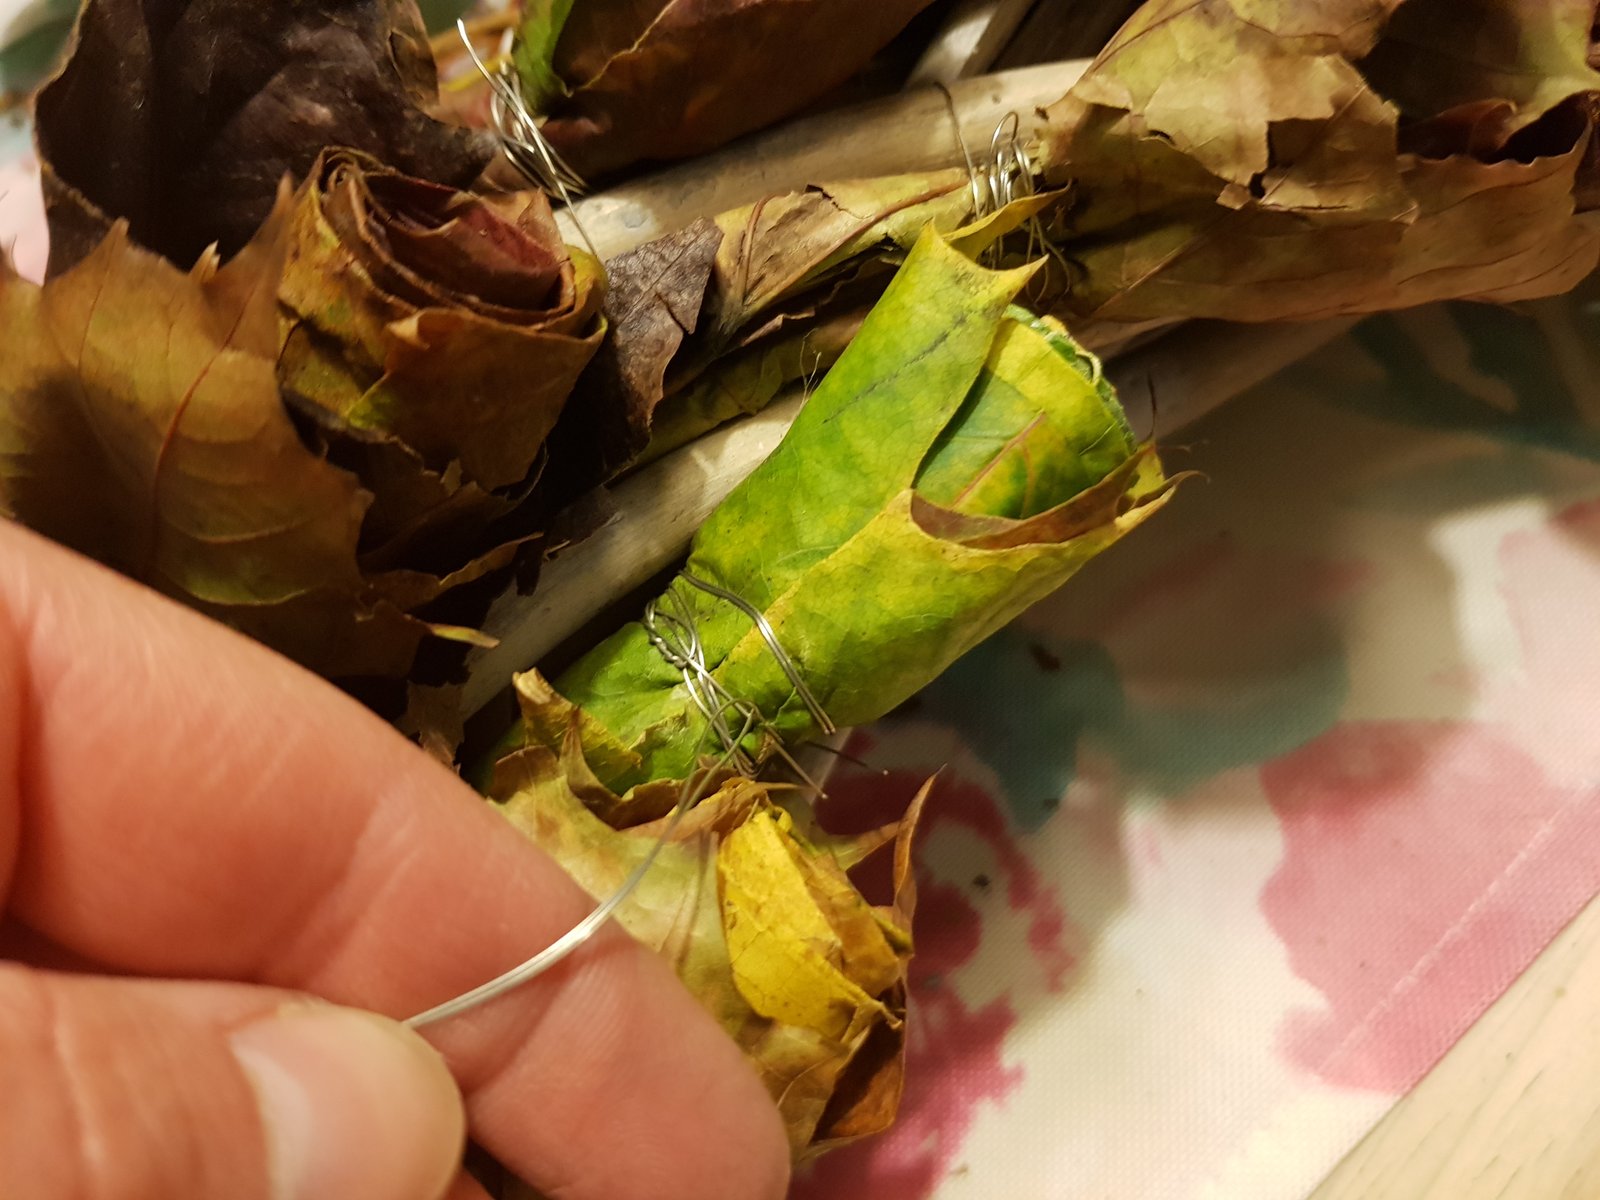
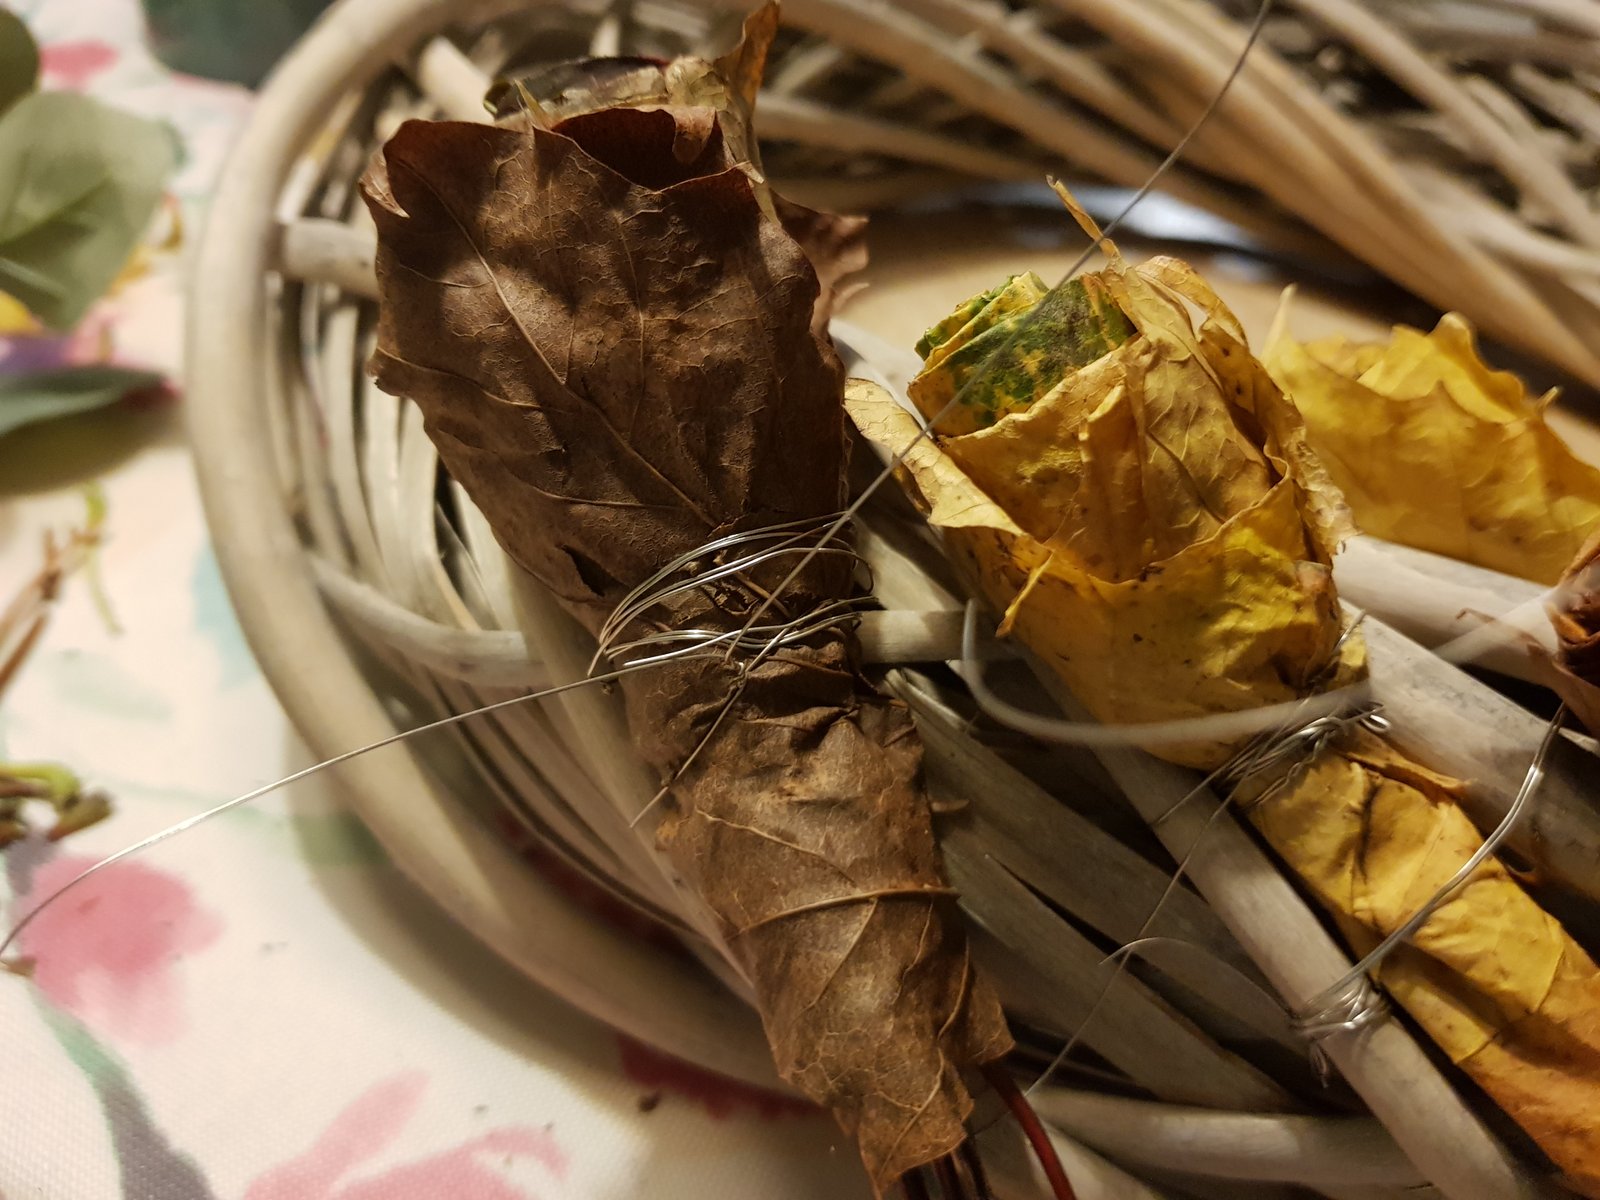
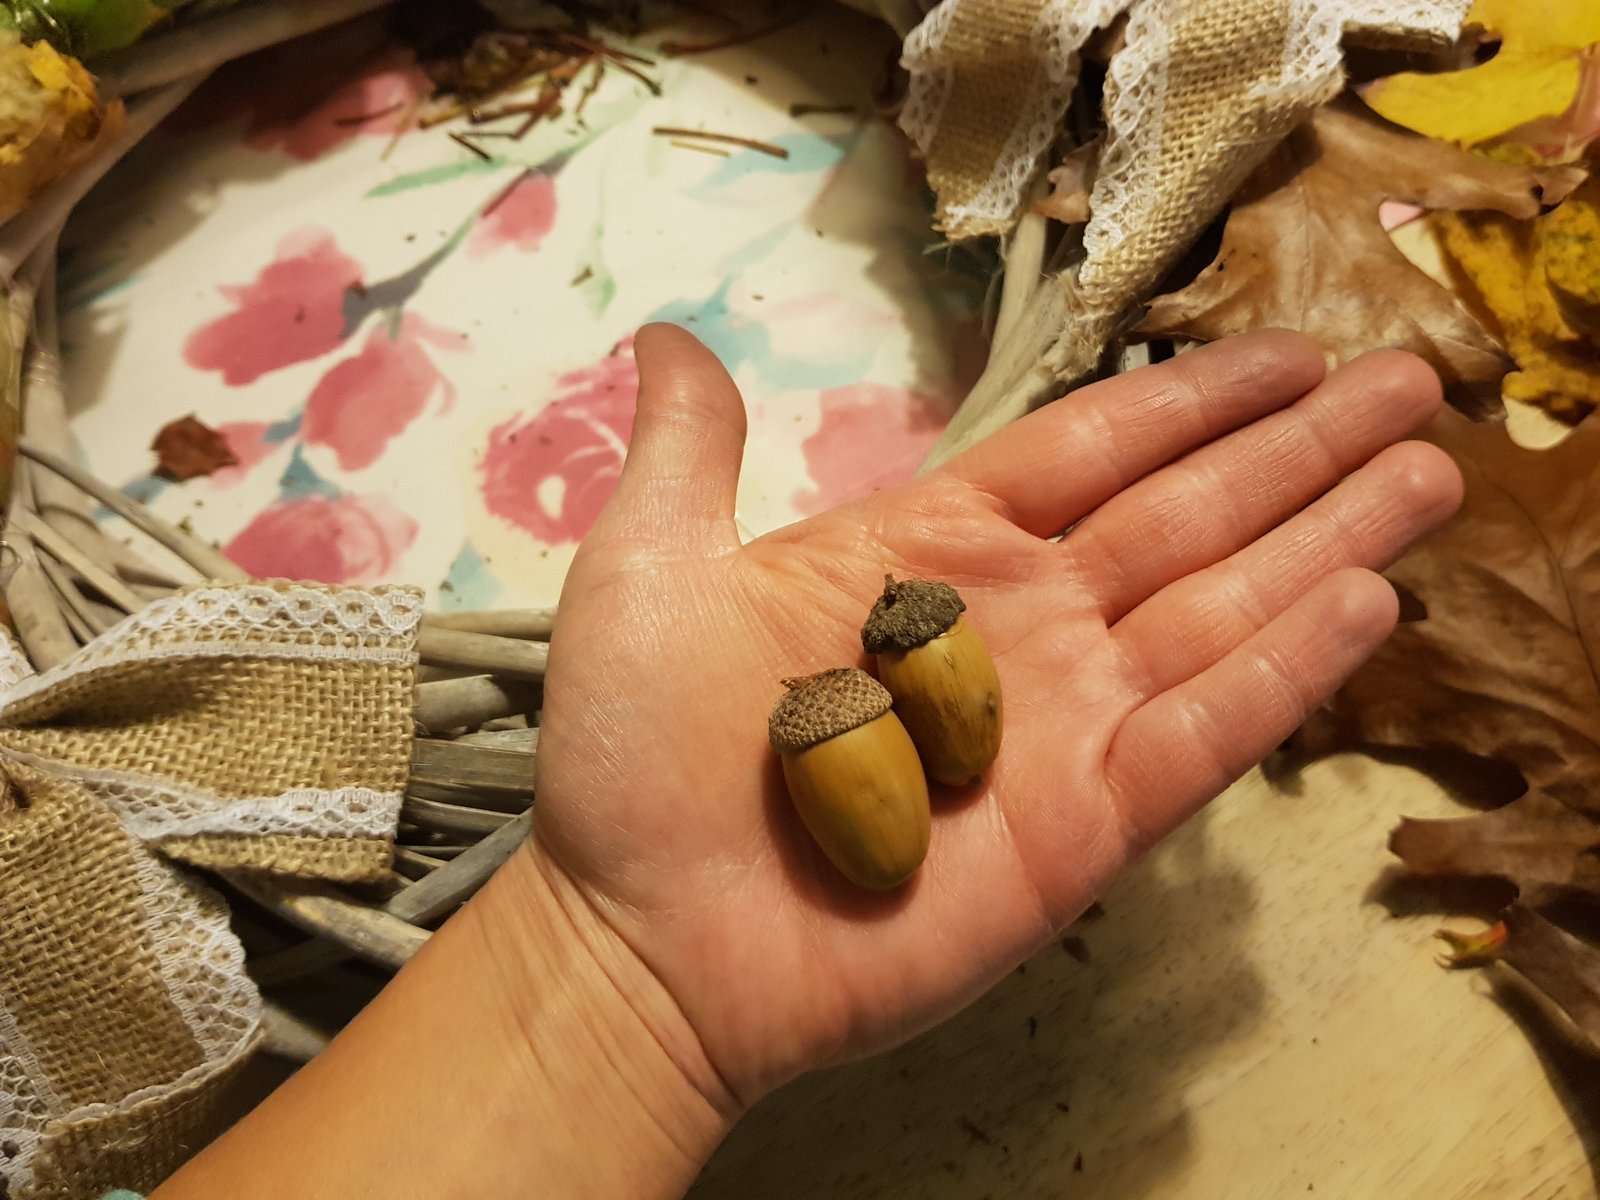
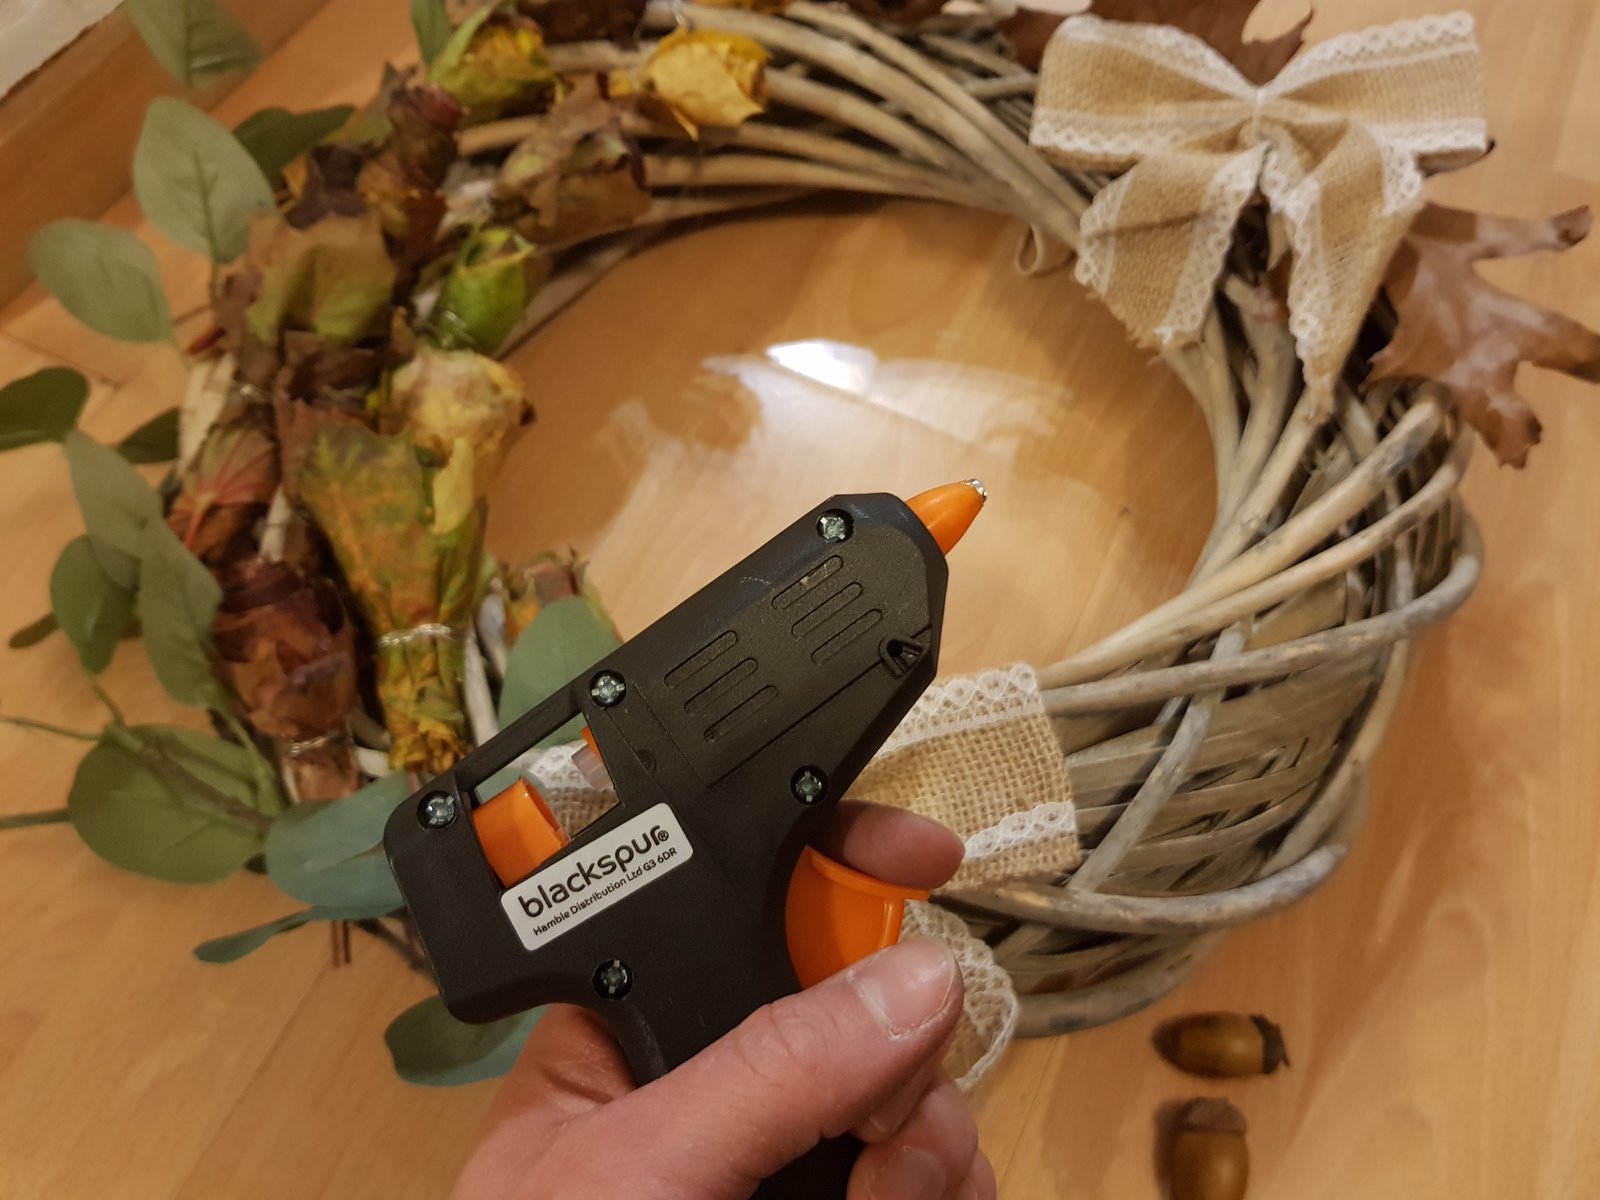
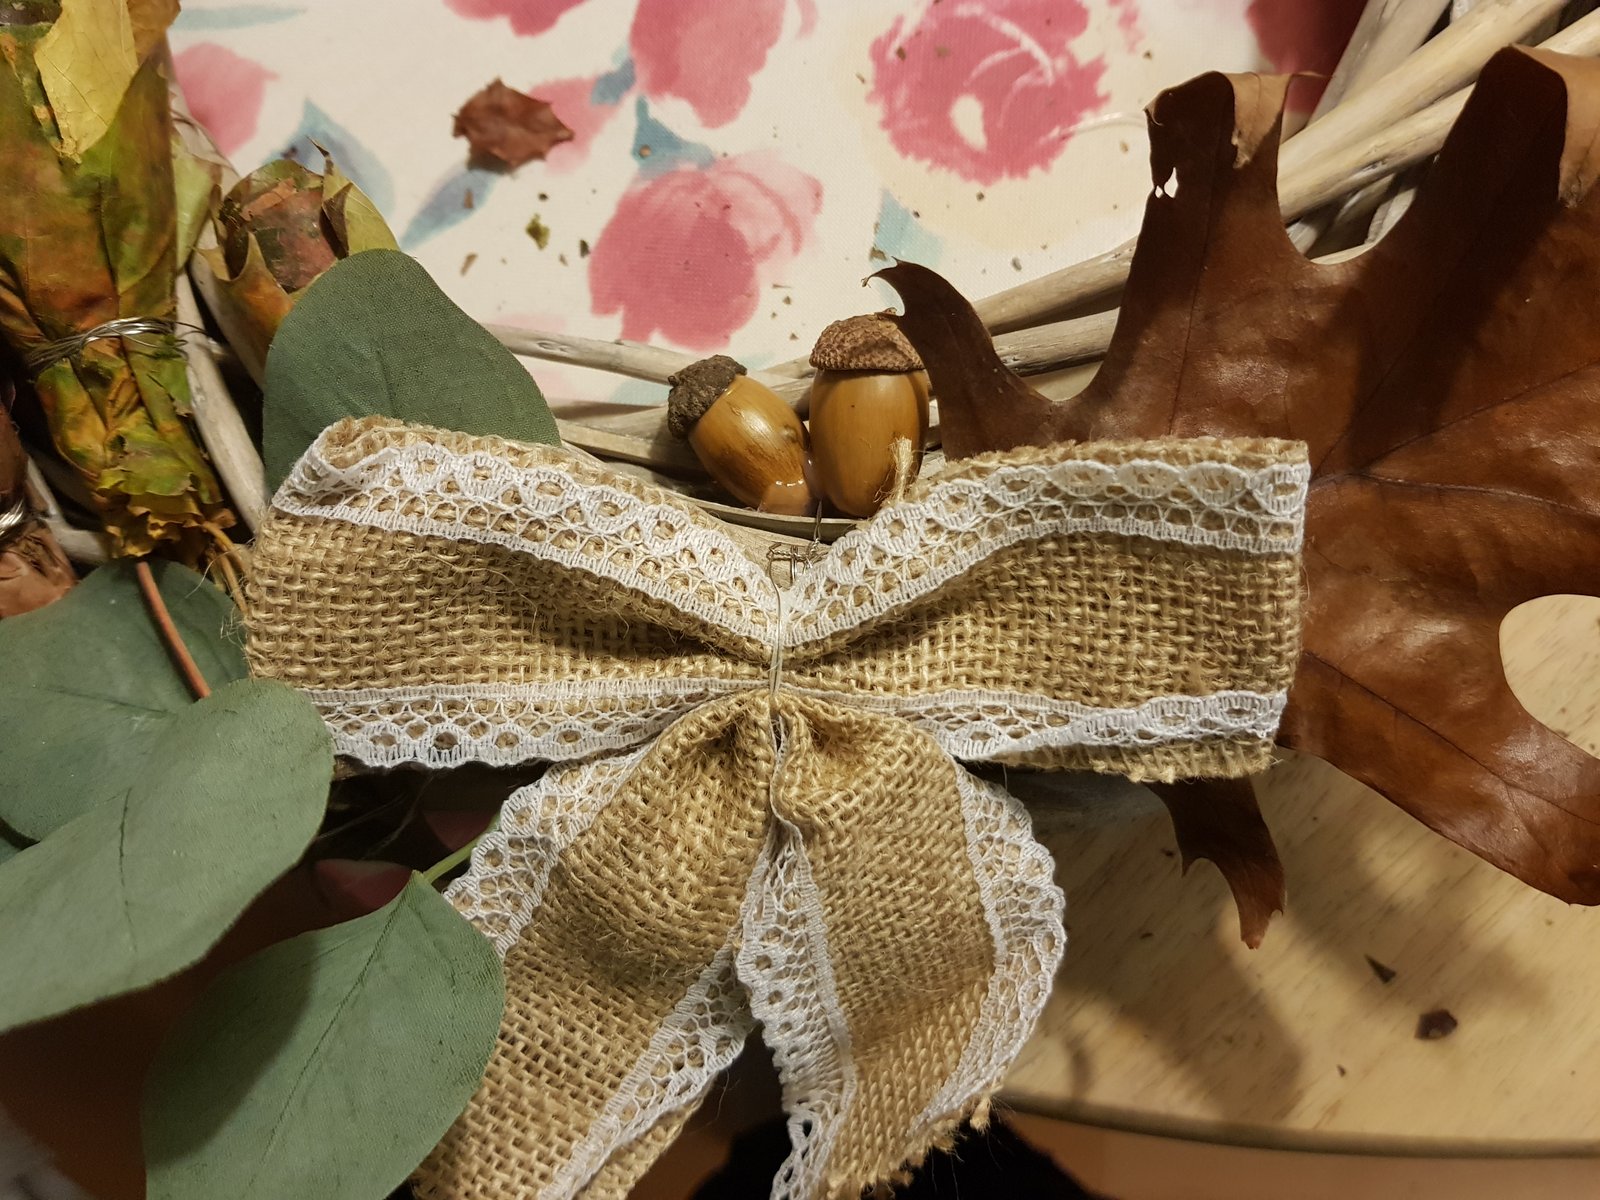
When you’ve made enough roses you can start attaching them to the wreath. Again, use a wire for that. And make sure they are properly secured in place. I have purposely added the roses to one side of my wreath only as I’m a big fan of asymmetrical things. If you however wish to have your roses all around just make few more (OK, maybe more than just a few). When you’re happy with your layout you can start adding more decorations. I used some jute bows (from Poundland), some acorns (which I glued with hot glue gun) and just few more leaves. I also added a faux green eucalyptus (which I have split into smaller pieces) to add more interest. My faux greenery also had another purpose – to hide that not so pretty looking wire. And if you don’t want to spend money, just pick something green form the park when collecting the leaves.


When I thought my DIY door wreath was ready I remembered I had some battery operated mini fairy lights on a wire, which seemed perfect for this wreath. And as it turned out, they were perfect!!!


As you can probably see on the photos my door wreath was not actually hung on the door, instead it was decorating our kitchen wall. The reason for that was I didn’t want Ophelia to blow my new wreath off the door and smash it on the street before I even showed it to you. But with Ophelia’s departure I can report it is now in place!


And you know what I love the most about my new door decoration? As soon as the Autumn turns into Winter I can simply remove everything from the wreath and make it look Christmasy…
Are you a fan of my easy DIY’s? Check out my DIY art that is laterally on fire in my post here or simply subscribe to my mailing list so you never miss a thing!
And Zapisz
Related News


Caro | The Twinkle Diaries
November 13, 2017FANTASTIC!! What a lovely idea Anne-Marie — I love the little leaf roses! That’s such a wonderful thing! Thanks so much for sharing — I need to get collecting leaves so I can make one myself!! Caro x #HomeEtc
Kimberley | Oh Just My Little Blog
November 9, 2017This is stunning, the leaf roses are amazing! x #HomeEtc
Anonymous
November 9, 2017Thank you so much ?
Meera
October 31, 2017So so beautiful, and so clever, Anne Marie! I love your idea of making roses out of leaves and the way you’ve put it together looks gorgeous! ?
Anonymous
October 31, 2017Thank you so much Meera ? Making leaf roses is so easy and so cost-effective ☺