
Making your very own DIY art is probably one of the most cost-effective ways of decorating the house. If the art is personalised that’s even better! It can be done within a matter of minutes (depending on the project) and very often without the need of spending a single penny!
I’m not a stranger to DIY arts myself. The idea for this one has only come to life after living with on old art for the past few months. As with almost everything in the house, I just simply got bored with it. And here’s the best part. If you use free stuff for making art (or anything else), you don’t have to feel guilty if you fancy a change. You can change them as often as your socks! And that’s exactly what I did. (Although I have to assure you that I change my socks more often than my art.)
You can check out that DIY picture that I got bored with here.
So if you’re thinking about giving it a go look around your house for anything that can be used for this project. Don’t rush to the shops only because you want everything to be exactly the same. This is a guide only, therefore it’s here to guide you, not force you to spending money. In fact I don’t want you to spend any money or as little as possible. Put your creative hat on and use your head rather than your purse.
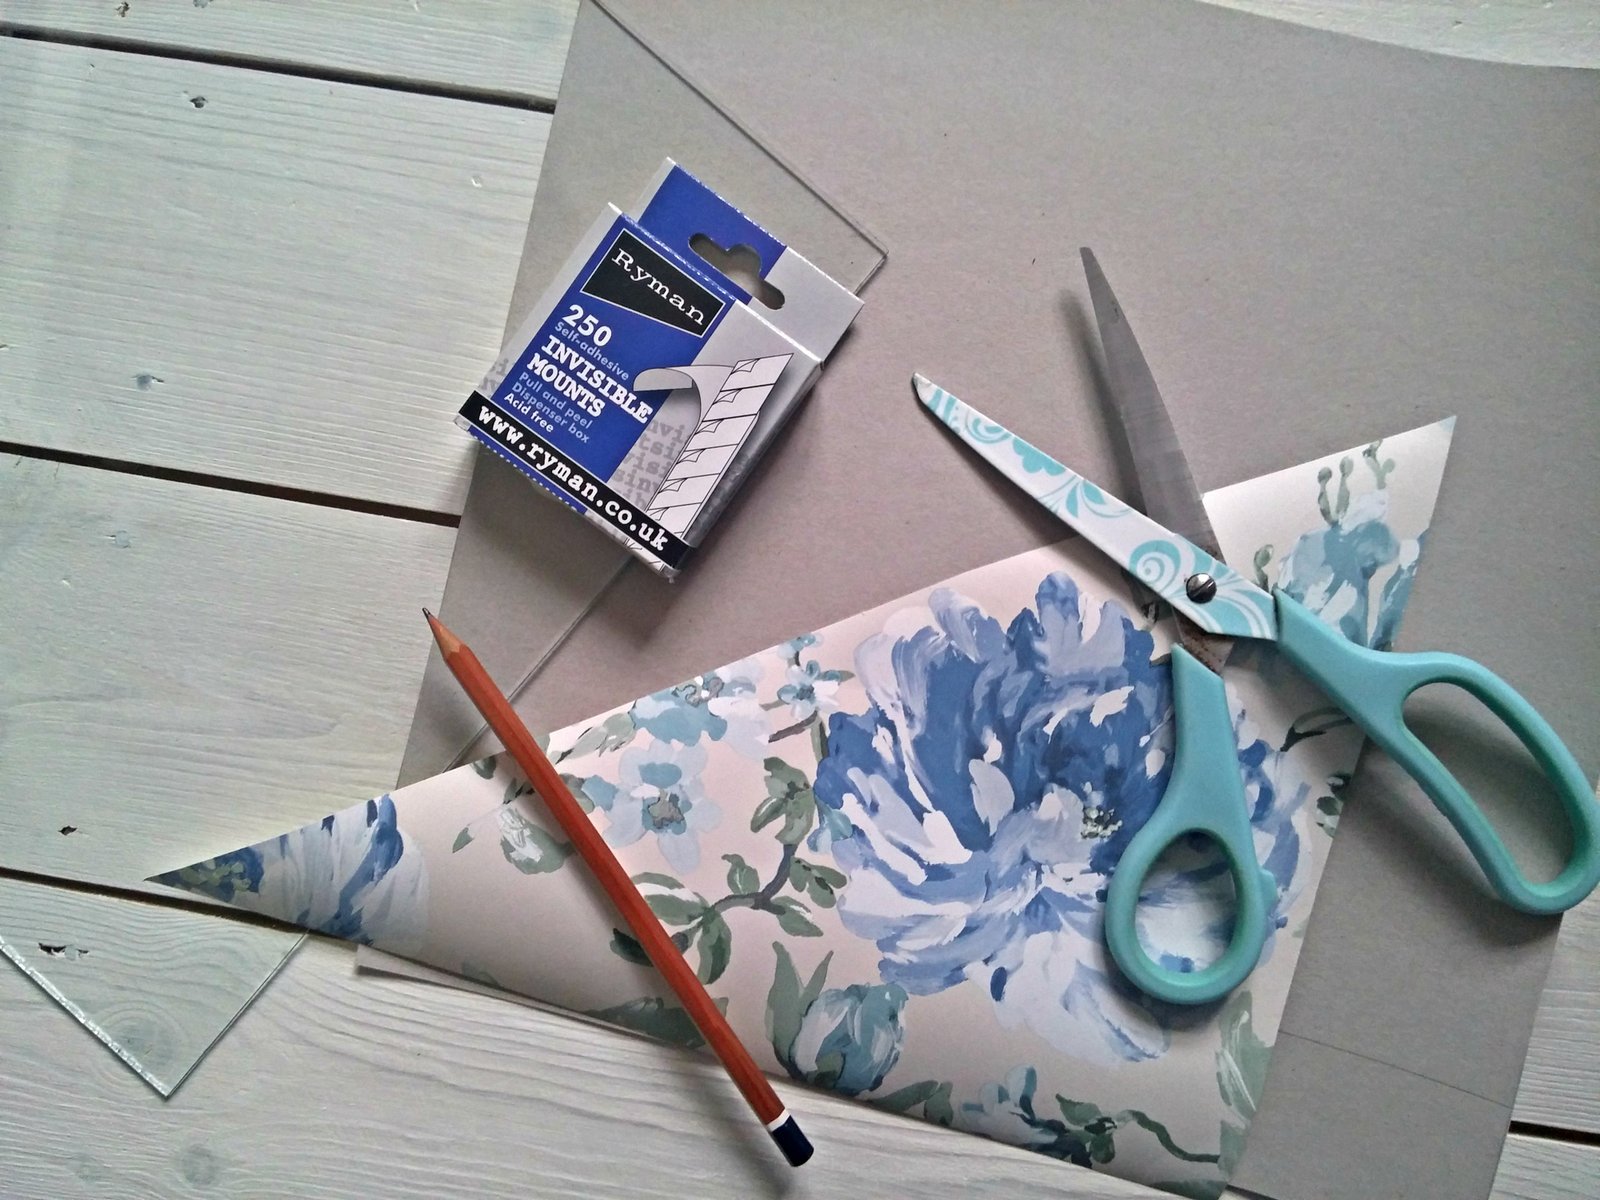
And here are the suggestions of things you will need for your DIY art:

- wallpaper samples or any pretty paper
- photo frame
- a cardboard
- pencil
- scissors
- invisible mounts or glue
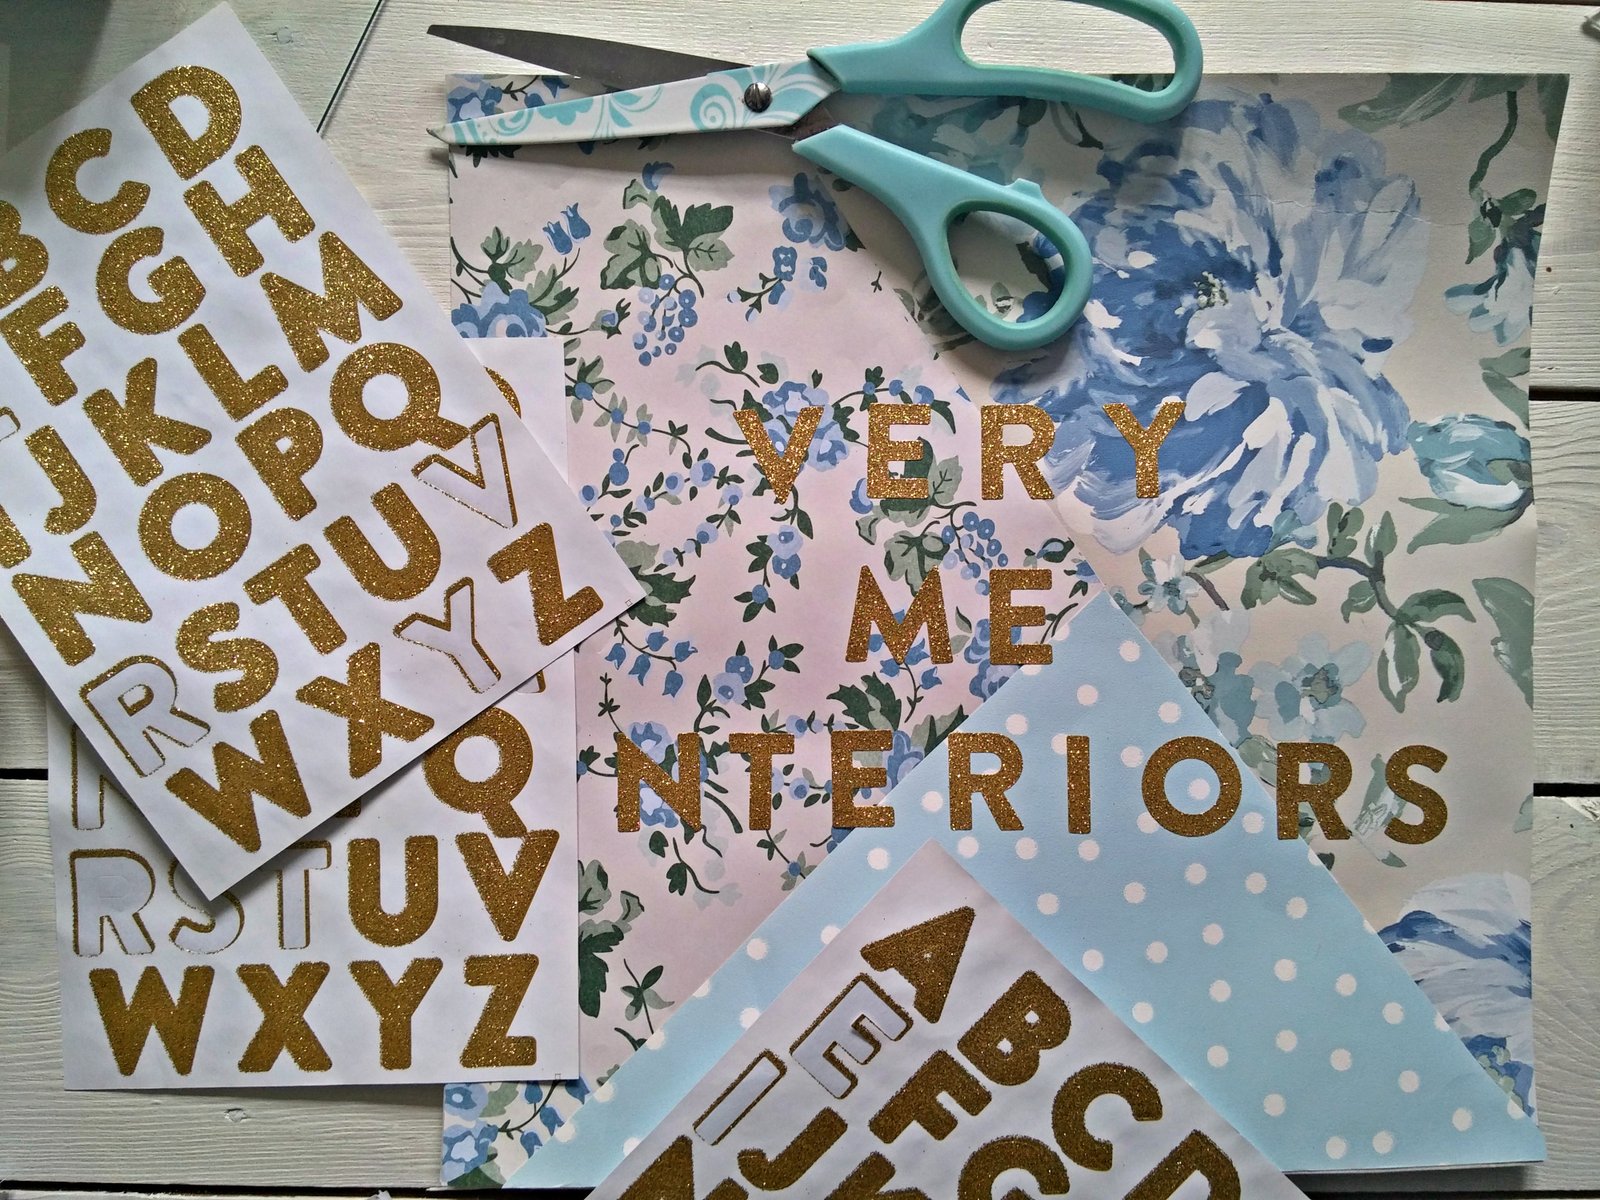
- alphabet stickers or a metallic pen for the writing
First
Start by cutting the piece of cardboard according to the size of your frame.


Next cut the triangle shapes out of the wallpapers (or whatever you have there) and arrange them on the cardboard. Experiment with different layouts before deciding on the final one. You can use as many or as little different patterns as you like.


What’s next?
When you have the whole cardboard covered, you can stick the paper pieces with invisible mounts or (if they’re not laying around your house) simply use a PVA glue.
Now, that you have the background for your art, you can move on to the next step. And that is the easy part if you’re using the stickers. If, on the other hand, you will be using a pen, it can be a little bit more tricky so consider using a template to help you with it.
And finally
Personalise your art however you want, even if it will only make sense to you. As I needed something to go above my desk it made sense to have Very Me spelt out on it. As long as you can understand the meaning of the words it is fine. And you know why? Because it is yours! Because it will be on your wall and because you don’t give a damn what other people think. And if it’s a little bit wonky? So what? The most important thing is you made it – your very own personalised DIY art!


That was easy right? Try it or pin it for later.

Related News

Caroline
April 26, 2017This turned out so pretty! I love the glittery letters. I’m always a fan of DIY art projects, it’s nice to have something unique.
Anonymous
April 26, 2017Thank you Caroline, I’m quite surprised myself how pretty it turned out! And I have literally pulled everything out of my drawers, so no spend here!